Post by daklunk on Dec 31, 2006 20:08:18 GMT -5
This is Revell's excellent RSX kit, which I'm building pretty much OOB, because lately what I've been built has required so much scratchbuilding and detailing that the creative juices get a little stagnent. This build is to get them flowing again ;D
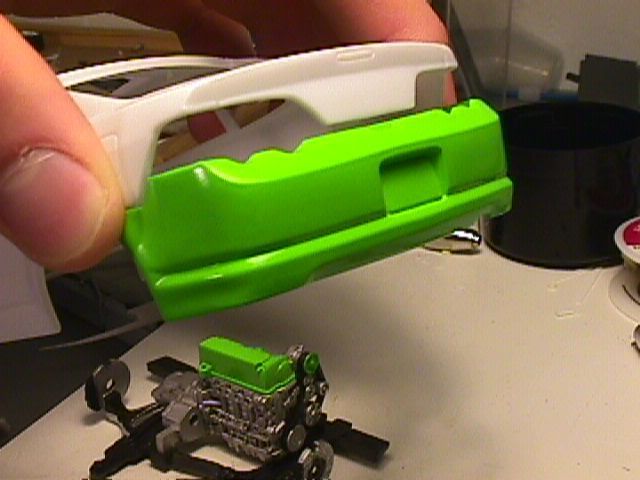
Color is Tamiya Light Green, which is the best lime green (my favorite color) I've found yet. I will be making custom masks based on the included tear graphics and spray them black, which should look really sweet. This is just a pic of the stock rear bumper I painted as a test, I'll be using the bodykit.
These are the wheels from the '93 Civic, the centers will be gloss black and the lip and hardware will be chrome/polished. Rotors will be aluminum metalizer, brass hubs, and black calipers.

The kit wing will be painted black with green caps and balck struts, I'll use black sponsor decals from, uh, somewhere, dunno yet, and I might paint that one section of the hood/front bumper gloss black. I would love to have some smoked Altezza style tails, but these lenses are solid red...
I didn't like the stock look kit of the steering wheel on such an eye-catching ride, and I had an extra Revell Eclipse steering wheel and column laying around, soooo...
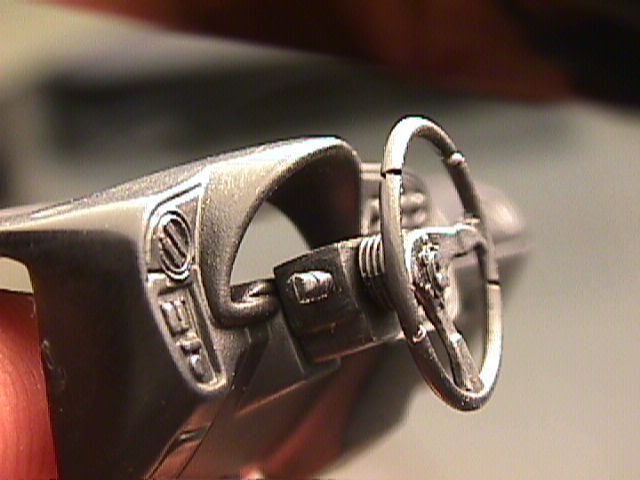
Looks much better IMHO, It will be black and silver, I just might make that center button thing green just because, the only other green thing will be the palm patch on the shift knob.
The interior is flat black and two shades of primer gray, the carpet was sprayed a light primer which spat everywhere, which was good because it simulates the look of carpet better than the kit plastic. The remaining greys are darker primer, and the rest is flat black. I have yet to mask off certain parts of the doors, dash, center console, audio housing, and seats to be painted grey, black, or silver trim. Yes I know, the sub rings look awful, I did them with a half dry Sharpie
 Will redo them eventually...

That big empty package shelf was just begging to have some amps for the audio system installed. I'm using my own resin parts, either 2 JL Audios (left) or 2 Kicker KX's (right). Both are shades of black, silver, and grey, so they'd go well with the rest of the interior. I think I'll probably go with the Kickers, and have them painted green with black or gunmetal inserts, add some color to the interior.

The seats will have balck patches and black seat belts with PE hardware. And I think I will make a green iPod nano with ear buds to leave in the center console
As much as I would like to go hog wild again with engine detailing, I must refrain *slaps own hand away from box of detailing wire* as I will refrain from adding any non-kit parts *busts ruler across knuckles as hand reaches for the resin stash* ;D
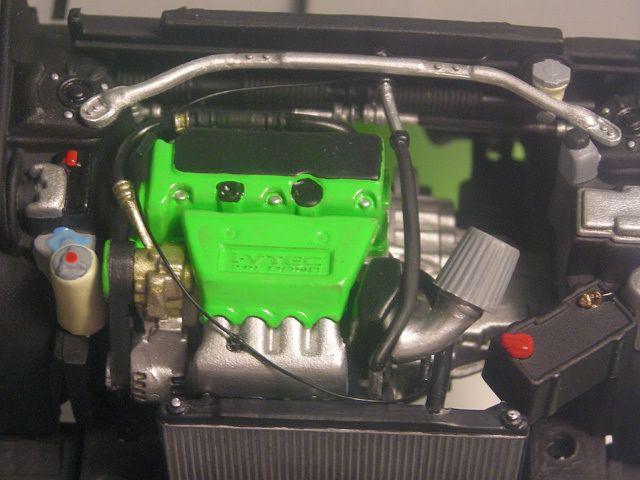
This is the engine before detail painting, dry fit (nothing glued except for the the block and tranny) to the front subframe/cradle. Aluminum metalizer, Smoke wash, Tamiya green valve cover (the intake shroud will be the same color, but it's requied a repaint and I haven't finished it yet. I might paint it black. You can't really tell, but the green bled away from all the sharp edges
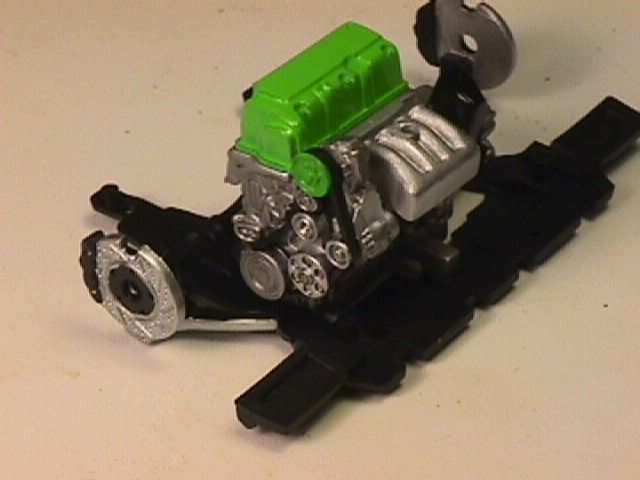
The first thing I noticed when I saw the engine on the box is that the conical air filter is right next to the exhaust manifold, not good for performance. Since I wasn't going to be doing alot, I decided not to build a heat shield (as one should) but to just chop the intake pipe a little. I drilled it out and added a rod to the filter, and now it sits a little further from the heat. But it's still not a very good situation...
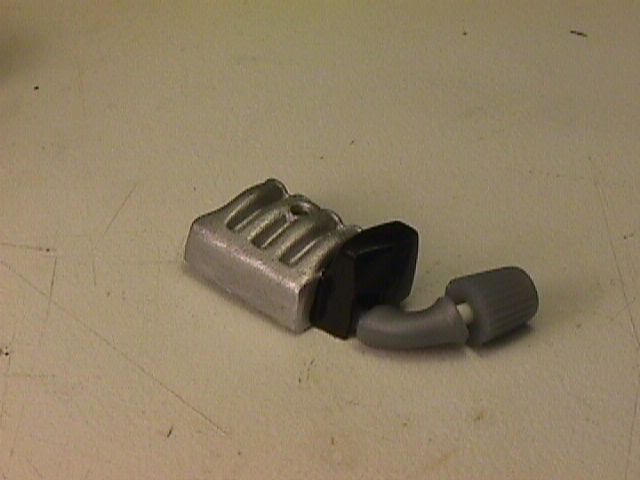
I mixed some aluminum and some gold to get the brass color that I used to paint all the bolts. You can see (in order) the oil pan, the back of the engine, the front of the engine (painted wiring harness, water neck, and starter also) and the pulley assembly.
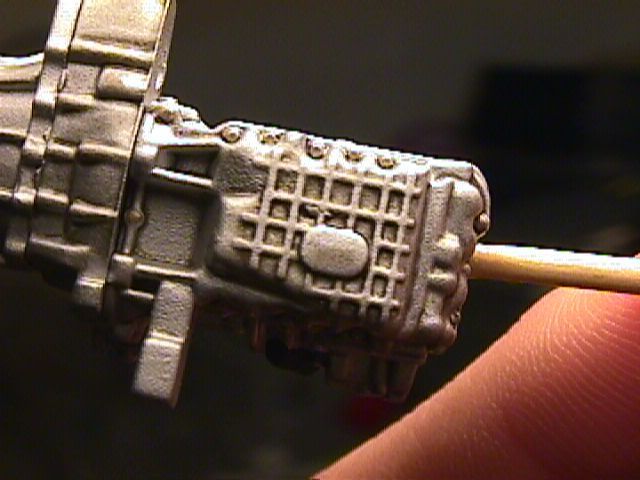
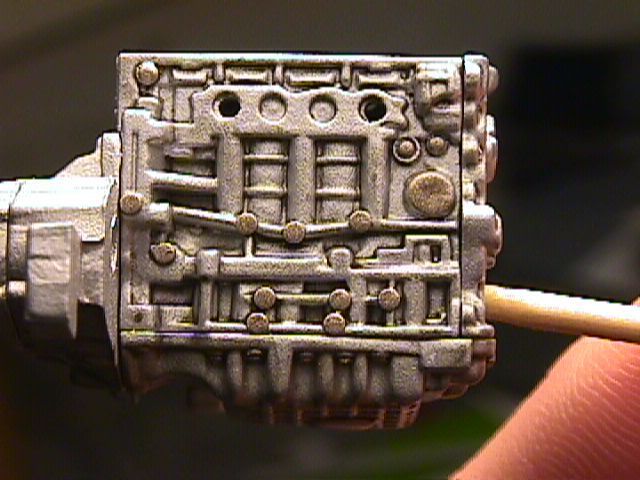

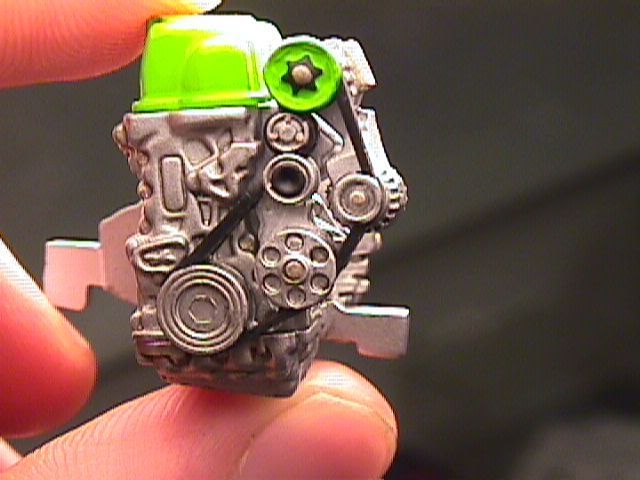
These next pics are from after I got a new camera and after more progress
Dry fitting of the mostly finished engine, still working on that intake cover. The valve cover details are semi gloss black, brake hubs are gold. Since this pic I have added more wash to the pulleys, repainted the brake hubs and top belt accessory (I want to call it a P/S pump, but RSXs don't have conventional fluid assisted steering systems) Tamiya titanium gold, and used a little more wash here and there.
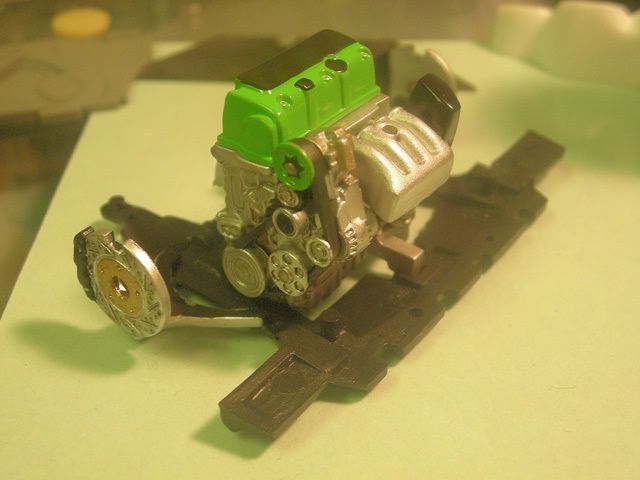
The engine bay was detail painted, just a few points are the steering rack, ABS unit, and master cylinder.
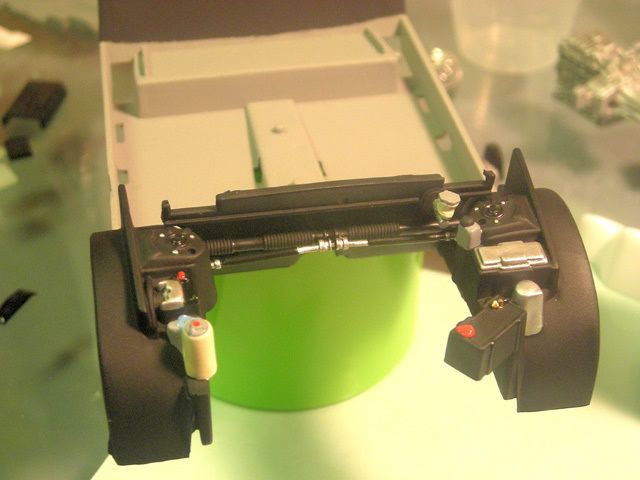
All together now! Still nothing glued yet, I'm going to wait until I know everything is completely ready to go together.
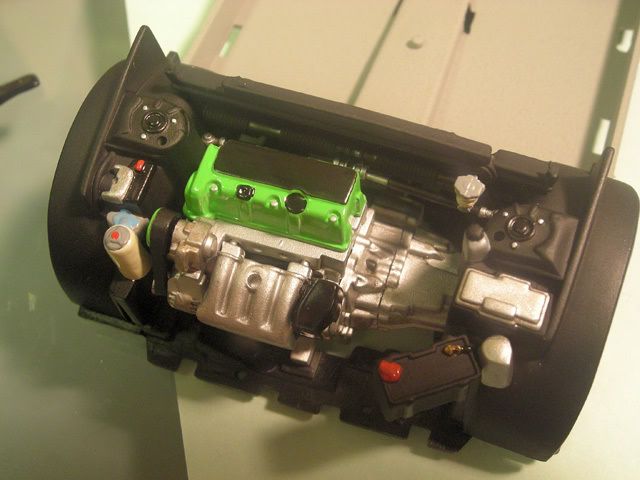
Before I weathered the chassis, I painted the major components that would be different colors (aluminum parts, the fuel pump, brakes lines, etc). I have the whole process on my photobucket as a walk through if anyone wants to see what I did.
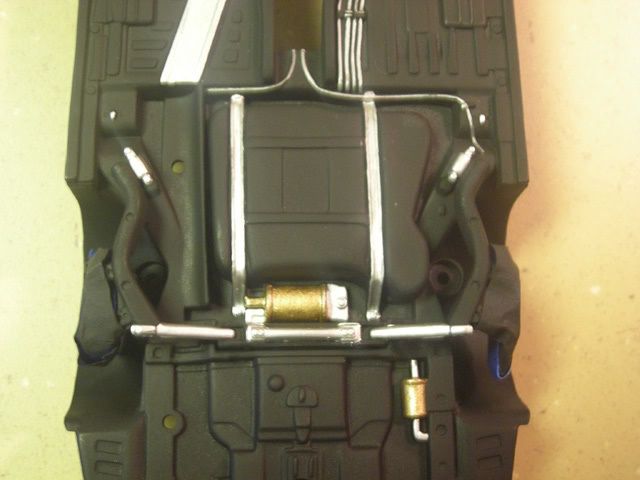
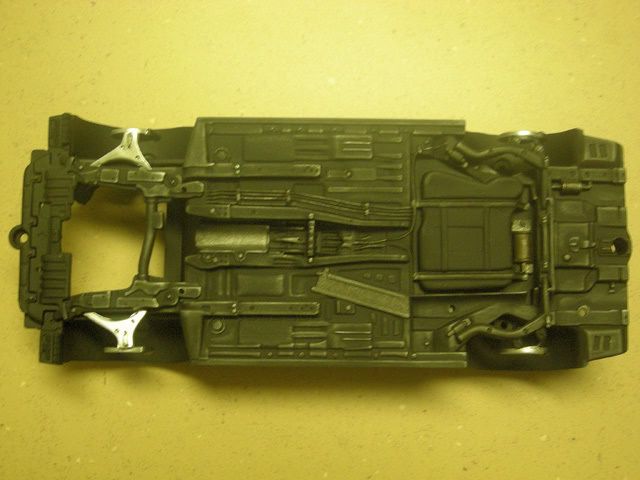
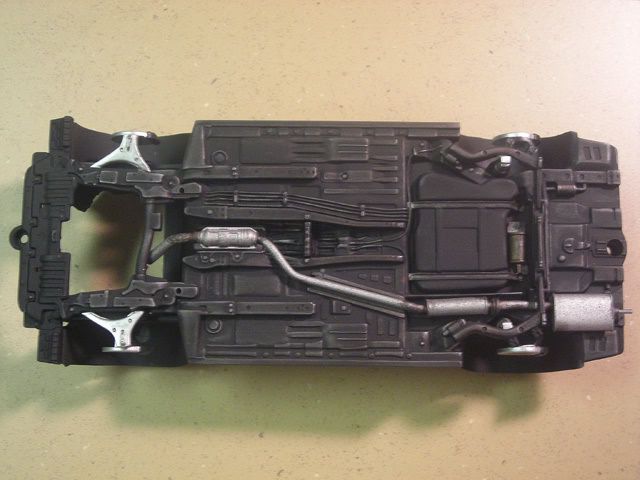
Here's the chassis weathered, I was aiming for light weathering, not a huge build up of crud and road gunk.
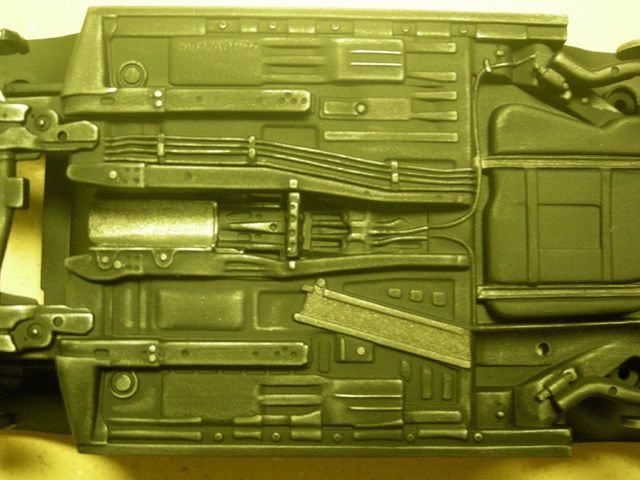
An up close shot, I think I might add some rust here and there.
Wow. That's a lot of post to digest at once! Sorry if that's a bit much. But I think the tuner section of this forum needs a little bit of a boost. I've got another build I can post up in a while, it's even bigger though
Here's the link to the weathering mini-write up:
s5.photobucket.com/albums/y19...20RSX/Chassis/
And here's the link to my RSX Photobucket album, where there are a lot more pics:
s5.photobucket.com/albums/y193/daklunk/Acura%20RSX/
Everything is in sub albums that makes organizing things a little easier...
OK, enjoy!!!
Color is Tamiya Light Green, which is the best lime green (my favorite color) I've found yet. I will be making custom masks based on the included tear graphics and spray them black, which should look really sweet. This is just a pic of the stock rear bumper I painted as a test, I'll be using the bodykit.

These are the wheels from the '93 Civic, the centers will be gloss black and the lip and hardware will be chrome/polished. Rotors will be aluminum metalizer, brass hubs, and black calipers.

The kit wing will be painted black with green caps and balck struts, I'll use black sponsor decals from, uh, somewhere, dunno yet, and I might paint that one section of the hood/front bumper gloss black. I would love to have some smoked Altezza style tails, but these lenses are solid red...
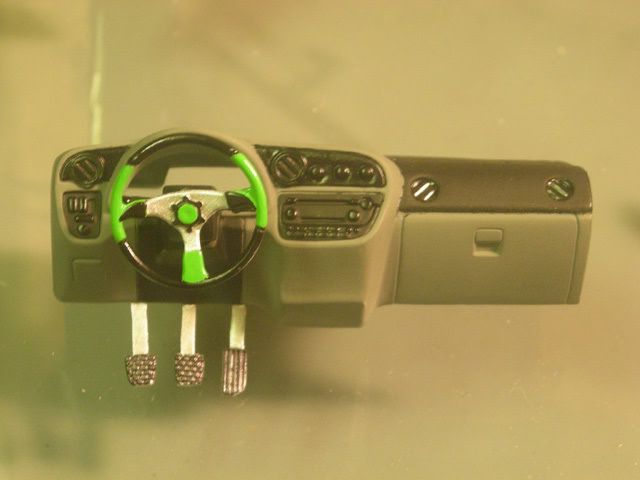
I didn't like the stock look kit of the steering wheel on such an eye-catching ride, and I had an extra Revell Eclipse steering wheel and column laying around, soooo...

Looks much better IMHO, It will be black and silver, I just might make that center button thing green just because, the only other green thing will be the palm patch on the shift knob.
The interior is flat black and two shades of primer gray, the carpet was sprayed a light primer which spat everywhere, which was good because it simulates the look of carpet better than the kit plastic. The remaining greys are darker primer, and the rest is flat black. I have yet to mask off certain parts of the doors, dash, center console, audio housing, and seats to be painted grey, black, or silver trim. Yes I know, the sub rings look awful, I did them with a half dry Sharpie

 Will redo them eventually...
That big empty package shelf was just begging to have some amps for the audio system installed. I'm using my own resin parts, either 2 JL Audios (left) or 2 Kicker KX's (right). Both are shades of black, silver, and grey, so they'd go well with the rest of the interior. I think I'll probably go with the Kickers, and have them painted green with black or gunmetal inserts, add some color to the interior.

The seats will have balck patches and black seat belts with PE hardware. And I think I will make a green iPod nano with ear buds to leave in the center console

As much as I would like to go hog wild again with engine detailing, I must refrain *slaps own hand away from box of detailing wire* as I will refrain from adding any non-kit parts *busts ruler across knuckles as hand reaches for the resin stash* ;D

This is the engine before detail painting, dry fit (nothing glued except for the the block and tranny) to the front subframe/cradle. Aluminum metalizer, Smoke wash, Tamiya green valve cover (the intake shroud will be the same color, but it's requied a repaint and I haven't finished it yet. I might paint it black. You can't really tell, but the green bled away from all the sharp edges

The first thing I noticed when I saw the engine on the box is that the conical air filter is right next to the exhaust manifold, not good for performance.
 Since I wasn't going to be doing alot, I decided not to build a heat shield (as one should) but to just chop the intake pipe a little. I drilled it out and added a rod to the filter, and now it sits a little further from the heat. But it's still not a very good situation...

I mixed some aluminum and some gold to get the brass color that I used to paint all the bolts. You can see (in order) the oil pan, the back of the engine, the front of the engine (painted wiring harness, water neck, and starter also) and the pulley assembly.


These next pics are from after I got a new camera and after more progress

Dry fitting of the mostly finished engine, still working on that intake cover. The valve cover details are semi gloss black, brake hubs are gold. Since this pic I have added more wash to the pulleys, repainted the brake hubs and top belt accessory (I want to call it a P/S pump, but RSXs don't have conventional fluid assisted steering systems) Tamiya titanium gold, and used a little more wash here and there.

The engine bay was detail painted, just a few points are the steering rack, ABS unit, and master cylinder.

All together now! Still nothing glued yet, I'm going to wait until I know everything is completely ready to go together.

Before I weathered the chassis, I painted the major components that would be different colors (aluminum parts, the fuel pump, brakes lines, etc). I have the whole process on my photobucket as a walk through if anyone wants to see what I did.

Here's the chassis weathered, I was aiming for light weathering, not a huge build up of crud and road gunk.

An up close shot, I think I might add some rust here and there.

Wow. That's a lot of post to digest at once!
 Sorry if that's a bit much. But I think the tuner section of this forum needs a little bit of a boost. I've got another build I can post up in a while, it's even bigger though
Here's the link to the weathering mini-write up:
s5.photobucket.com/albums/y19...20RSX/Chassis/
And here's the link to my RSX Photobucket album, where there are a lot more pics:
s5.photobucket.com/albums/y193/daklunk/Acura%20RSX/
Everything is in sub albums that makes organizing things a little easier...
OK, enjoy!!!





 I'll see if I can't get a WIP on that one together for you guys this weekend...
