|
|
Post by chuckinredneck on May 6, 2007 7:09:42 GMT -5
Well I got so involved with the 33 Ford coupe I sort of burned out on it. So I packed up the 33 and set it on the WIP shelf to let it "cool off" a bit and I took the time to build a box stock 55 Ford Pick-up which I should have entered into the contest but didn't and now it's all done, LOL. While I was building the 55 I went to a swap meet and found the project I'm on now. This project involves two things I've been wanting to do for a long time, working with resin and building a Fiat Bodied Drag Car. 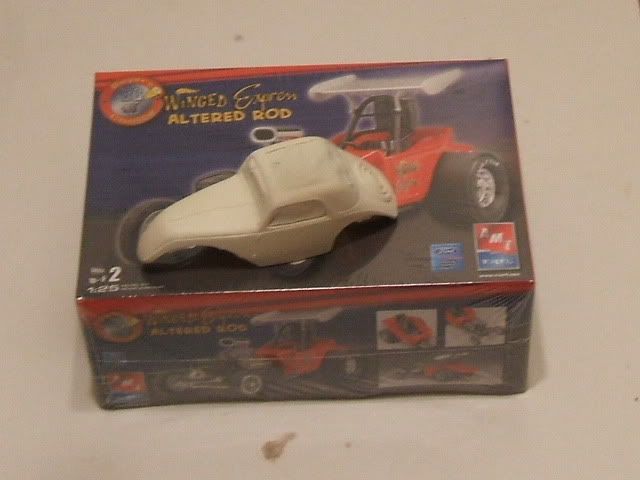 The kit is the Winged Express from AMT and the body is a Jimmy Flintstone Fiat Topolino. When I got started cutting the windows and roof out I learned my first lesson in working with resin, it's soft. Fortunately the damage was minor and will be an easy fix. Next I partially assembled the chassis so I could get the body to fit the chassis and open the hood for the blower. 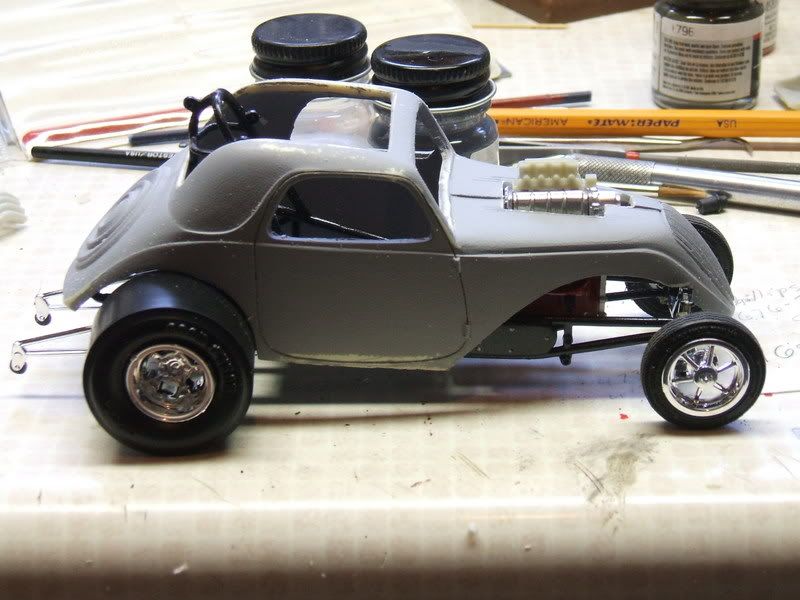 The rear tires I wanted to look like they had done a burnout or 2 so I sanded them with 220 grit to get rid of the shine followed with 80 grit to rough them up some. Finally I took 40 grit and laid it on the table and turned the tires in one direction so that it would create some tears and leave little bits of rubber stuck to the tires. 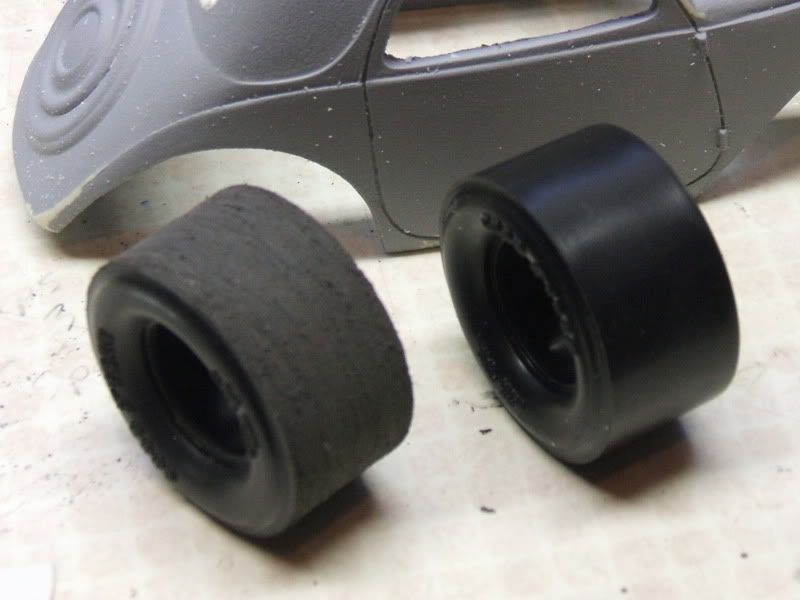 I permanently mounted the axles and put on the tires in the direction they were sanded. When I set the body back on the chassis I found I needed to do some more work on the fit of the body. 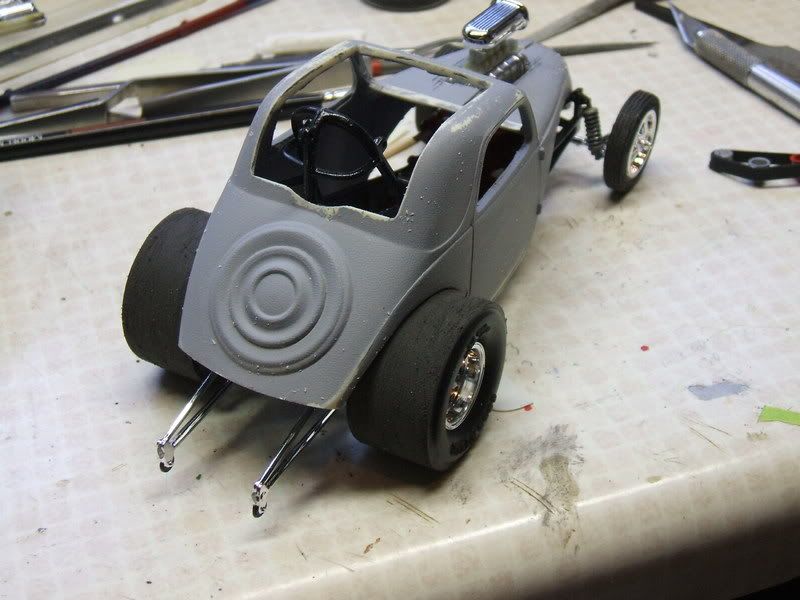 Next I plan on doing a bit of detail work on the engine. Chuck J |
|
|
|
Post by The Mad Modeller on May 6, 2007 20:06:44 GMT -5
Off to a great start Chuck. Can't wait to see what you do with it.
|
|
|
|
Post by chuckinredneck on May 17, 2007 5:53:03 GMT -5
OK heres the little bit I've gottten done between spring cleaning and the honeydos LOL. I've basically have the body fit the way I want it to, so I figured it was time to work on the engine. I had a lot of clean up on the blower so I stripped the chrome off and repainted it with chrome paint. The injectors were painted Jet Exhaust and lines were run from the distribution box. The lines for the doors were filled and sanded on the body. 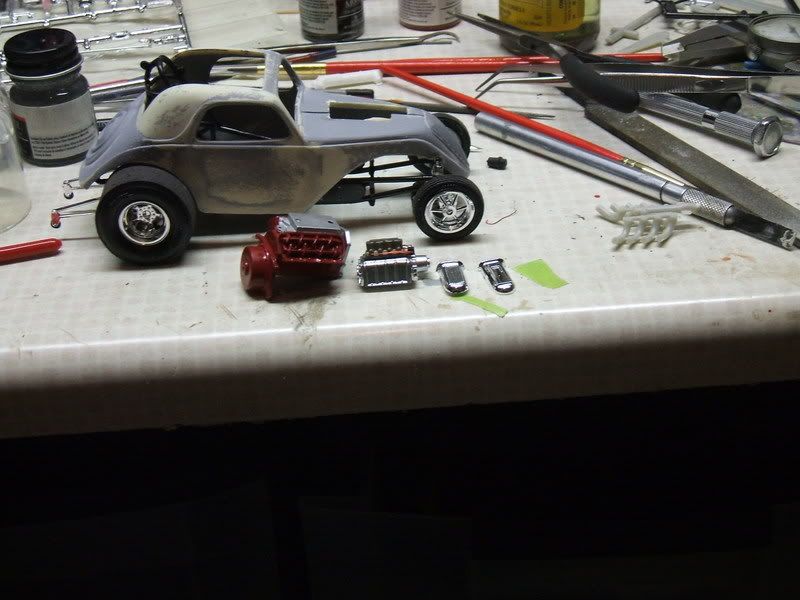 The scoop and valve cover had fins that I used a thinned wash on. Plug wires were added with boos for the sparkplugs 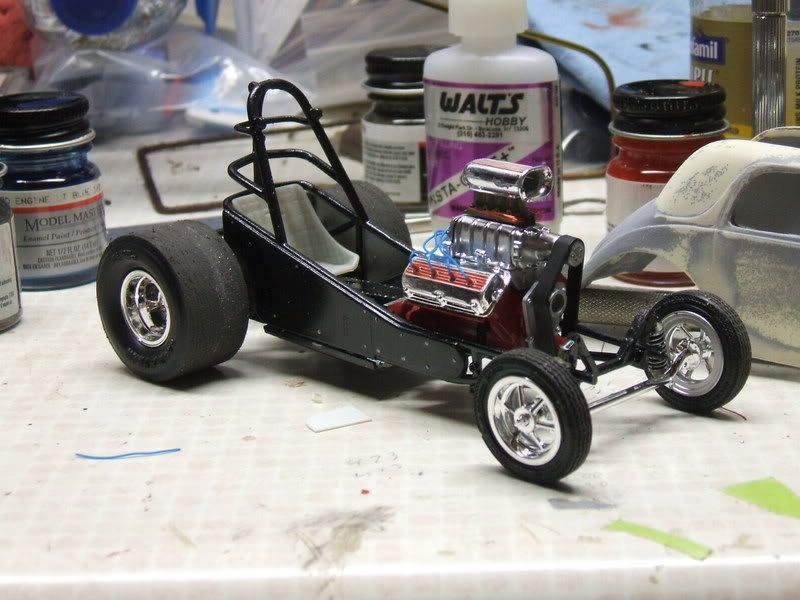 Chuck J |
|
|
|
Post by The Mad Modeller on May 17, 2007 17:05:50 GMT -5
Looking good Chuck.
|
|
|
|
|
|
Post by ronr on May 26, 2007 11:51:21 GMT -5
Love those Altereds! This is turning into a cool build Chuck.
|
|
|
|
Post by chuckinredneck on May 28, 2007 8:21:26 GMT -5
I found out the headers from the Winged Expressed kit won't work with the Fiat body so I looked through the parts box but I was unable to find anything that looked right so I got some aluminum tubing and bent up some headers. I tried the wing from the kit but I think it's too big so I'm looking for the smaller wing that came with the Bantam Blast kit 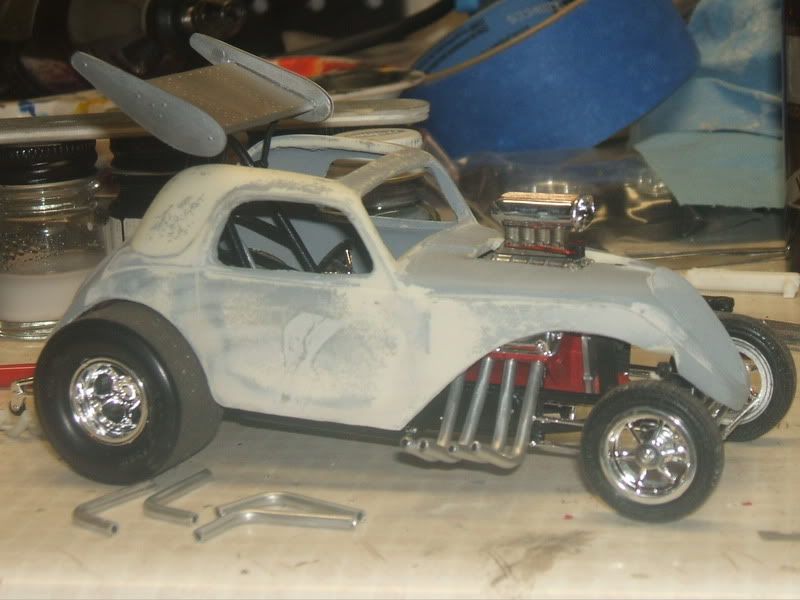 I started with them a bit on the long side and then cut them until I felt they looked right and then the ends were drilled out to thin the walls up. 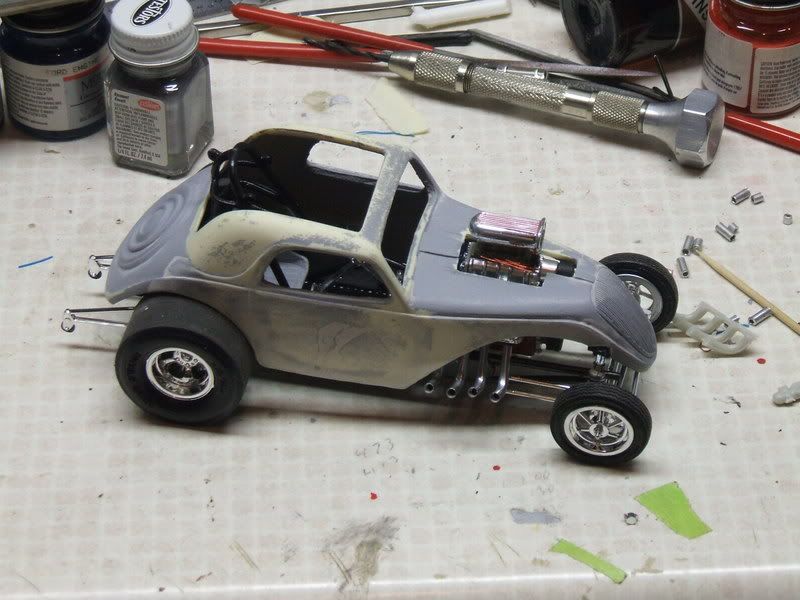 The keg style gas tank won't work with the body so I need to find a different one or make something up Chuck J |
|
|
|
Post by The Mad Modeller on May 28, 2007 12:40:23 GMT -5
Looking good. Those headers look sweet. Nice work Chuck.
|
|
Smokin Models
Junior Member
  "Resident RattleCan Master"
Posts: 172
|
Post by Smokin Models on May 28, 2007 18:21:17 GMT -5
thats coming along very nicely
|
|
|
|
Post by chuckinredneck on Aug 11, 2007 7:52:27 GMT -5
Between the Syracuse Nationals and a very sick child I haven't had a lot to do with anything lately. Now the Nationals are over and the baby is out of the hospital, so I'm back, lol. I've gotten a bit of work done on the altered. I didn't clean the resin body good enough so I had to strip all the primer off it and start over with the body work and all. I layed on new primer and the a silver base coat and 4 coats of Candy Apple Red 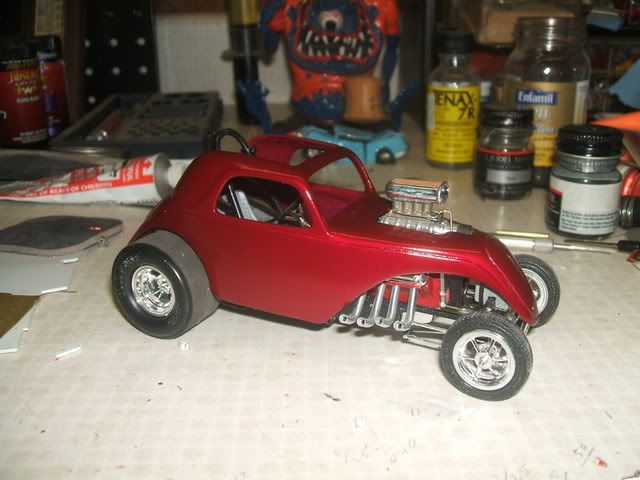 I needed to make a fuel tank to fit under the nose of the body and I didn't care for the fuel lines running to the injectors so I yanked them out and ran some new ones which I think look much better 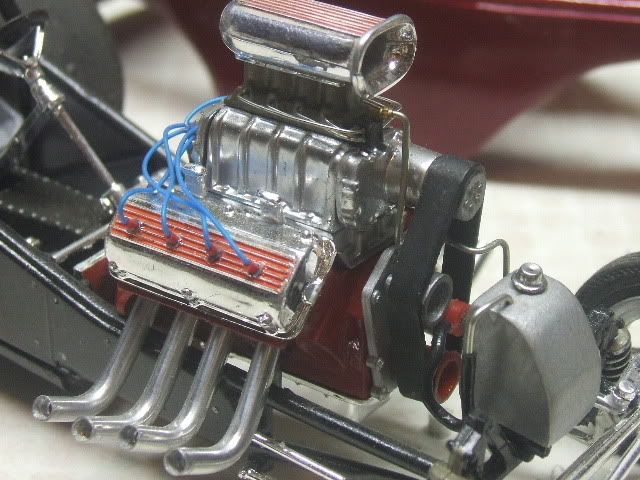 Right now I'm not happy with the seam on the injector scoop so that will probly be next to get some work done on it. I've been messing around with some graphics for the body, here's pictures of the front and rear. I'm calling the Fiat Altered Cherry Bomb now. 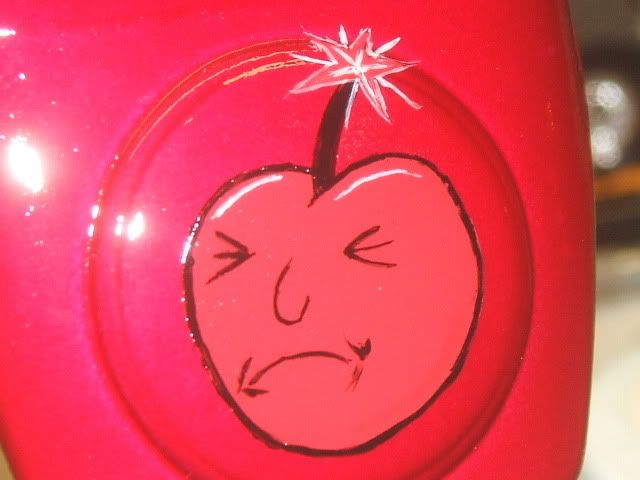 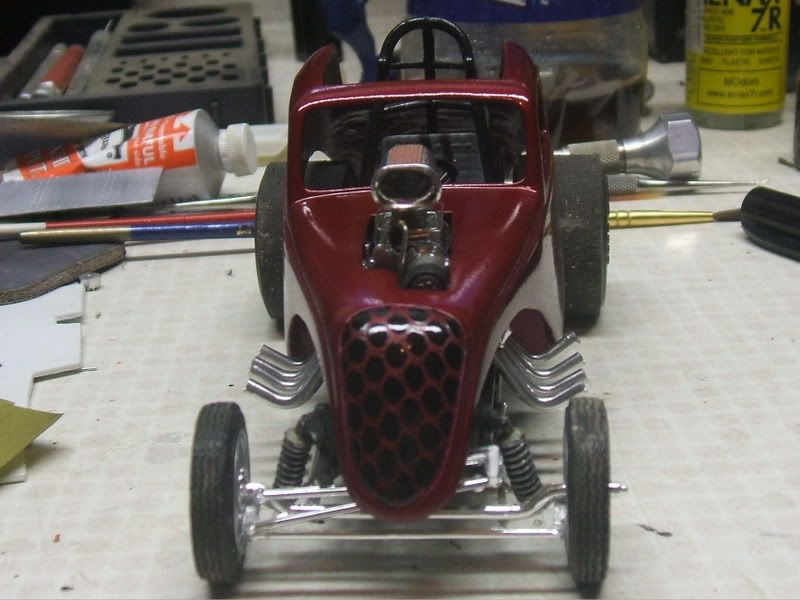 Chuck J |
|
|
|
Post by whtchevy on Aug 11, 2007 10:25:36 GMT -5
;)Outstanding work on the wheels and the body, as for your little cherrybomb....sweeeeeeeeeeeeeeeeet, let's keep her going.
|
|
|
|
Post by ronr on Aug 11, 2007 18:27:11 GMT -5
Good progress Chuck! That little Bomb is lookin` SWEET!
|
|
|
|
Post by chuckinredneck on Aug 16, 2007 16:38:51 GMT -5
Thanks to everyone for their comments on this build. I was going to paint Cherry Bomb on the sides of it, but it turned into a big mess. I thought the paint job was ruined and I was going to have to start over. Luckily I was able to cover it up with some flames. The flames ain't perfect but look a hole lot better than the lettering job I was doing. I'm going to do a bit more pin striping on it and clear coat it and call the body done. 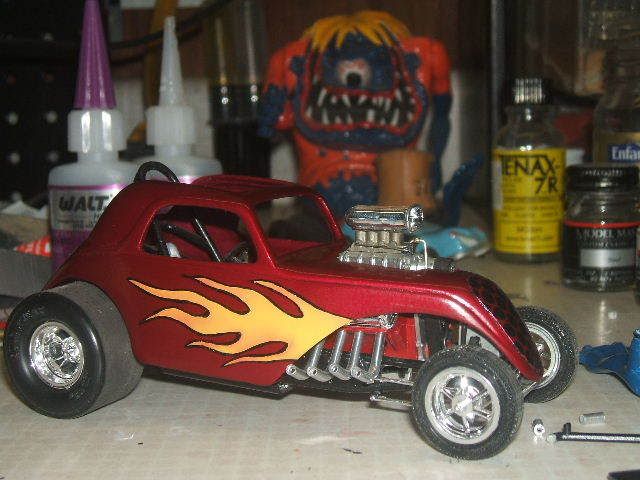 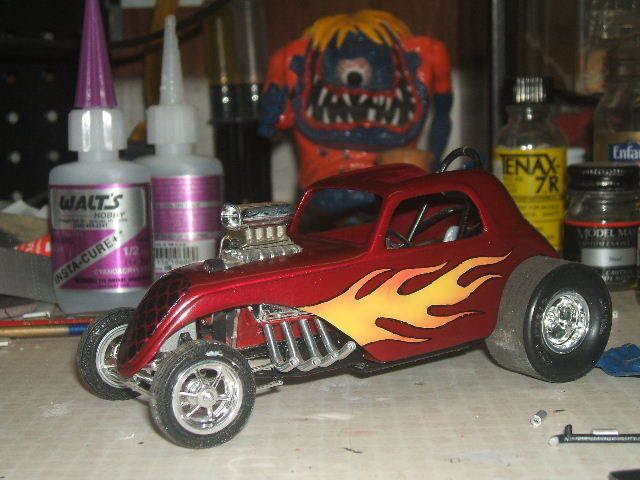 I'm making a couple of small changes to the chassis to better fit the body. Chuck J |
|
|
|
Post by The Mad Modeller on Aug 16, 2007 21:59:21 GMT -5
Good looking Altered Chuck.
|
|
|
|
Post by 67impala427 on Aug 17, 2007 17:15:32 GMT -5
That paint is really poppin'. Looks real nice.
Alex.
|
|
|
|
Post by chuckinredneck on Aug 19, 2007 6:56:13 GMT -5
I done a little bit more work to the flames to improve them and to help cover my mistakes LOL. 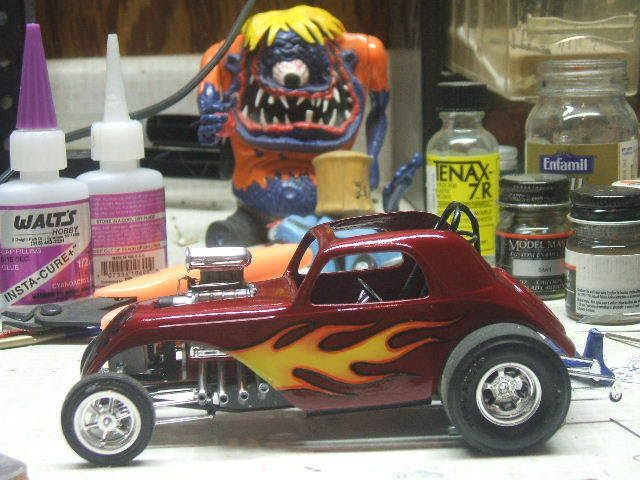 After I was done with the flames I clear-coated the body and that really made everything stand out. 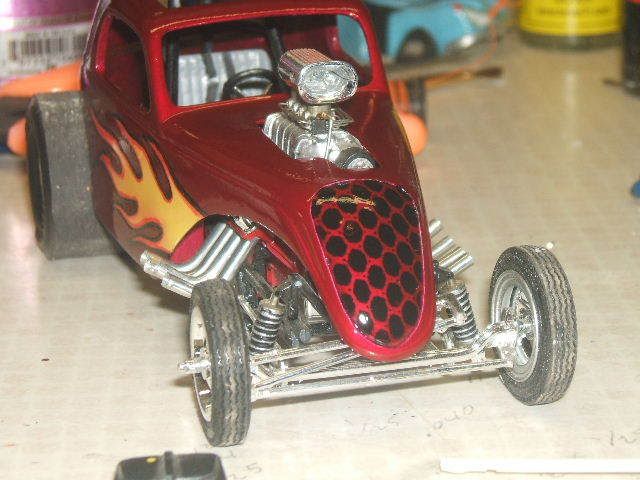 Except on th rear of the body. The paint on the cherry bomb cracked up. Right now I'm not sure of the possiblities of making the best of a bad situation or if I'm going to have t remove the paint and start over 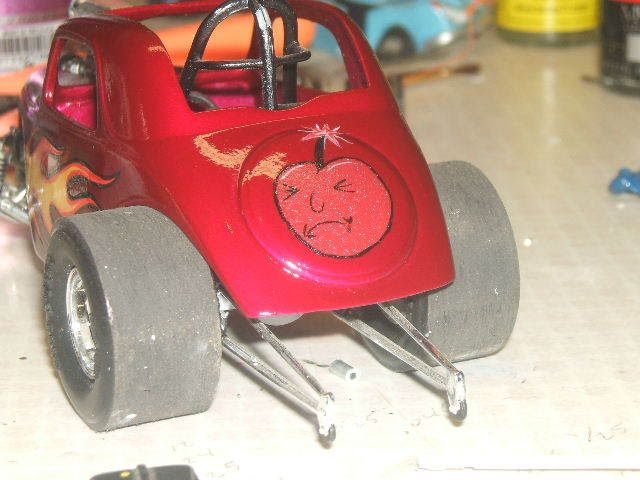 this was the second coat of clear on the cherry so now I'm affraid to put a second coat on the rest of the car as all the graphics were done with the same type of paint. I'm making a couple of changes to the chassis to better fit the body. Chuck J |
|
|
|
Post by dan on Aug 19, 2007 7:42:06 GMT -5
Looks good to me,love the "Cherry Bomb"!!!!!!!!
|
|
|
|
Post by ronr on Aug 19, 2007 8:41:17 GMT -5
I`m really liking this build! humm..............wonder what one would look like with a Scott blown , Ardun head, Flathead for power?
|
|
|
|
Post by chuckinredneck on Aug 25, 2007 7:59:47 GMT -5
After a good bit of wet sanding and and some touch up work I got the cherry so it don't looks so bad. Then I laid on two coats of poly instead of the clear laquaer. Next I got the body polished out and the decals applied. 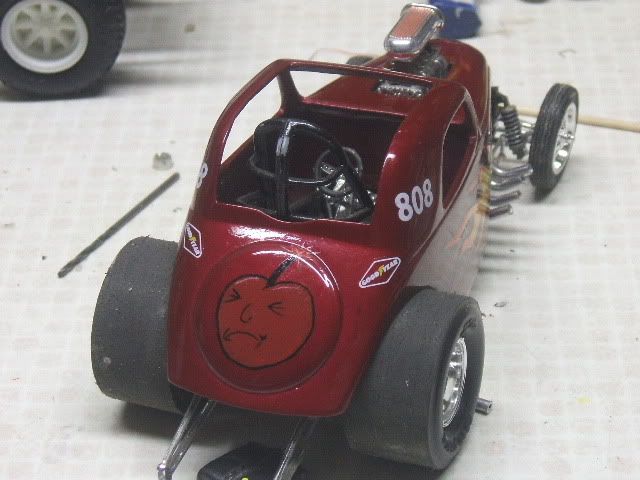 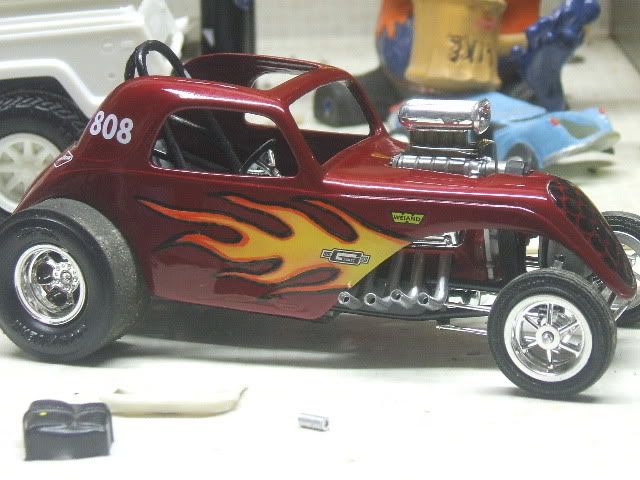 I doctored up the kit's parachute by adding some of the lines so that it looks like it is actually attached and not just setting there. 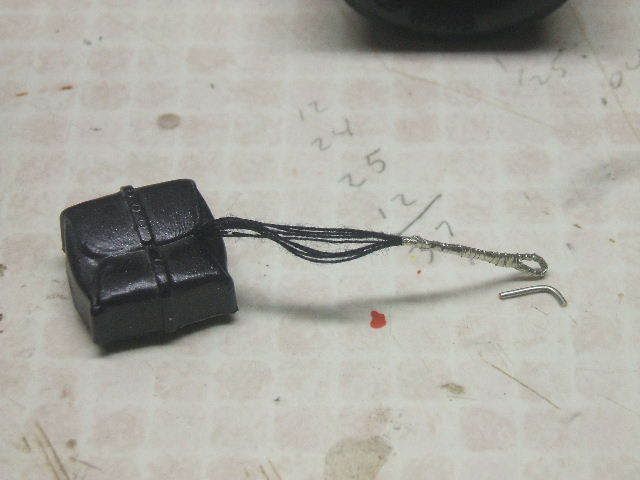 I'm making some changes to the rear of the chassis when I'm done with these changes this build will be done. 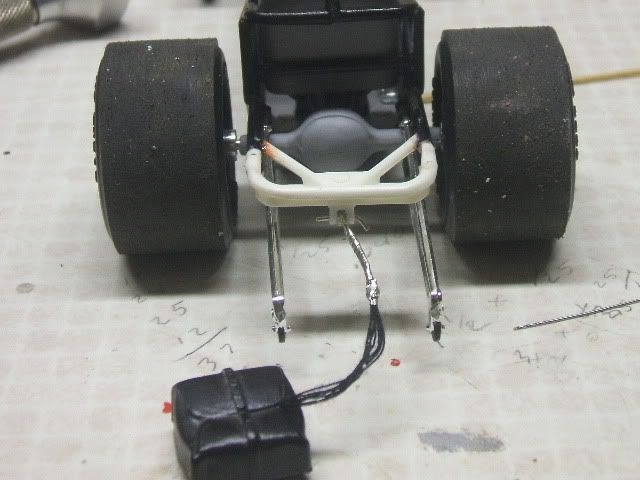 Chuck J |
|
|
|
Post by chuckinredneck on Aug 27, 2007 4:50:43 GMT -5
Cherry bomb is now done. I've finished all the changes and the touch ups and now I'm calling this one done. Thank You to everyone who has encouraged me along the way. 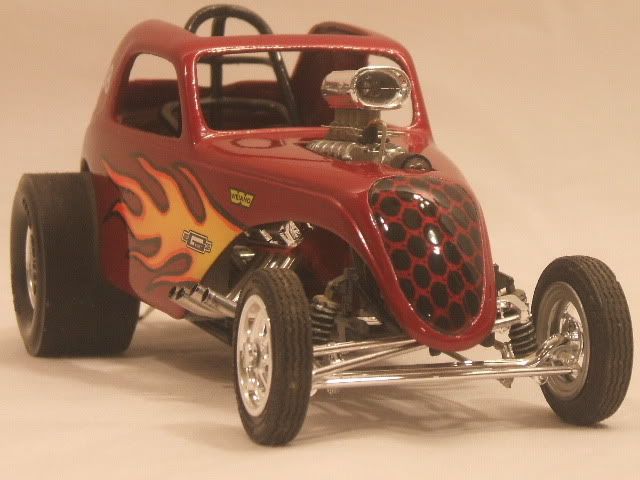 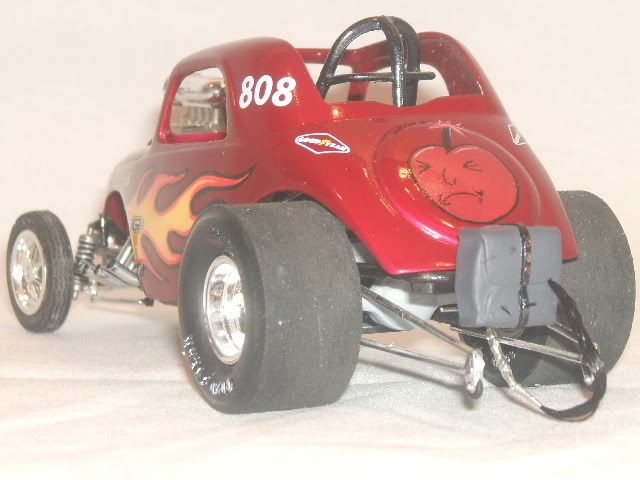 Chuck J |
|
|
|
Post by The Mad Modeller on Aug 27, 2007 16:40:01 GMT -5
Beautiful build Chuck. It looks great. Now on to the next one.
|
|
geezerman35
Junior Member
  I don't build kits - I molest them
Posts: 65
|
Post by geezerman35 on Aug 27, 2007 18:32:36 GMT -5
Great model.
Nice work.
Geezerman
|
|
|
|
Post by cubsfan on Aug 28, 2007 0:00:33 GMT -5
I know that I'm about three weeks late but its great to hear that your child is out of the hospital.
Cool build, I really like the engine details.
Matt
|
|


