sarge
Junior Member
  My 6.0L grocery getter. Love it!!
Posts: 134
|
Post by sarge on Jan 30, 2009 12:32:32 GMT -5
Well I am finally working on something I can post in this section. I am building the "cars movie" scheme ran at Texas in 2006. I wanted to try my hand at a little body work on this one, so I took on the task of converting a Monte Carlo body into a Charger. The nose, grill area and quarter windows are really the biggest differences. So that is where I went to work, I am pretty pleased with what I came up with. At the same time though I will be the first to admit that it is not even close to exact. I needed more of a snout on the nose of the car, but for my first attempt at a major conversion I am happy and going on with the build. This is going to be a wheels off detailed build. Concentrating mainly on the engine, interior, underside of chassis, and of course the body. I should have opened the trunk, but I got in a hurry to get some paint on the body to see what it looked like and it totally slipped my mind. Anyhow, If you are even still reading I am sure you are tired of it so here is what I have so far. What I am shooting for. 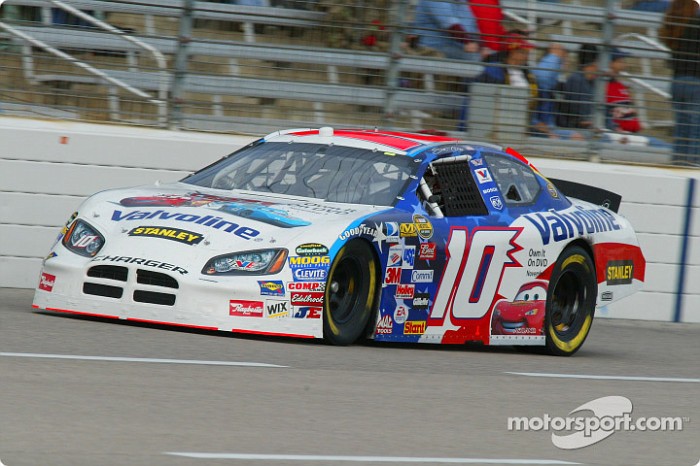 What I ended up with. 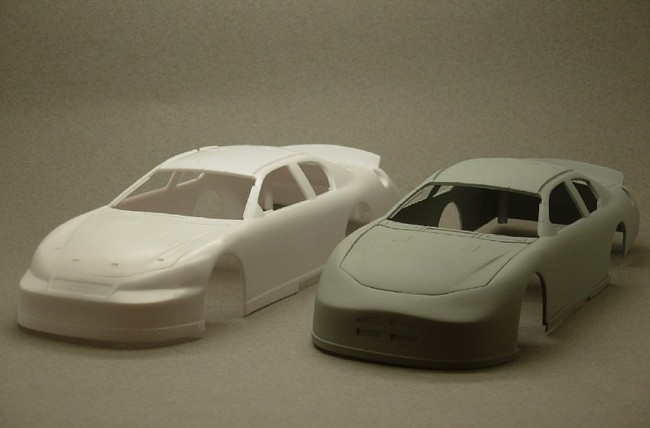 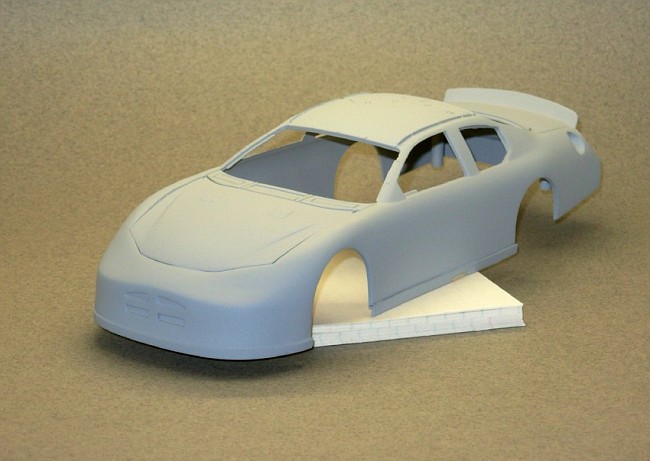 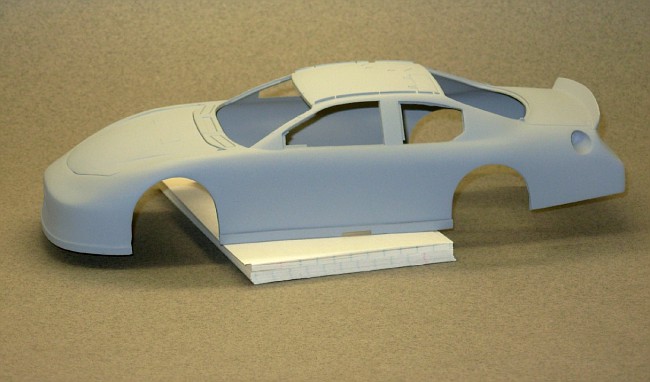 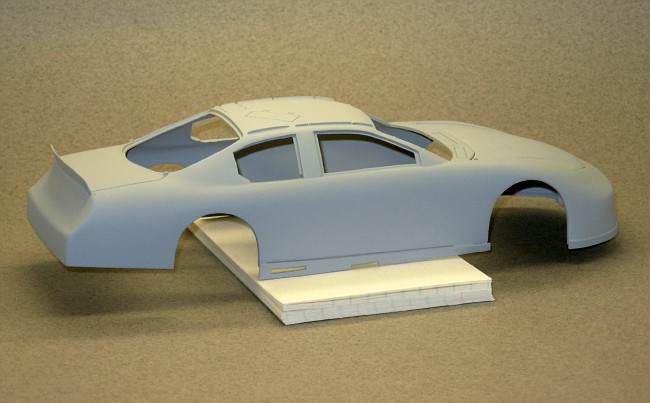 |
|
sarge
Junior Member
  My 6.0L grocery getter. Love it!!
Posts: 134
|
Post by sarge on Jan 30, 2009 12:33:16 GMT -5
|
|
sarge
Junior Member
  My 6.0L grocery getter. Love it!!
Posts: 134
|
Post by sarge on Jan 30, 2009 12:35:25 GMT -5
|
|
|
|
Post by nascarrocks on Jan 30, 2009 12:46:27 GMT -5
looks good so far.
|
|
|
|
Post by The Mad Modeller on Jan 30, 2009 19:23:34 GMT -5
Looks good. Not sure why all the pics arent showing up. Glad to see you back to the forum Tom.
|
|
sarge
Junior Member
  My 6.0L grocery getter. Love it!!
Posts: 134
|
Post by sarge on Feb 3, 2009 23:07:17 GMT -5
Fixed the links sorry, I rearranged my fotki the other day.
|
|
sarge
Junior Member
  My 6.0L grocery getter. Love it!!
Posts: 134
|
Post by sarge on Feb 4, 2009 19:49:01 GMT -5
Update time, I have been working on this one alot but have very little to show for it. Hopefully it will start to go a little quicker, as I have everything at least for the interior pretty much ready to go. Reworked the kit seat to try and represent the Lajoie seat that Rigg's runs. Still have some work to do on it, but it is getting close. Also added the extinguisher' and some lines for the thingypit and fuel cell area. Thanks for looking. 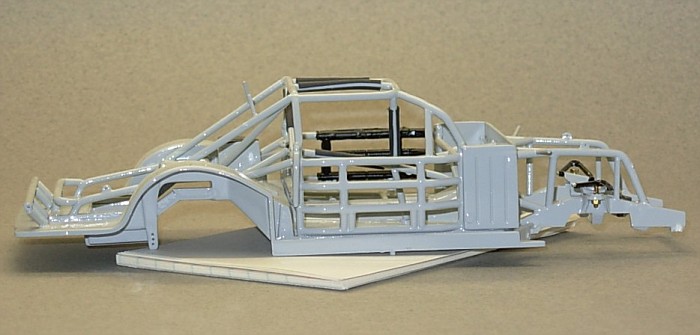 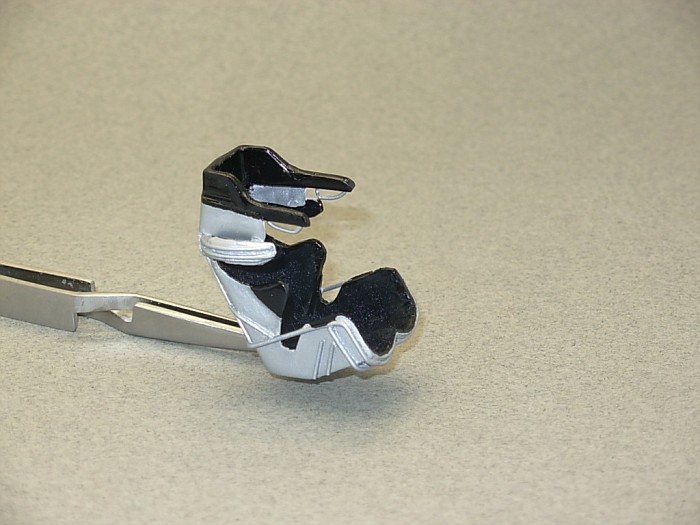 |
|
|
|
Post by The Mad Modeller on Feb 4, 2009 21:51:08 GMT -5
Looking good.
|
|
|
|
Post by fireguy14 on Feb 4, 2009 22:34:20 GMT -5
Very nice! Those rotors look terrific!
|
|
|
|
Post by Gary Kulchock on Feb 5, 2009 9:55:46 GMT -5
Beautiful job. Nice clean work here. ;D
|
|
sarge
Junior Member
  My 6.0L grocery getter. Love it!!
Posts: 134
|
Post by sarge on Feb 8, 2009 23:42:10 GMT -5
|
|
|
|
Post by willysurvive on Feb 22, 2009 0:55:26 GMT -5
Wow this is really great Sarge. First off I love the decals. My 3 year old son saw it and wouldn't let me go to a different page cause he wanted to look at your "Lightning McQueen" car. So you made his day. Those brakes and rotors look awesome too. Did you use heat shrink tubing for the rollcage padding? Sorry to ramble but I'm truly awestruck. Really great job buddy. Can't wait to see it finished.
|
|
sarge
Junior Member
  My 6.0L grocery getter. Love it!!
Posts: 134
|
Post by sarge on Feb 26, 2009 9:35:34 GMT -5
Thanks guys, I do use heat shrink or the roll bar pads. Heat them up on a .80 piece of metal rod and then cut them and put them into place. I am getting closer on this bad boy. Interior is for the most part wraped up, I see I have a few areas to touch up some, but this is generally what I am going with. I figured I would give a Ross Gibson Dodge motor a try. Got it in the mail last week and have been working on cleaning it up and getting it together. Hopefully I can get this one wraped up in the in time for the show in Charleston on March 28th. Thanks for looking guys as always suggestions or critiques welcome. 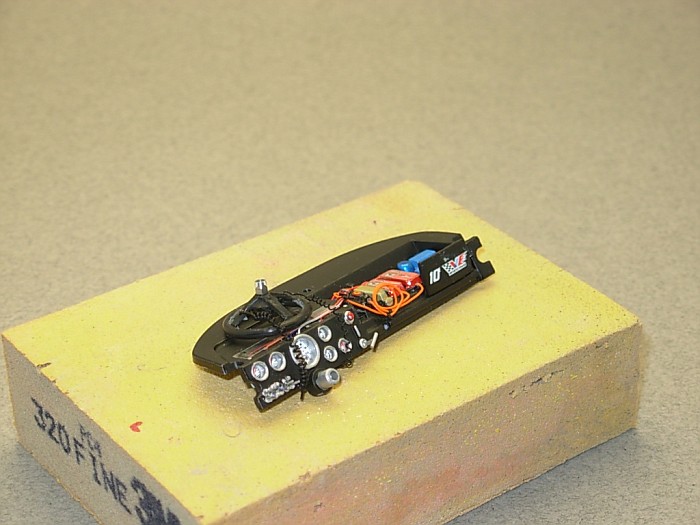 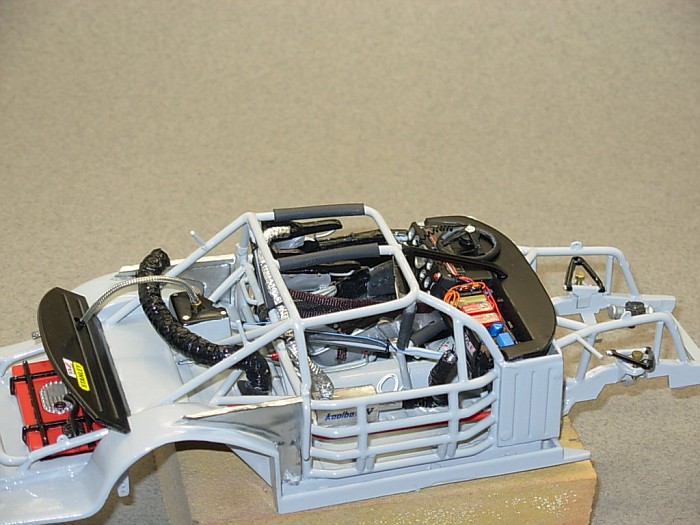 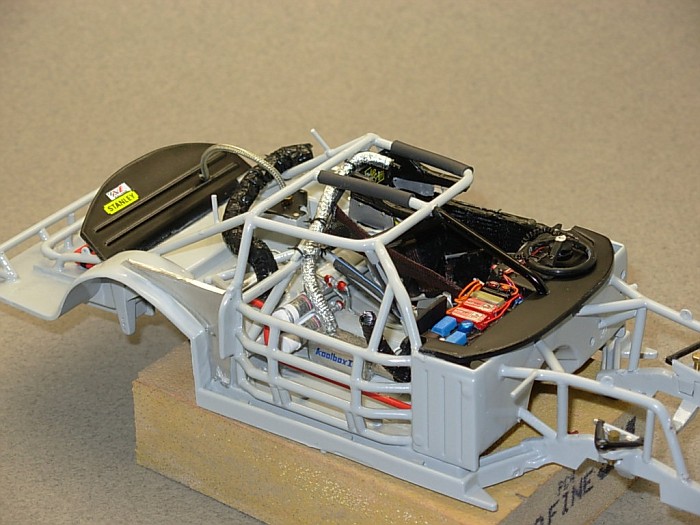  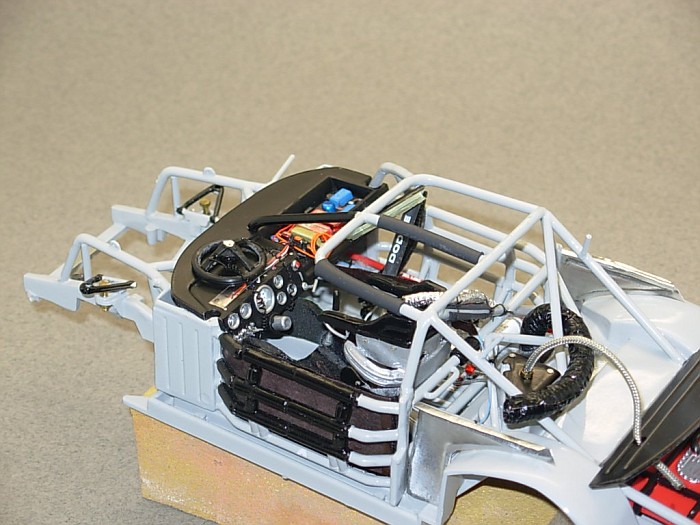 As you can see my skills with the embossing metal are very lacking. Hopefully the next set will be better. :-\ |
|
|
|
Post by willysurvive on Feb 26, 2009 11:26:01 GMT -5
I don't see anything lacking about this build. Great job.
|
|
|
|
Post by The Mad Modeller on Feb 26, 2009 21:58:50 GMT -5
Looks great Sarge. Excellent detail work.
|
|
sarge
Junior Member
  My 6.0L grocery getter. Love it!!
Posts: 134
|
Post by sarge on Feb 27, 2009 17:41:03 GMT -5
Thanks guys, hoping to get the underside of the chassis done this weekend. If I can stay off the computer and get to builing. lol
|
|
|
|
Post by Nacho Z on Feb 27, 2009 22:06:28 GMT -5
Man O Man......that thing looks great. I have been watching this and meaning to post a comment and never did. So let me say WOW!! You're doing a beautiful job on this one.
|
|
|
|
Post by fireguy14 on Mar 2, 2009 12:31:50 GMT -5
Fantastic work! That level of detail would just about make me want to leave all the subassemblies apart for display by themselves!
|
|
|
|
Post by wilson on Mar 4, 2009 19:49:32 GMT -5
This coming along great.
I can't wait to see the detail you add to rest of the car.
|
|
sarge
Junior Member
  My 6.0L grocery getter. Love it!!
Posts: 134
|
Post by sarge on Mar 7, 2009 11:59:52 GMT -5
Well, I am slowly plucking away at this one. Got the underside of the chassis started. I used braided line to plumb in the rear end, I realized when I got to this part that I was running low on my pro-tech hardware. Being that I have been off work for a month their is not exactly alot of extra play money right at the moment so I am saving the good stuff for the top of the motor. Thinking that is the area that will be the most visible. I used a arrowhead rear spring set, a little photo etch from the no bull Earnhardt set. And this is what I came up with, hopefully it will bring it to life once I get the rotors installed. Also got the motor going, I had ordered a Ross Gibson piece for this build when I first started it. Wanting to try one, I was very impressed with the detail and the thing is huge compared to the kit motor. Hopefully I can get it stuffed down in the chassis. I have been doing some test fitting of course and it looks like it will go fairly easy, not sure what the headers are going to do to me though. I had also picked up a Arrowhead pulley set, so I put it to use on the Gibson motor. Used a little more pro-tech braided line and some detail master fitting lines to plumb in the bottom of the motor. Thanks for looking, trying to get this thing wraped up for the show in Charleston at the end of this month. So I got to get busy. If any of you guys see somewhere I am getting off track please let me know I am treading in uncharted waters for me here and just figureing it out as I go. Hopefully that does not come back to bite me when it comes time to put it all together. 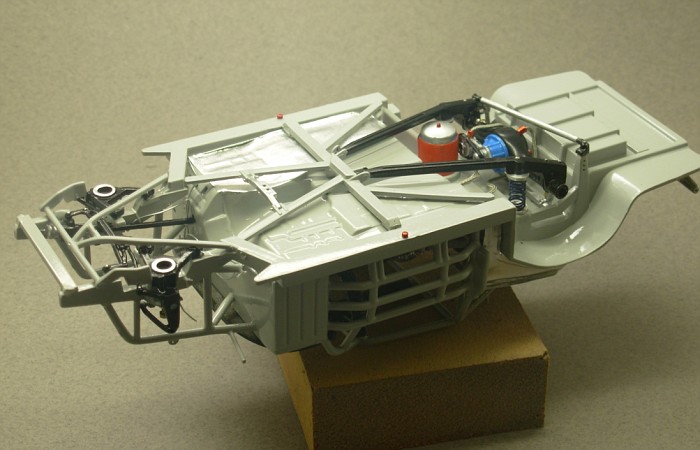 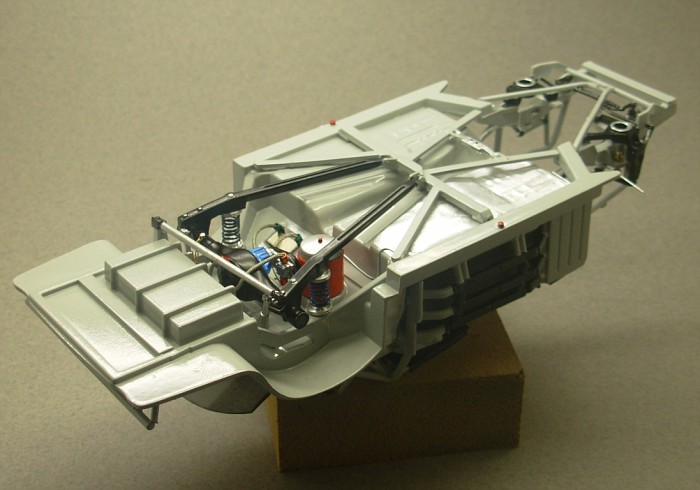    |
|
|
|
Post by willysurvive on Mar 7, 2009 12:39:12 GMT -5
Chassis looks awesome Sarge. Nice work.
|
|
sarge
Junior Member
  My 6.0L grocery getter. Love it!!
Posts: 134
|
Post by sarge on Mar 8, 2009 0:20:01 GMT -5
Got a bit more done this afternoon, beautiful day outside and I am still hobbling around on this dang knee, so I worked on the model. Anyways hopefully the next time you see this thing it will be in the chassis. Made me up a set of headers from soder, first time I had tried that and it was a pain at first. I think I got the hang of it there at last, still not perfect but for my first try I am pleased with the results. Also got most of the plumbing in. Thanks for looking. The real motor 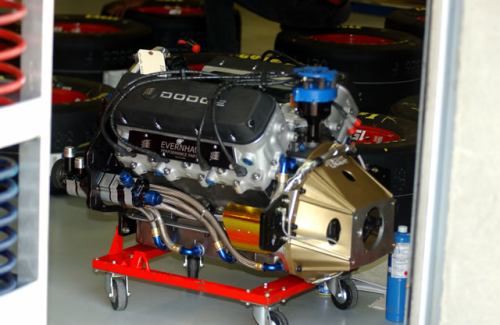    |
|
|
|
Post by The Mad Modeller on Mar 8, 2009 14:18:05 GMT -5
Looks good. I like those headers. Next time I need custom headers made I'm asking you. LOL
|
|
sarge
Junior Member
  My 6.0L grocery getter. Love it!!
Posts: 134
|
Post by sarge on Mar 8, 2009 21:01:00 GMT -5
Bobby for you I would consider it, however I think I pulled out half my hair doing those. I got another guy on a board I won't mention that thinks I am his personal part maker  . I would do it for a friend though you just say what you need them for. Anyhow, after working on the thing all day I think the chassis is pretty close to being wraped up, I may actually get this thing done by the end of the month. Basically just put everything together that I have been boring you with up to this point. I did make the front shocks from metal tubing, and used some modern motorsport pieces to try and dress up the engine bay. Thanks for looking. 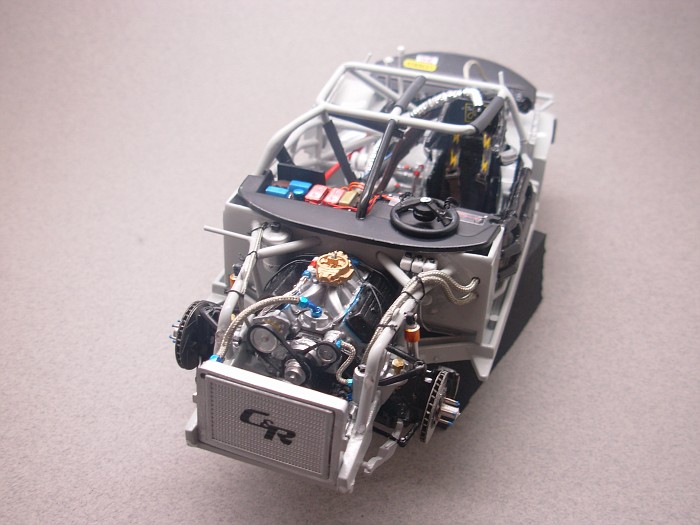 Someone remind me to make my seatbelts longer next time. :-\ 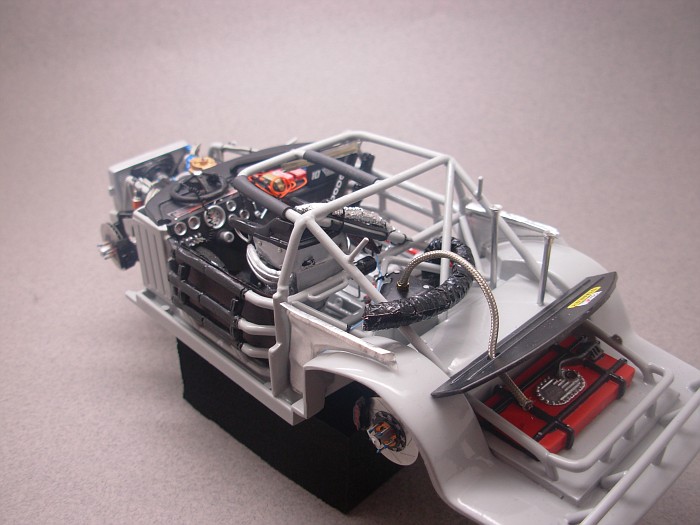 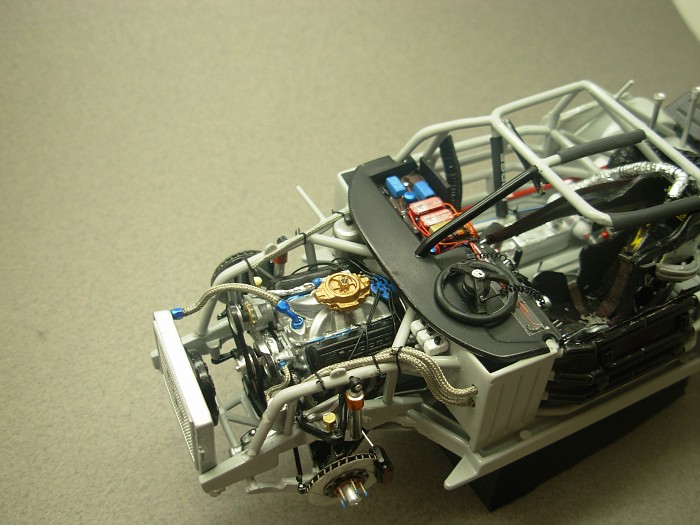 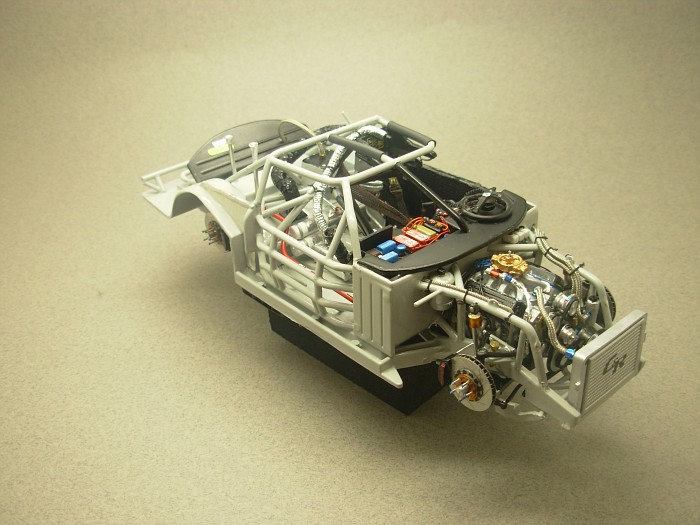 |
|
|
|
Post by willysurvive on Mar 10, 2009 7:51:08 GMT -5
Looks good Sarge. Bobby's right those headers look sweet. What did you use for the collectors? Inquiring minds want to know.  |
|
sarge
Junior Member
  My 6.0L grocery getter. Love it!!
Posts: 134
|
Post by sarge on Mar 10, 2009 9:16:03 GMT -5
The collectors are just embossing metal wraped around some metal tubing and then shaped to the end of the headers.
|
|

