|
|
Post by roadhawg on Sept 30, 2009 15:52:47 GMT -5
Here's one of my latest projects. The club I'm in...The IPMS Georgia Mountain Modelers, which, by the way, was just named the national IPMS chapter of the year ;D, is having a group build called "The Georgia Connection. We can choose any model subject that has something to do with the state of Georgia. I chose to build the 1993 Revell Hot Wheels Camaro of the 1992 SCCA Trans Am champion, Jack Baldwin, who is from Marietta GA. 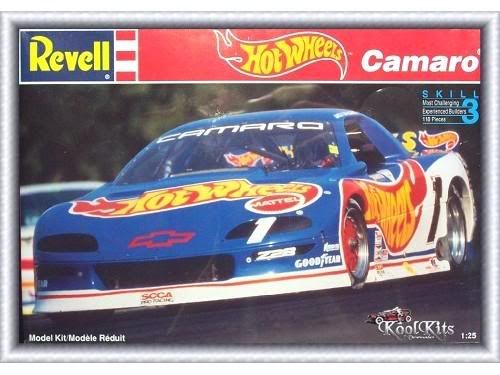 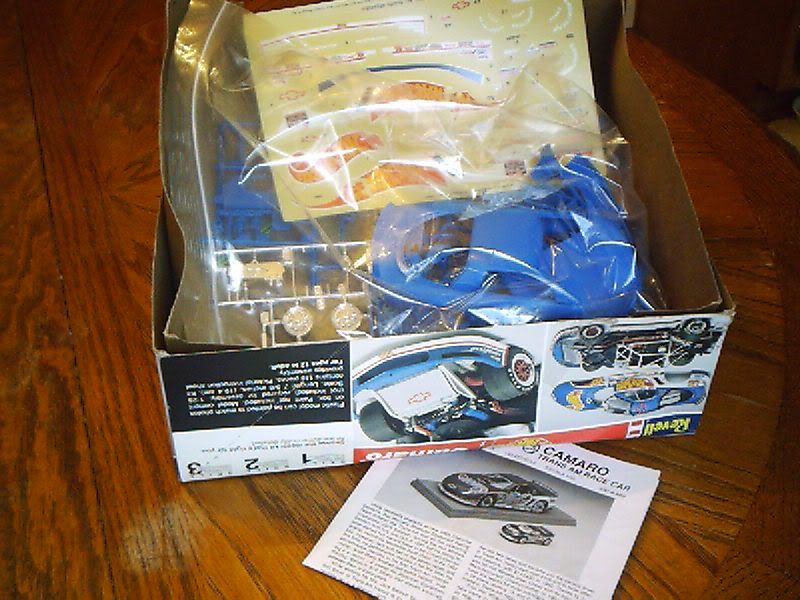 I got this kit from z24dude, who, by the way, is a great trader! I decided to build it 100% box stock, since its such a well detailed kit right out of the box. Looking in the box, it looks kinda intimidating at first, but so far its going together really well..... 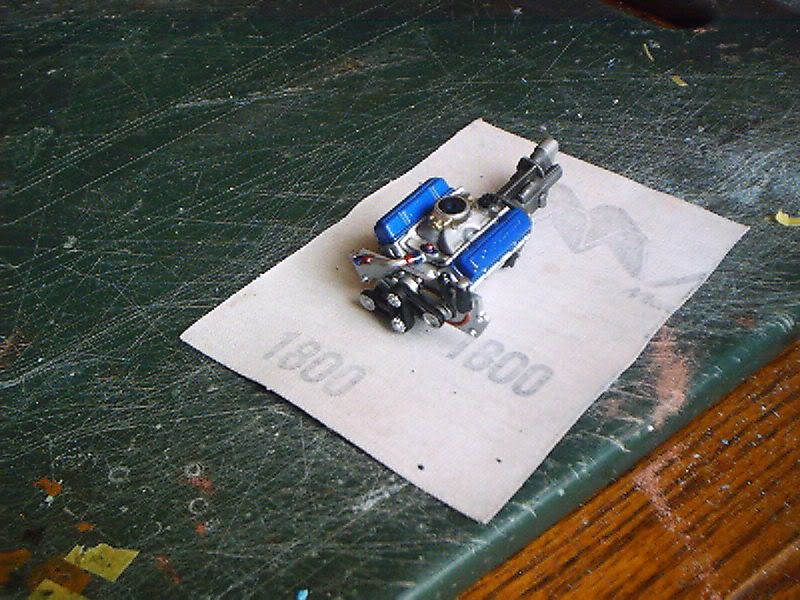 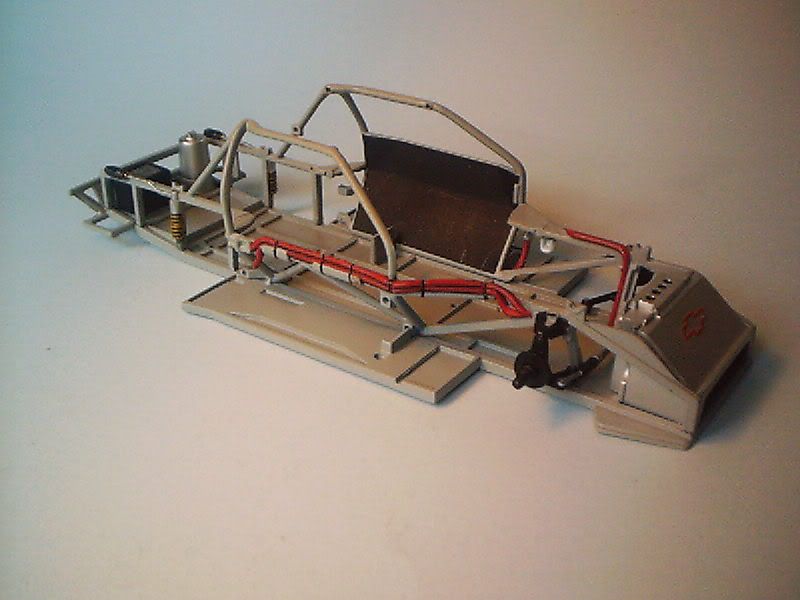 This was my first attempt at painting welded up, heat stained headers...  Again, everything you see so far...except for the jack stands....is 100% box stock. Really nice kit. I'll probably add some tape seat belts, but thats all. Hope to have this finished by October 24....big show at Warner Robbins GA that day! |
|
|
|
Post by prumus99 on Sept 30, 2009 18:12:40 GMT -5
I like this build so far everything is looking great!
|
|
|
|
Post by Nacho Z on Sept 30, 2009 19:08:35 GMT -5
You've done a fantastic job so far Roadhawg. The exhaust looks great. Keep the pics coming. I am curious to hear how the decals have held up and how they lay down. Good luck with the rest of the build!!
|
|
|
|
Post by roadhawg on Sept 30, 2009 19:23:13 GMT -5
You've done a fantastic job so far Roadhawg. The exhaust looks great. Keep the pics coming. I am curious to hear how the decals have held up and how they lay down. Good luck with the rest of the build!! Ugggghhhhh.....I'm really concerned about the decals. Lol. The few I've used so far...one on the radiator inlet and two on the dash....didn't lay down well at all. I was able to work with 'em awhile and get 'em down (the instructions say to NOT use solvent, but I had to!), then cleared over them, and they seem to be ok. My plan on the body is to paint the white areas insted of using the decals, and just cut out the Hot Wheels logo and numbers. I'll keep ya posted! |
|
|
|
Post by The Mad Modeller on Sept 30, 2009 21:49:41 GMT -5
Lookin good Tommy. Great detail work. I have a set of decals if you want I can put them in the mail to you.
|
|
|
|
Post by z24dude on Oct 1, 2009 1:07:16 GMT -5
Looking good!!!
|
|
|
|
Post by roadhawg on Oct 1, 2009 3:38:50 GMT -5
Thanks, everyone! ...I have a set of decals if you want I can put them in the mail to you. That would be great, Bobby, if its not too much trouble. It couldn't hurt to have an extra set. |
|
|
|
Post by The Mad Modeller on Oct 1, 2009 9:51:57 GMT -5
Will mail them out Fri morning.
|
|
|
|
Post by wilson on Oct 2, 2009 8:44:42 GMT -5
Even though you comment that everything is "out of the box" it is your detailing skills that is making this look so good.
I need to learn how to do that heat stain detail on the exhaust. Any tips???
The Revell directions always say not to use any type of solvent but I have found that you can use them with out damaging the decals. You just have to be careful and not use allot at one time and let the decals dry after each application.
can't wait for more pictures of you progress.
Dana
|
|
|
|
Post by roadhawg on Oct 3, 2009 18:35:33 GMT -5
I need to learn how to do that heat stain detail on the exhaust. Any tips??? Dana Thank you for your kind words. As far as the headers, this was my first attempt at this, so they're not perfect, but basically, heres the plan: First, paint the headers with Testors chrome silver enamel and let that dry. Then, take some thin slivers of masking tape (I use Tamiya) and wrap where the weld joints would be. Airbrush the weld joints and the flange areas with Metalizer non-buffing gunmetal. Then, on each side of where you airbrush the gunmetal, airbrush some Tamiya clear orange. The areas where headers get the hottest, in the bends and wherever they taper, leave those areas silver. Now, on each side of where you sprayed the clear orange, dry brush some Tamiya Clear blue and clear purple. Last, remove the tape from the joints and give the entire header a very light coat of Tamiya smoke. 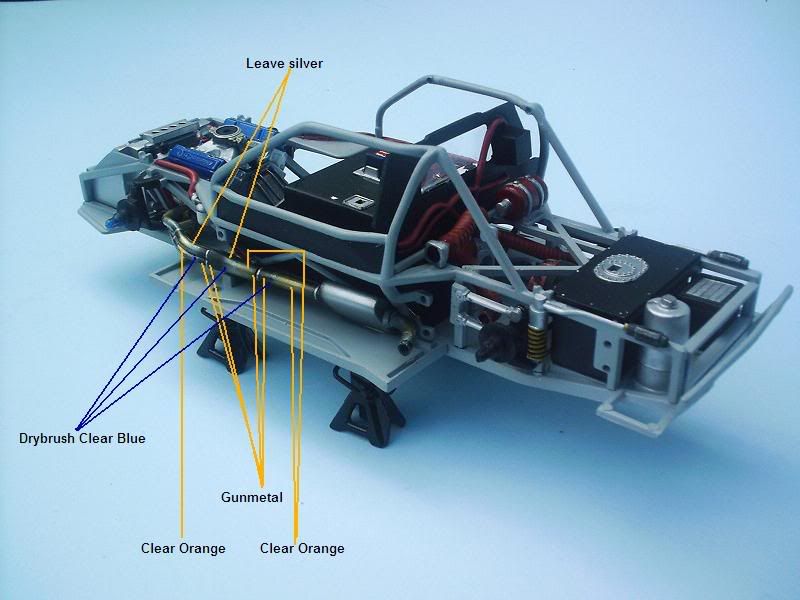 Hope this helps. It probably sounds more confusing than it really is, though! Lol! |
|
|
|
Post by hotrod347 on Oct 3, 2009 22:52:23 GMT -5
i had a kit like this as well, and now i wished i'd kept the box. i always thought it was a 98 rather than a 93 revell kit. either way nice job. mine was fun to build as well. but i got bored with it stock and decided to do some customizing of my own with it. i pulled the stock engine out and dropped a V16 WW2 corsair fighter plane engine in it. i call it my "flymaro" haha, lame i know, but i was 16 when i did the customizing.
|
|
|
|
Post by roadhawg on Oct 4, 2009 12:20:34 GMT -5
. i always thought it was a 98 rather than a 93 revell kit. This is the car that Baldwin drove during the '93 season. He won the championship in '92, which is why he carried the #1 in '93. ... but i got bored with it stock and decided to do some customizing of my own with it. i pulled the stock engine out and dropped a V16 WW2 corsair fighter plane engine in it. i call it my "flymaro" haha, lame i know, but i was 16 when i did the customizing. What an awesome idea!! A jet engine would be interesting too. I'll keep that in mind, maybe for a future project. ;D |
|
|
|
Post by fireguy14 on Oct 5, 2009 5:40:46 GMT -5
Looking real good Tommy! I really like the in progress shots, especially as I have one of these to build as well!
|
|
|
|
Post by roadhawg on Oct 5, 2009 7:38:33 GMT -5
.... I really like the in progress shots, especially as I have one of these to build as well! Well, whatcha waitin' on? Lets see it! Lol! Seriously, This thing goes together quite well, at least so far. The biggest issue I've had was cleaning up all the flash and ejector pin marks....and theres a bunch of them, and in all the wrong places! Lol! But once you get that done, its not bad. Take your time with detail painting and it'll look fine. I'm having fun with it, for sure! |
|
|
|
Post by wilson on Oct 8, 2009 19:52:37 GMT -5
Thank you for taking the time to show how you did the stained headers. I have never seen anyone explain where to located the the different colors of paint like you have. I think I now know what I have been missing when I try to do this.
Doesn't mean that I will do a good job, but I understand the process .
Dana
|
|
|
|
Post by roadhawg on Nov 12, 2009 12:03:53 GMT -5
|
|
|
|
Post by z24dude on Nov 12, 2009 17:09:16 GMT -5
Looking good!!!
|
|
|
|
Post by ronryan on Nov 12, 2009 19:46:02 GMT -5
Looks great....really inspirational work!! Looking forward to seeing the completed build.
Ron
|
|
|
|
Post by The Mad Modeller on Nov 12, 2009 21:02:26 GMT -5
You are on a roll Tommy. Hope to see these in Cookeville, TN in March 2010.
|
|

