Post by roadhawg on Aug 3, 2010 18:23:22 GMT -5
I guess it's time to share my '55 Chevy, and tell the story behind it. To be quite honest, this is a model I built about 10 years ago and had put away and forgot about. I was going through some stuff about a month ago, ran across it, and said "hmmm, I should fix this back up and display it awhile". Yes, I said fix back up....more about that later!
Fixing up a 1:1 car back in the 70's was a lot different than it is now. Today, the car has to be stripped down to bare metal, rust must be cut away and replaced with new panels welded in, and all bushings and rubber replaced with all new parts. Back then, we just wanted something fun to cruise in....loud and fast, and lookin' good....we didn't care about what it looked like underneath. If the floors were rusty, we'd throw a piece of plywood over it....heck, the carpet would hide it! Rust was good...it made the car lighter, thus faster!
A good friend of mine, Larry Landrum, had a '55 chevy. His was solid white, with a black interior and Corvette Ralley wheels. He had a 396 in it with a 4 speed. It was a sharp looking car, and VERY fast, to the point of being scary, but if you looked in the trunk, you could see the ground. There was a little rust in the floors too, but who cared? The only thing anybody would see was the OUTSIDE! Larry's '55 has always been one of my favorite cars, and was the inspiration for this build.
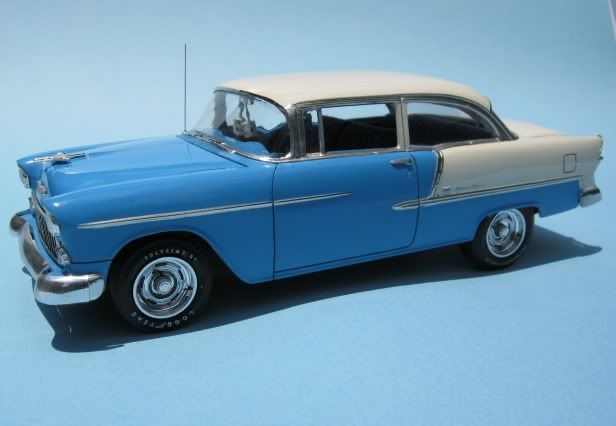
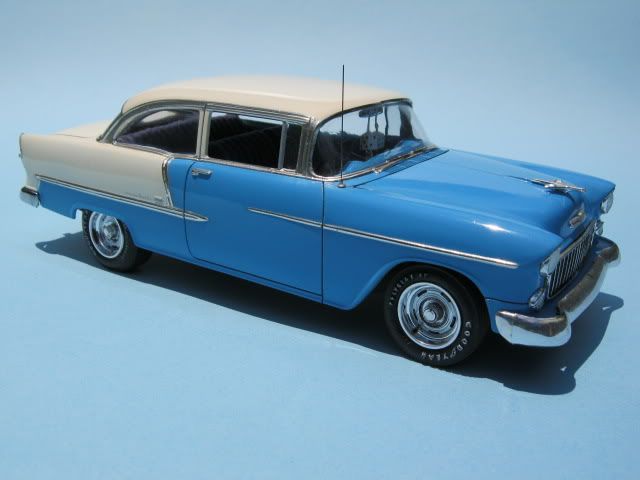
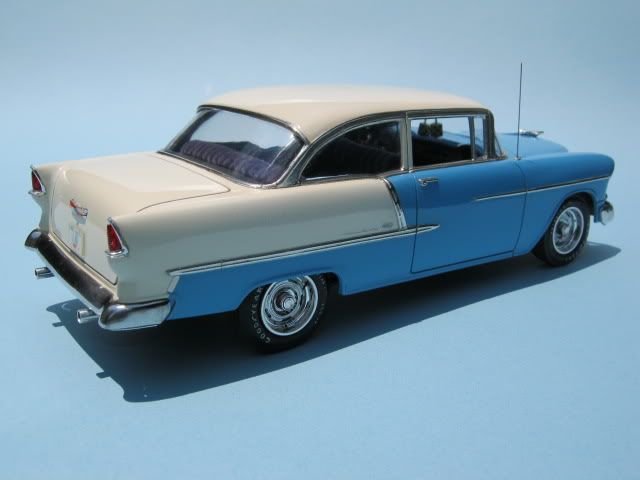
This is the AMT '55 Chevy Sedan kit. While my friend's car was solid white, I've always liked two-tone paint on '55's, so I went with Testors white and French Blue. The interior is fairly stock, but I wanted to go with the tuck-n-roll crushed velour look that was popular in the day, so I used corduroy from the fabric shop....and old trick I learned from reading Model Car Science and Car Modeler back in the 60's!
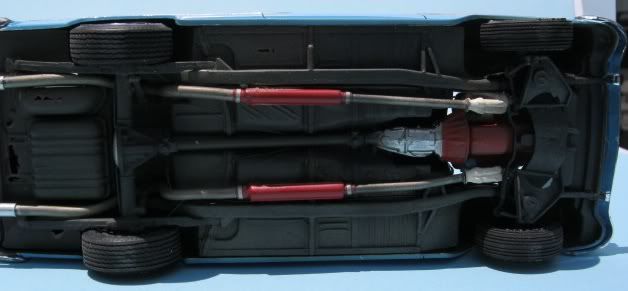
The big block engine is from a Revell '67 Chevelle, and the wheels are from a Revell Corvette.
I "rusted" out sections of the floorboards and trunk area by grinding from the back with a Dremel, then weathered it. The exhaust pipes are made from solder.
Ok, I said earlier I had to fix it back up. Well, that attempt at making exhaust from solder was my first try at that. They looked ok, but the problem was....I used ACID CORE solder. The acid had leaked out and the entire back bumper and part of the chassis was covered in white crusty stuff. It looked worse than it really was, though...no plastic was damaged, I just had to chip away all that crust, replace the exhaust tips, and Alclad the rear bumper.
Is it finished? Don't know....I'm thinking about stripping the FRONT bumper so I can remove that pesky molding seam and then Alclad it. Also thought about re-doing the tires. On second thought....maybe I'll leave it just like it is!


