Post by monoped on Jul 1, 2011 20:35:59 GMT -5
When ever I post pics of a finished model (which hasn't been too often as of late), I see comments not only on the build, but of the photos themselves. There's also been a few threads over the years where folks have asked questions about shooting model car pics, and a few of us answer, but they get buried under new threads fairly quickly. So, here's a quick how-to for the way I shoot pics of my builds. I'm not a professional, and am by no means the final authority on the subject, just sharing what works for me.
First, the camera, a Kodak Z-712is that was a little under $200 a couple years ago:


For desktop shooting, I use a small mini-tripod picked up a few years back. Not strong enough for a DSLR and lens, but works for point and shooters:


My "studio" is dead simple. A piece of semi-gloss white poster taped to the desk and the wall. I use the overhead lighting above my desk which is three recessed PAR20 50w flood lamps.


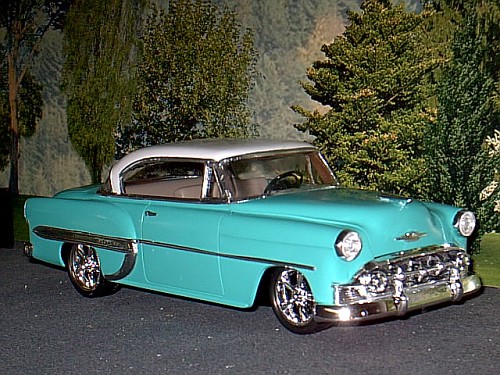
The camera is set to manual mode (M on the PASM dial), with the flash turned off, macro mode (flower icon) on, ISO 100, white balance set to Auto. The aperture is set to F-8.0 to get the greatest depth of field (more of the subject in focus) From there, I adjust the shutter speed to get the exposure value (EV) to 0. Sometimes I'll set the EV to +3 or -3 depending on how the first shot at 0 looks. For these two shots, the shutter speed was set to .5 sec. Even on a tripod, I always use the camera's self timer to avoid any camera shake. Let's take a look at the results:


It takes a bit of experimentation to find what works for you and your camera, but that's is the beauty of digital, if you don't like the shots, press delete and keep experimenting.
Brian
First, the camera, a Kodak Z-712is that was a little under $200 a couple years ago:


For desktop shooting, I use a small mini-tripod picked up a few years back. Not strong enough for a DSLR and lens, but works for point and shooters:


My "studio" is dead simple. A piece of semi-gloss white poster taped to the desk and the wall. I use the overhead lighting above my desk which is three recessed PAR20 50w flood lamps.


The camera is set to manual mode (M on the PASM dial), with the flash turned off, macro mode (flower icon) on, ISO 100, white balance set to Auto. The aperture is set to F-8.0 to get the greatest depth of field (more of the subject in focus) From there, I adjust the shutter speed to get the exposure value (EV) to 0. Sometimes I'll set the EV to +3 or -3 depending on how the first shot at 0 looks. For these two shots, the shutter speed was set to .5 sec. Even on a tripod, I always use the camera's self timer to avoid any camera shake. Let's take a look at the results:


It takes a bit of experimentation to find what works for you and your camera, but that's is the beauty of digital, if you don't like the shots, press delete and keep experimenting.
Brian
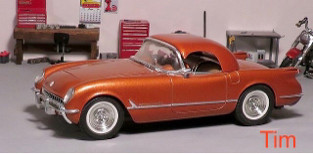


 . I remember seeing your work on Hobby Heaven. If I am not mistaken, you did this tutorial over there. I am going to give your method a try. I was a much more creative and better (?) photographer with my manual Canon A1. I would set up each pic. Now I put the digital on "auto" and press the button. Honestly, I'm not sure how to set my digital camera for manual
  . Guess I will have to get out the operator's manual.
