|
|
Post by Nacho Z on May 20, 2015 21:37:04 GMT -5
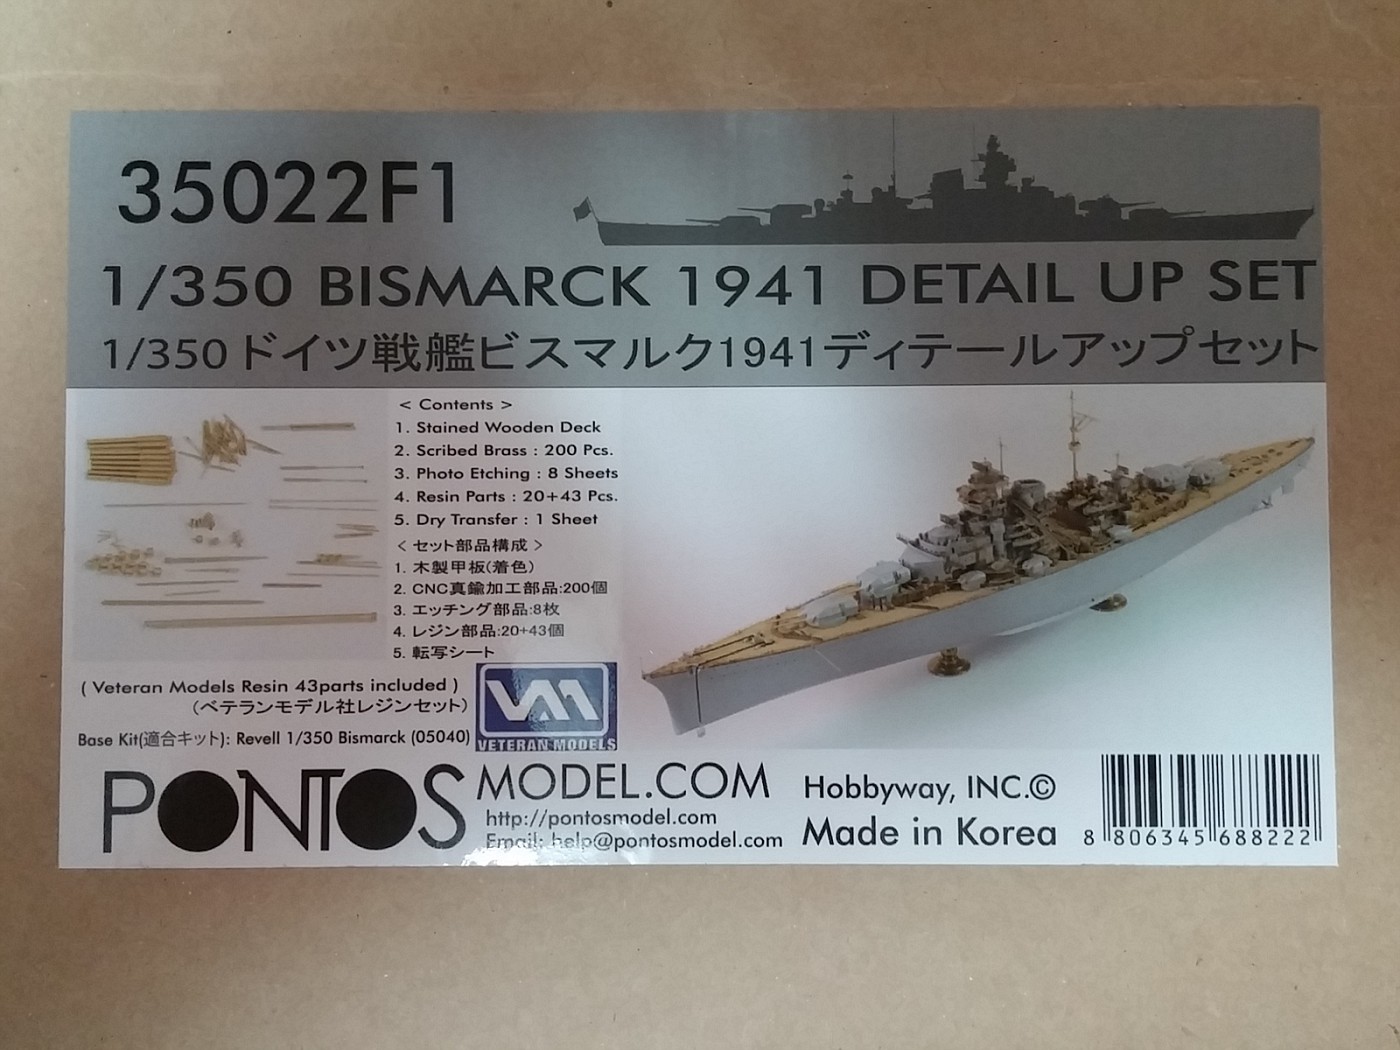
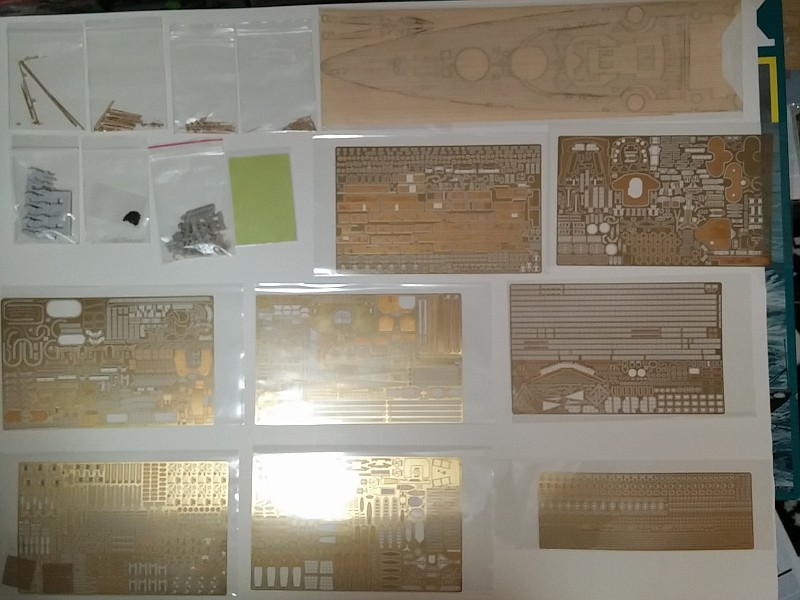
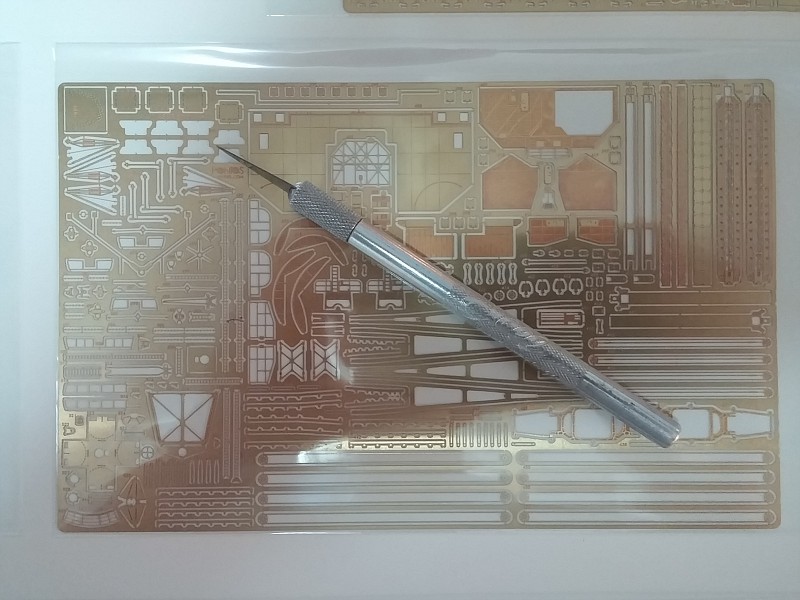
I have thought about whether or not to share this build with you all. I have never built a ship model before and I have no idea how this one is going to turn out. To make matters worse, I am going to try to add an insane amount of extra detail to it. I will start with the very good Revell of Germany Bismarck 1:350 scale kit. I will add as much as possible from the Lion Roar and the Pontos sets. The RoG kit has close to 700 parts and I can't even count how many PE, turned brass and resin pieces come in the two aftermarket sets. I originally purchased an Artwox wooden deck. The Pontos set came with a wooden deck. Comparing the two, I may go with the Artwox.
I will only be using two books for reference. These are basically the same book, one is a more detailed version of the other. They are published by Kagero. They are the 3D series. I am using a couple of awesome builds by other modelers, that I found on the internet, as reference too. If there are any ship modelers watching this thread, please let me know. I can use all of the help I can get.
One last thing that is unique to this build. I will not be using a camera for photos. I will be using my phone's camera. After some experimenting I have found that I can get better macro photos with m phone's camera than I can with either one of my point-and-shoot cameras.
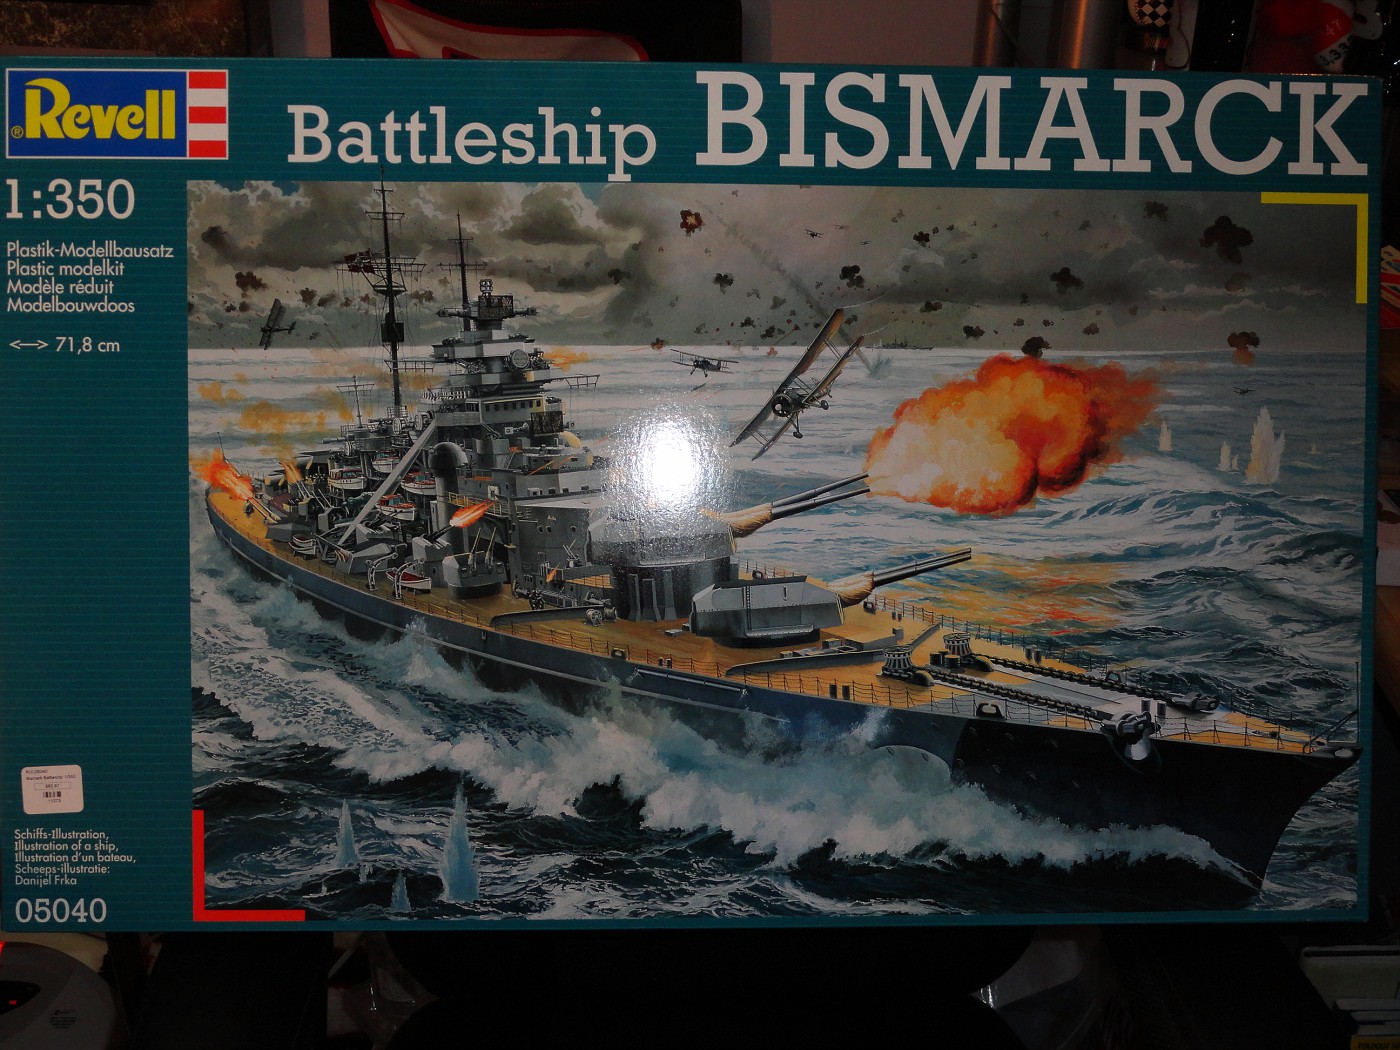
Here is the kit I am building:
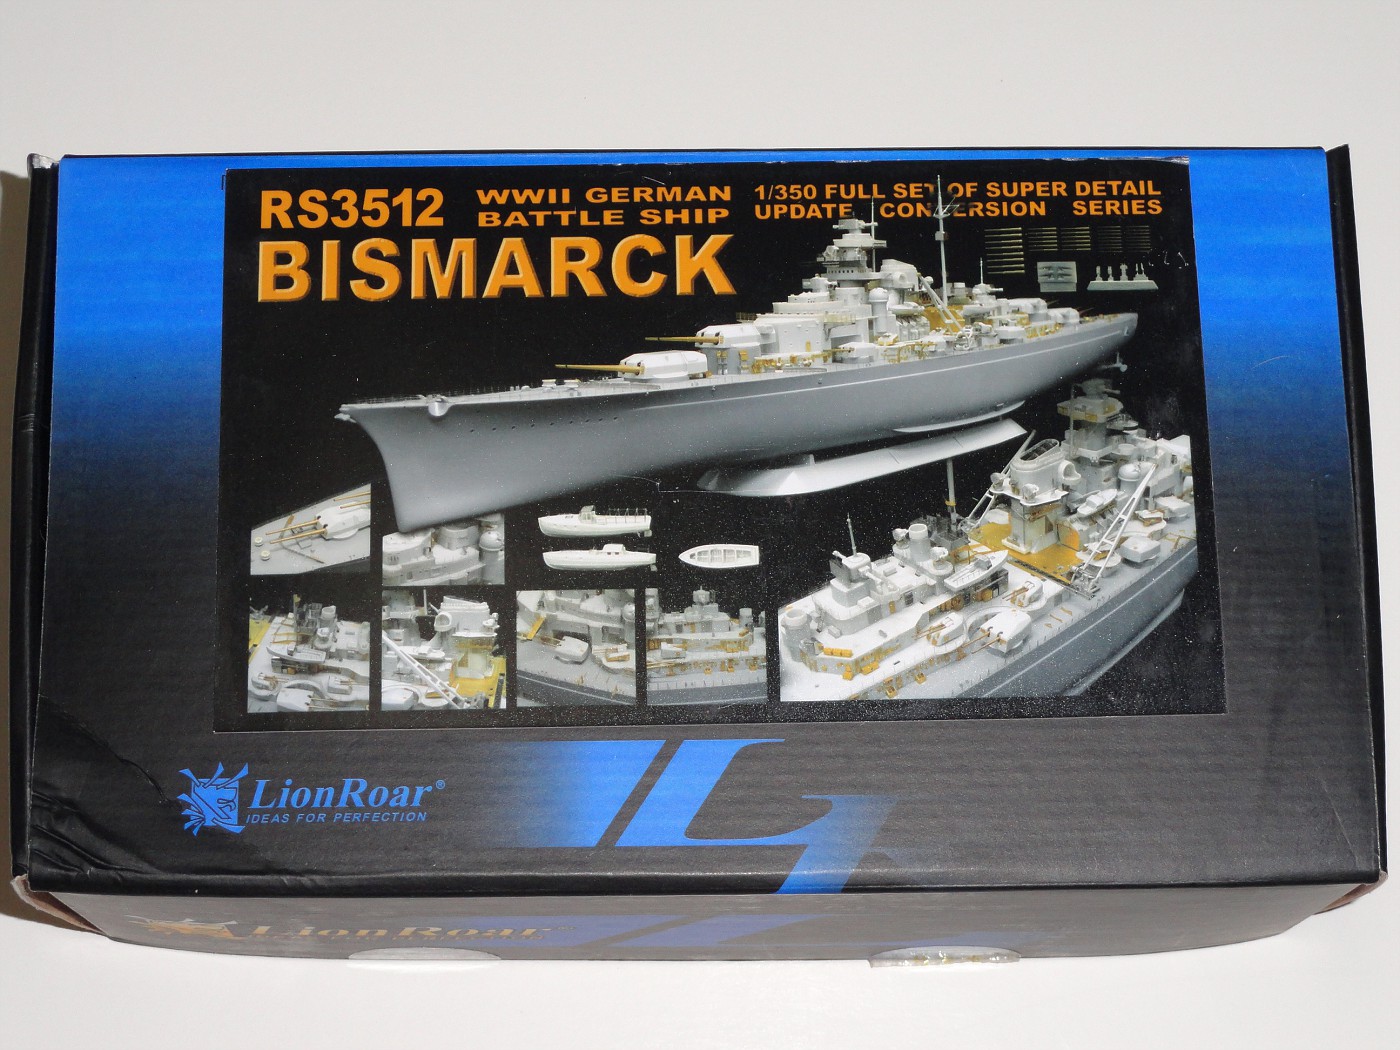
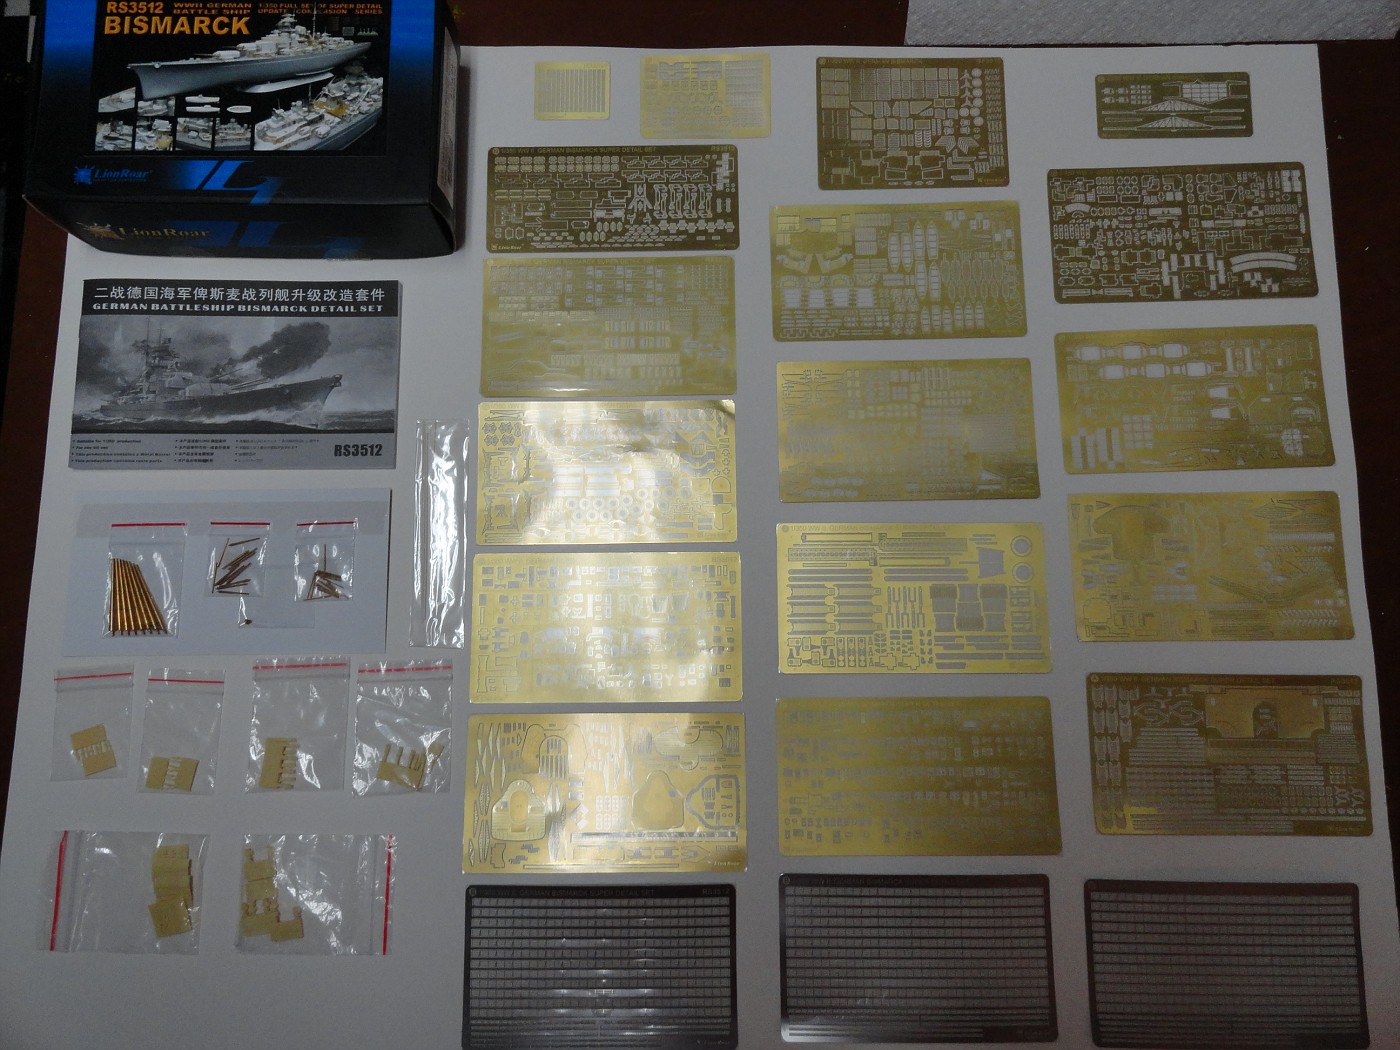
Here is the Lion Roar set with its contents laid out:
Here is the Artwox wooden deck:
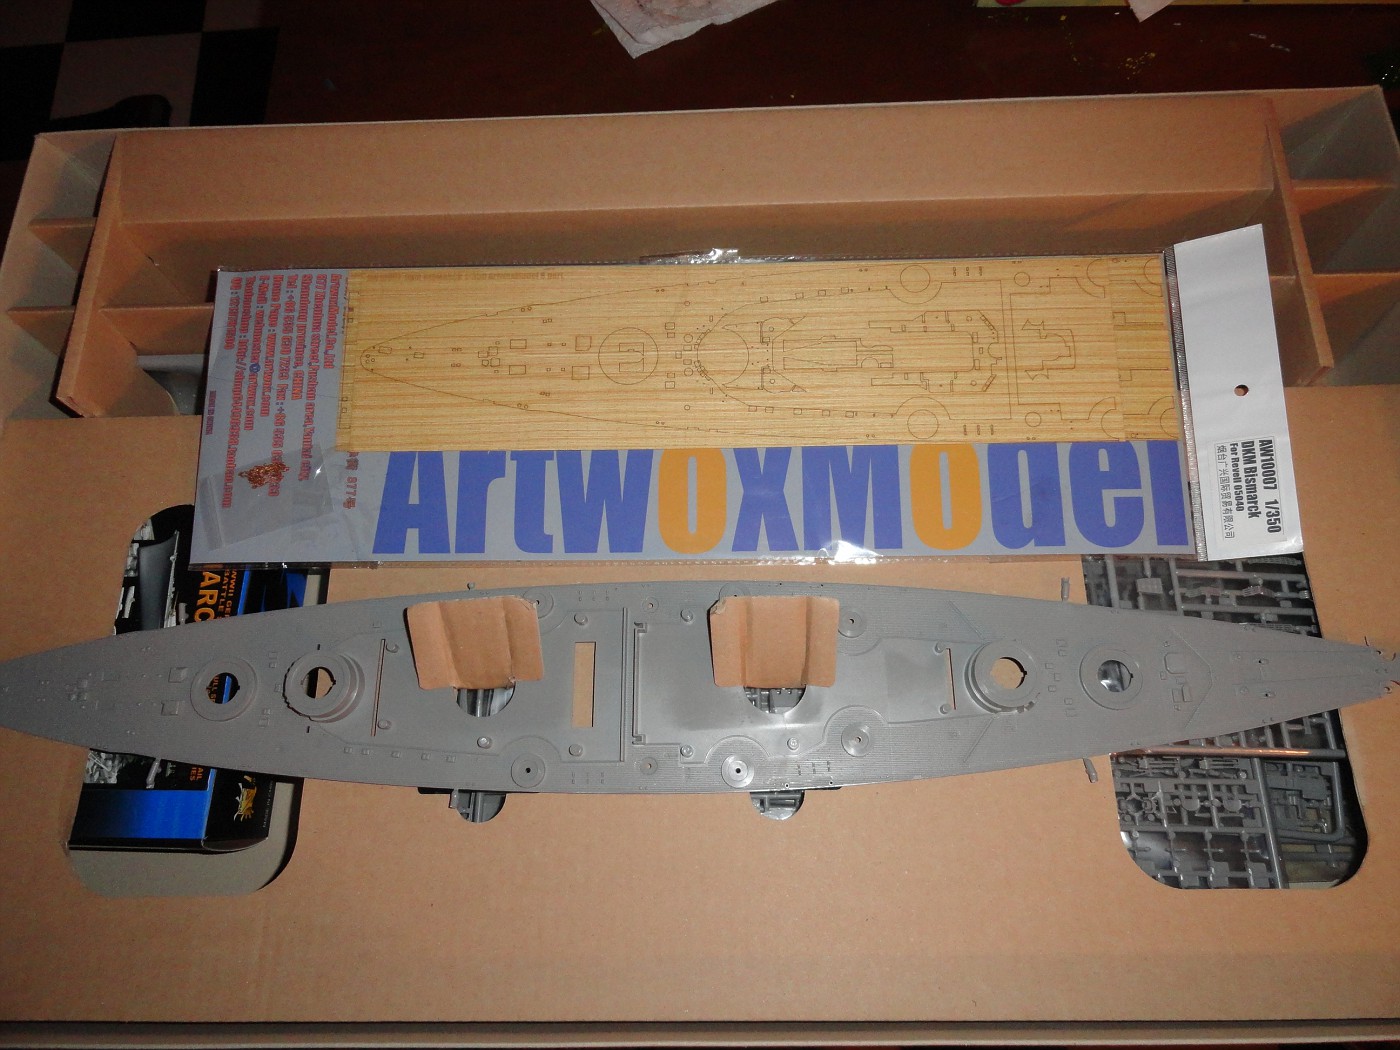
I will get some photos of the Pontos set posted soon.
Let me know what you think!
|
|
|
|
Post by Nacho Z on May 23, 2015 21:39:27 GMT -5
|
|
|
|
Post by Eddie on May 26, 2015 6:56:43 GMT -5
That looks really hard. Good Luck!!
|
|
|
|
Post by Nacho Z on May 26, 2015 19:09:06 GMT -5
That looks really hard. Good Luck!! Haha, thanks Eddie, I agree!  I have started assembling some of the stand alone PE pieces. Crates, boxes, vent covers, etc. I think the hardest thing will be to take 3 separate kits, (Revell, Lion Roar and Pontos), and figure out what to do to each part to make it work with the other two kits. Lion Roar and Pontos share a lot of the same parts. Each has its own unique parts. On the shared parts, one kit may be better than the other. Some of the PE is so small I don't think, realistically, I'll be able to use it. I will do my best to keep everyone updated. |
|
|
|
Post by Gary Kulchock on Jun 1, 2015 11:17:56 GMT -5
Your a Mad-Man John. Good luck with all that PE.
|
|
|
|
Post by kaqbot on Jun 3, 2015 9:45:16 GMT -5
that looks madding ,the detail omg ,i have a 1/350 USS enterprise that will be waiting for me to find the guts to start it
wish you well
|
|
|
|
Post by Gary Kulchock on Jun 4, 2015 6:57:55 GMT -5
So what year (era) are we seeing here? Looks like a couple bi-planes flying around on the box cover.
|
|
|
|
Post by Nacho Z on Jun 5, 2015 17:55:13 GMT -5
So what year (era) are we seeing here? Looks like a couple bi-planes flying around on the box cover. I'm not much of a historian, Gary. The Bismarck had a pretty short life. Less than a year, around 8 months. This was August, 1940 through May, 1941. I will be doing the Bismarck near the end of its life. I'm not too worried about making sure every gun or ammo box is where it should be at a specific hour of a specific day. I just want to make sure that I do a clean job of building and attaching them. |
|
|
|
Post by Nacho Z on Jun 5, 2015 17:57:44 GMT -5
that looks madding ,the detail omg ,i have a 1/350 USS enterprise that will be waiting for me to find the guts to start it wish you well Thanks kaqbot! Go ahead and dive into that USS Enterprise. We can do a dual build here on TMM.  |
|
|
|
Post by Nacho Z on Jun 5, 2015 21:24:04 GMT -5
Thought I would share a couple of pictures of what I have been working on. I'm starting off easy, just doing some basic PE work. The first two pictures are of a tool chest. I had to sand off the legs and added the PE ones and the hasps. These PE legs are tiny! I have gotten better with my gluing technique after these pictures were taken.
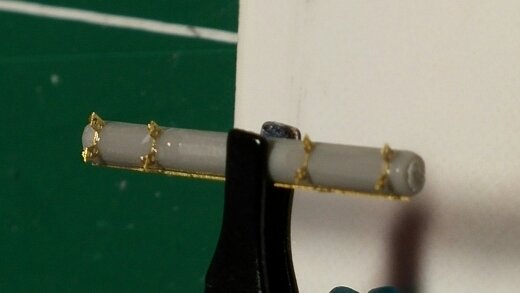
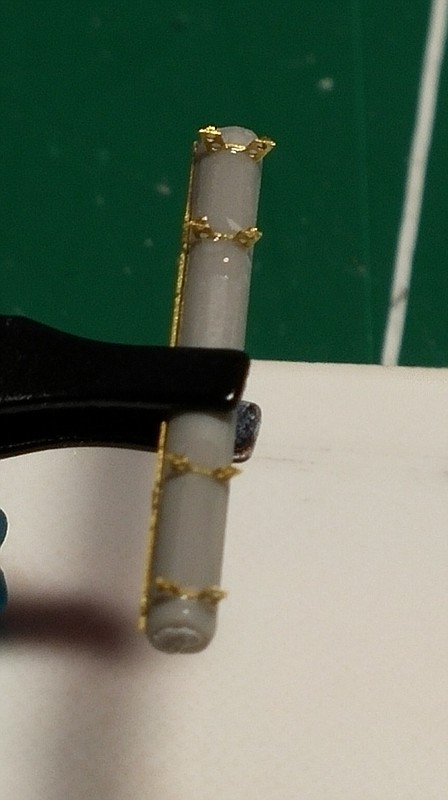
Next up are a couple of crates. First two pictures are of the Lion Roar set.
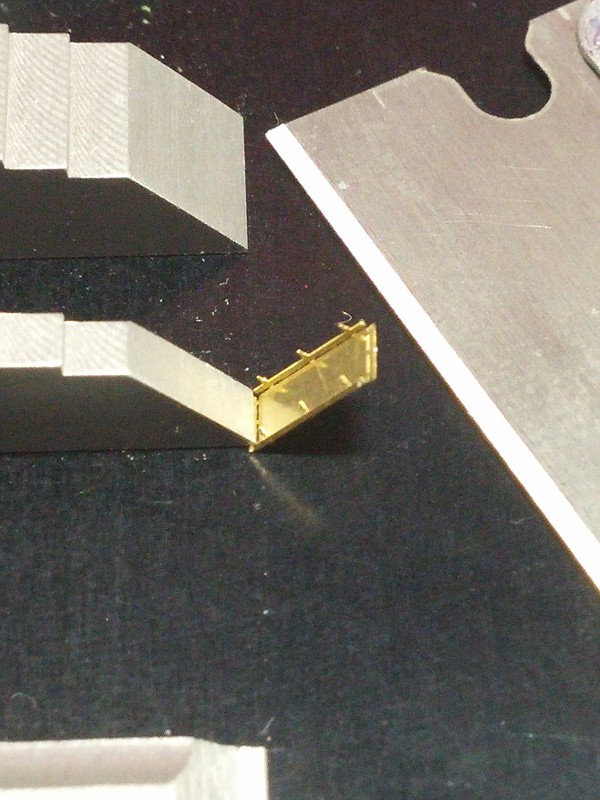
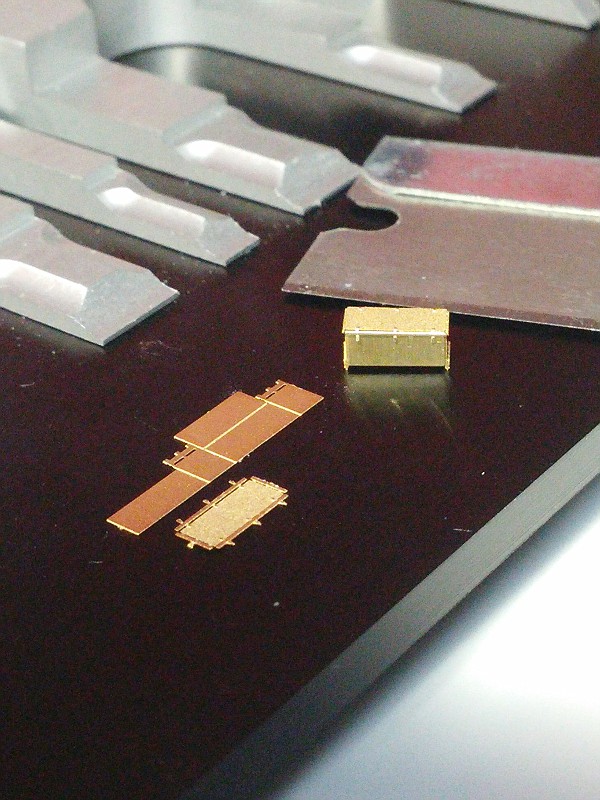
Next is from the Pontos set.
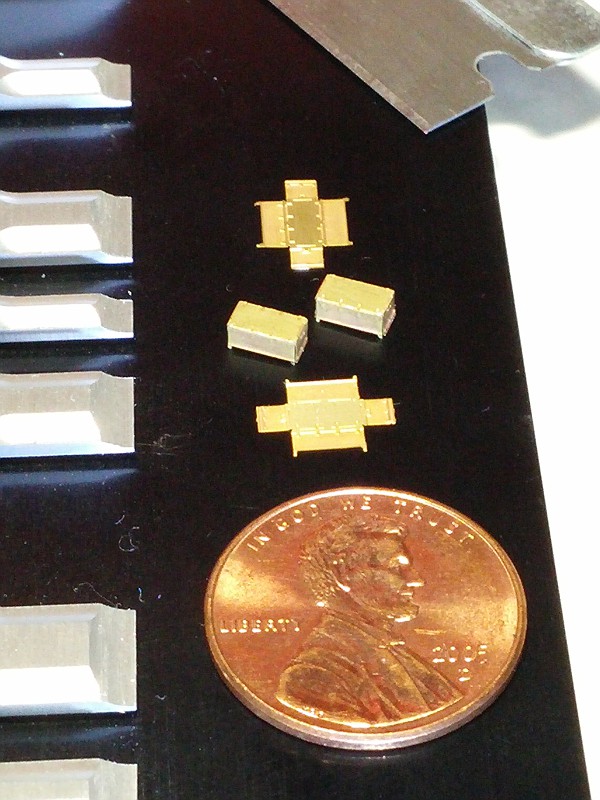
|
|
|
|
Post by Nacho Z on Jun 7, 2015 20:47:19 GMT -5
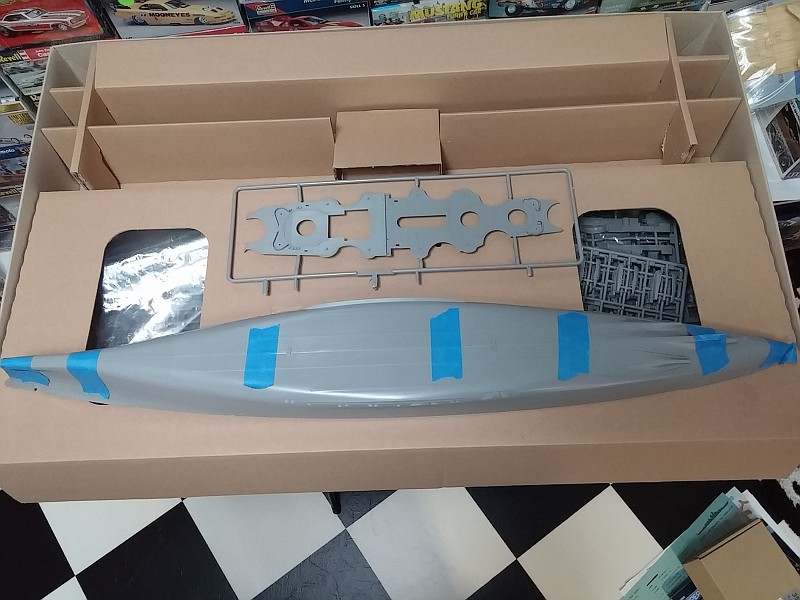
Slow but steady progress. I continue to build tiny metal crates but I felt the need to glue some plastic. I have to do a lot of research prior to proceeding with each step. I have to check both after market sets before I do anything permanent. I glued the hull together and added the parts where the rudder and screws are. A reminder, this thing is just short of three feet long.
As you can see below, there will be a lot of filling and sanding to get everything to blend together.
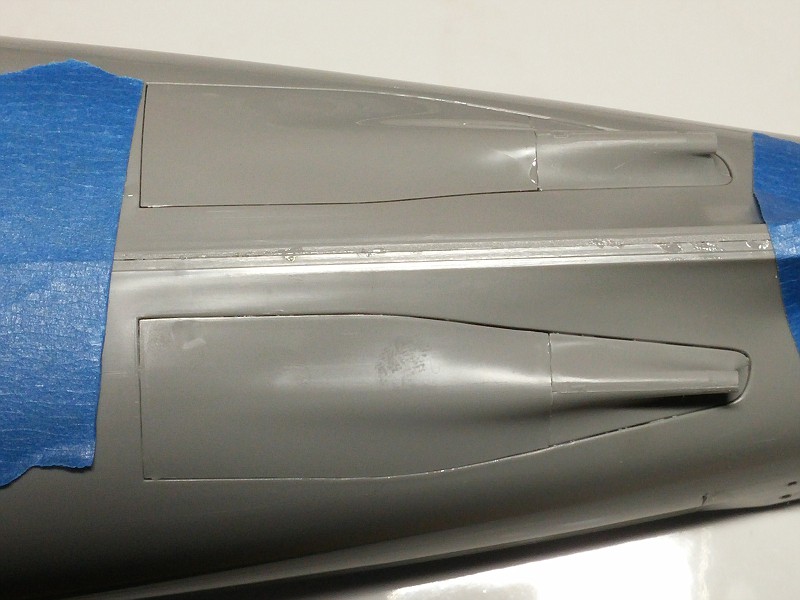
|
|
|
|
Post by Nacho Z on Jun 9, 2015 20:59:33 GMT -5
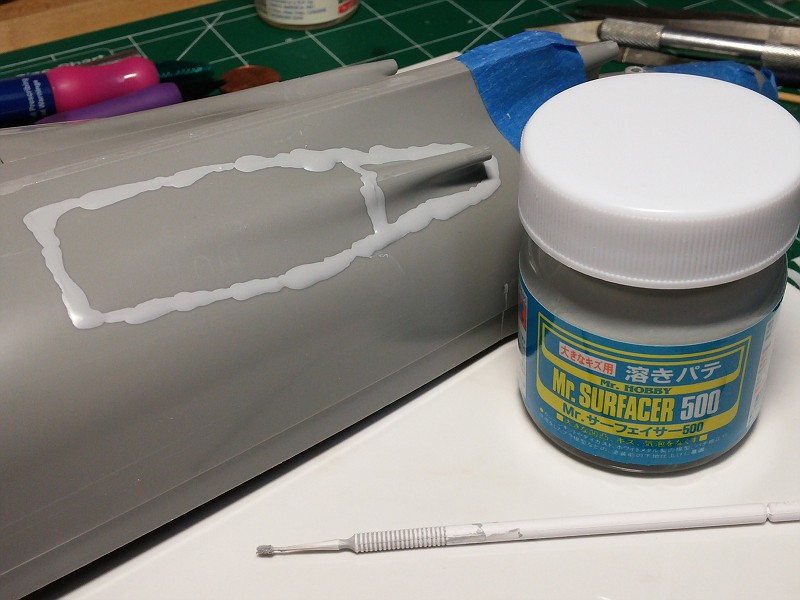
Work continues on the hull, and there is a lot of work to do.  There are a lot of raised seams and a lot of dimples. I don't know how many of you have used Mr. Surfacer but I think it is great stuff. Not as thick as putty. You can brush it right were you need it. There are a lot of raised seams and a lot of dimples. I don't know how many of you have used Mr. Surfacer but I think it is great stuff. Not as thick as putty. You can brush it right were you need it.
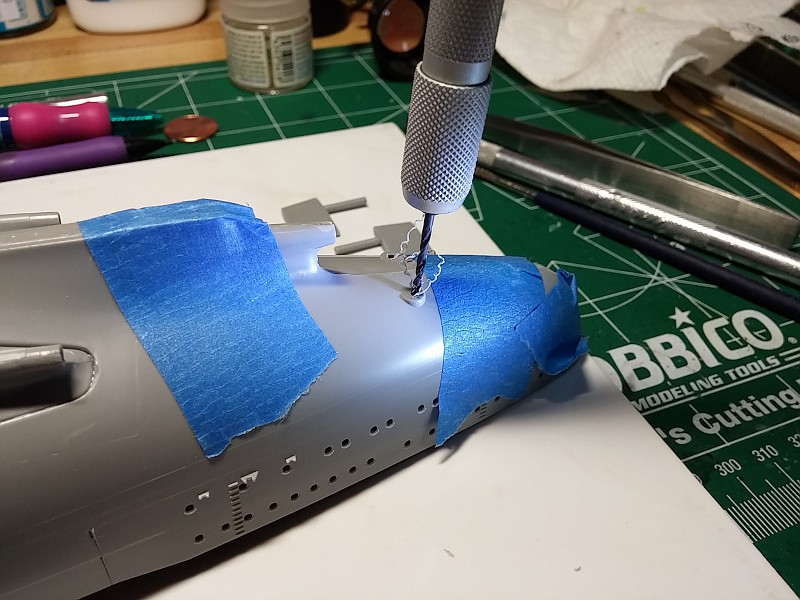
Here I am drilling out holes for the rudders. The instructions say to drill a 3mm hole but I checked the rudder shafts with my calipers and found them to be just over 2mm. Always good to double check things.
|
|
|
|
Post by Eddie on Jun 10, 2015 6:35:14 GMT -5
Work continues on the hull, and there is a lot of work to do.  There are a lot of raised seams and a lot of dimples. I don't know how many of you have used Mr. Surfacer but I think it is great stuff. Not as thick as putty. You can brush it right were you need it. There are a lot of raised seams and a lot of dimples. I don't know how many of you have used Mr. Surfacer but I think it is great stuff. Not as thick as putty. You can brush it right were you need it.

Here I am drilling out holes for the rudders. The instructions say to drill a 3mm hole but I checked the rudder shafts with my calipers and found them to be just over 2mm. Always good to double check things.

I'll have to try and track down that 'Mr Surfacer' it looks easy!
|
|
|
|
Post by Nacho Z on Jun 13, 2015 21:43:53 GMT -5
A little update for a Saturday night. As I've said before and will continue to say, I really don't know what I'm doing on this build.  I worked on the hull some more. I pretty much have all of the heavy filling and sanding done. I removed mold lines and filled in some small divots. I worked on the hull some more. I pretty much have all of the heavy filling and sanding done. I removed mold lines and filled in some small divots.
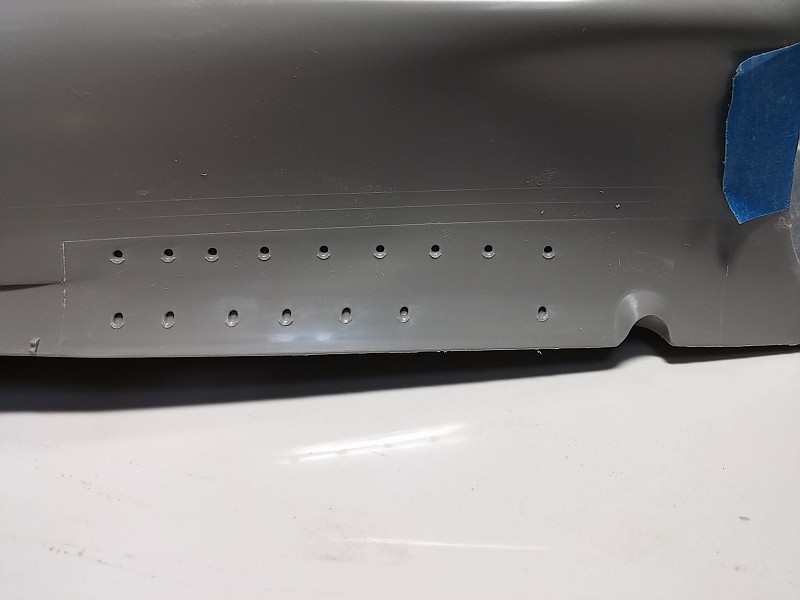
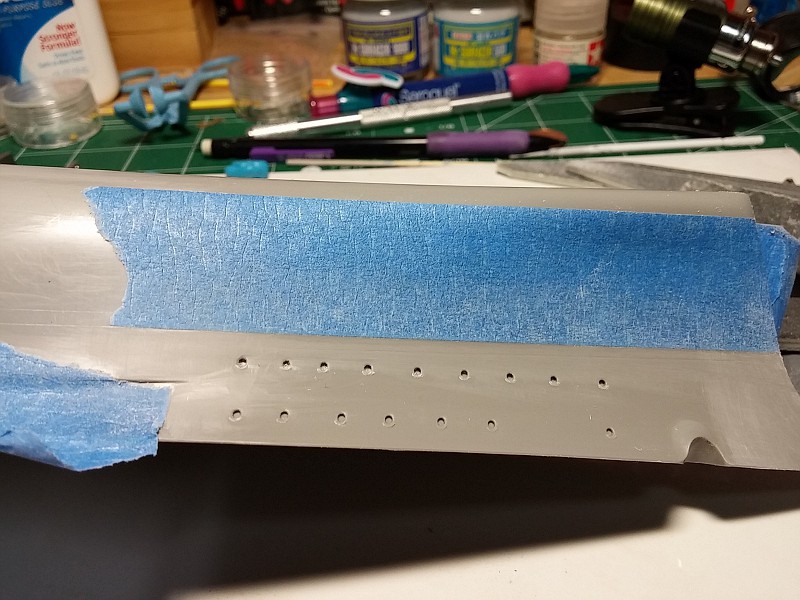
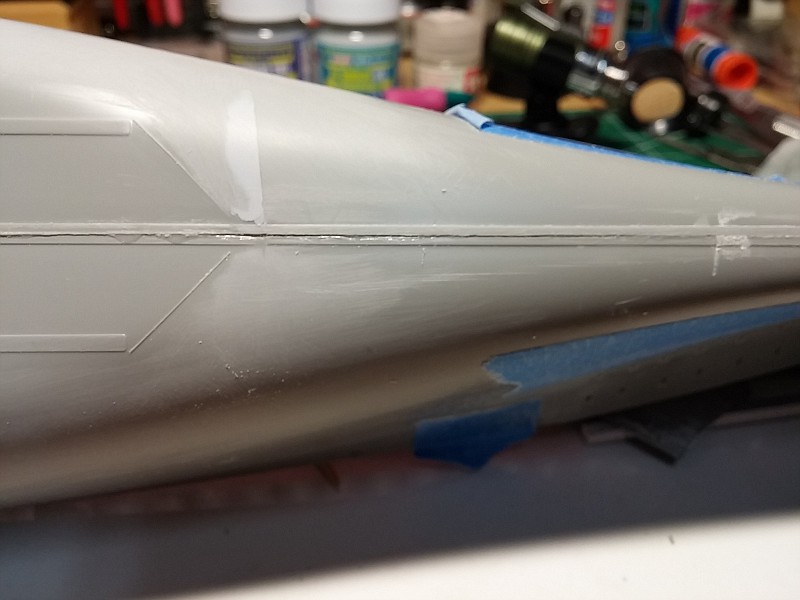
There was a pretty nasty seam all the way down the middle where the two sides of the hull are joined. I glued the heck out of it! The seam was not level and had a step in it. No way to putty it or sand it down level. I had the correct size styrene strip and glued it to the bottom of the hull.
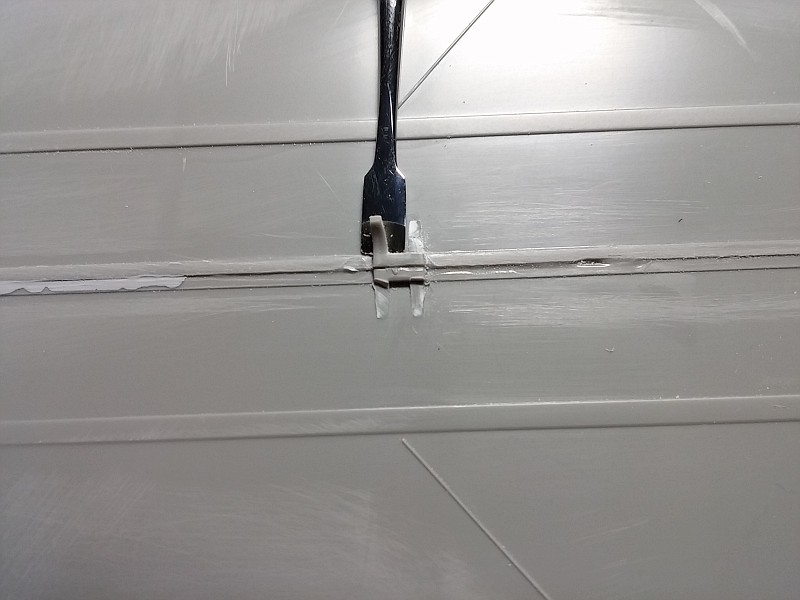
I recently purchased a set of chisels that Micro Mark had on sale. I was able to use them to remove some unused tabs. They worked great. Saved me a lot of sanding time.
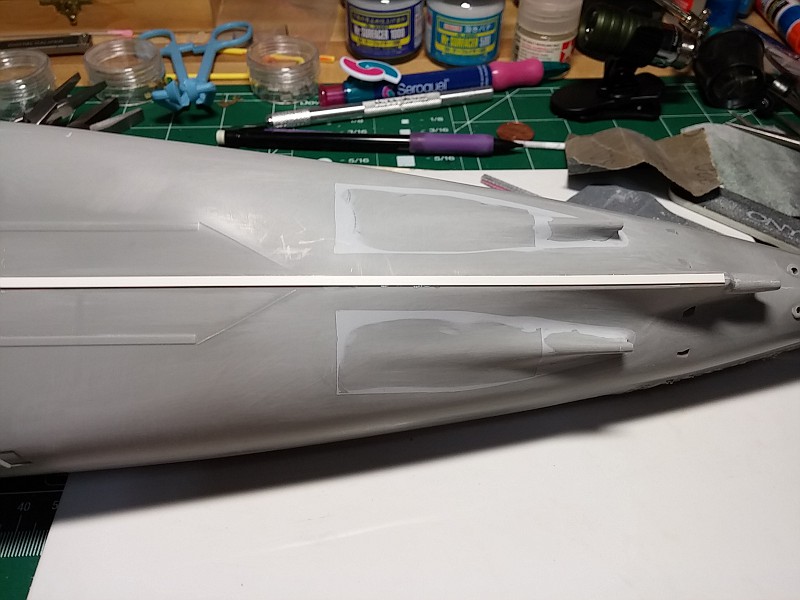
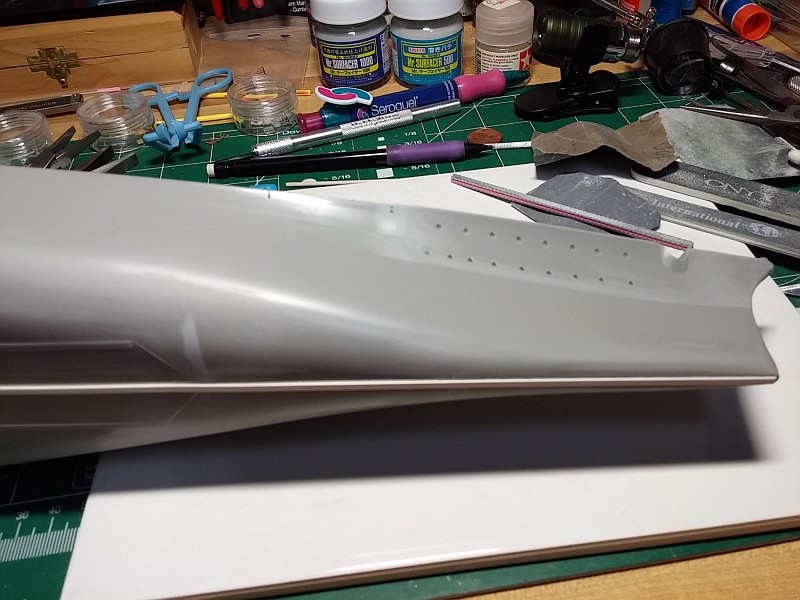
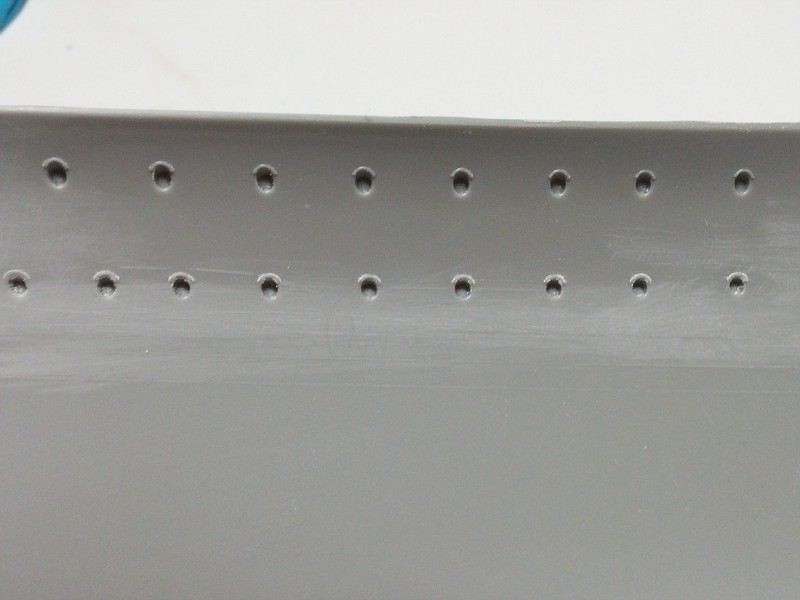
I have also began work on the portholes on the hull. I have ran into a snag and am working on a "fix" for it. I am also working on the water intakes on the hull. I will share this when I make more progress.
|
|
|
|
Post by Gary Kulchock on Jun 14, 2015 9:25:49 GMT -5
I don't build ships either, but it looks great to me.  |
|
|
|
Post by Nacho Z on Jun 16, 2015 17:28:09 GMT -5
I don't build ships either, but it looks great to me.  Thank you, Gary!
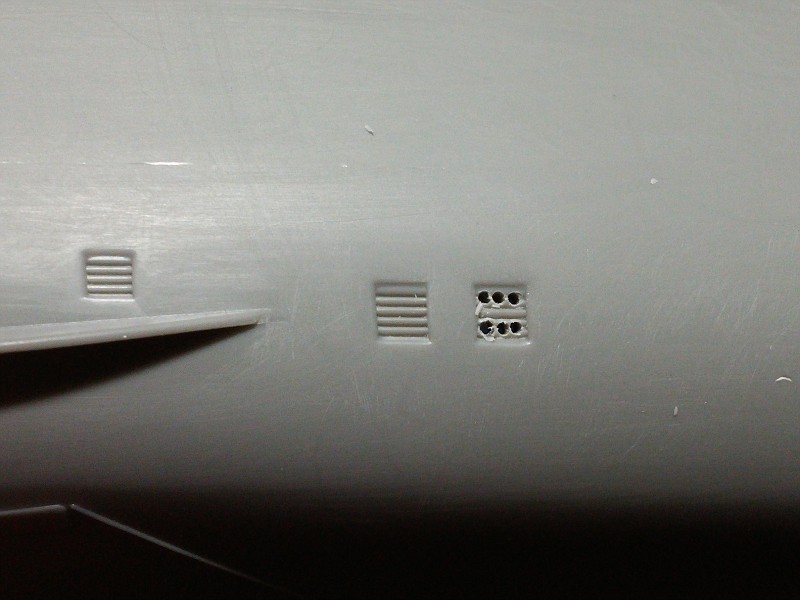
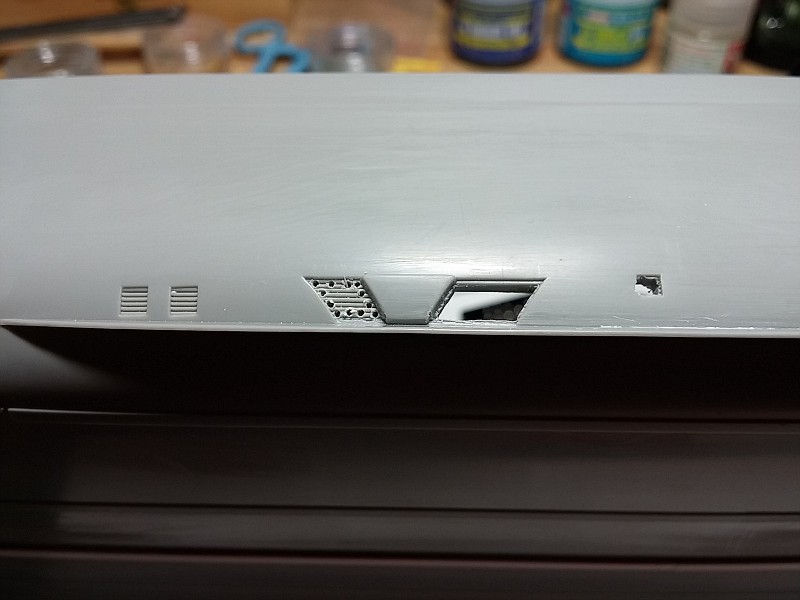
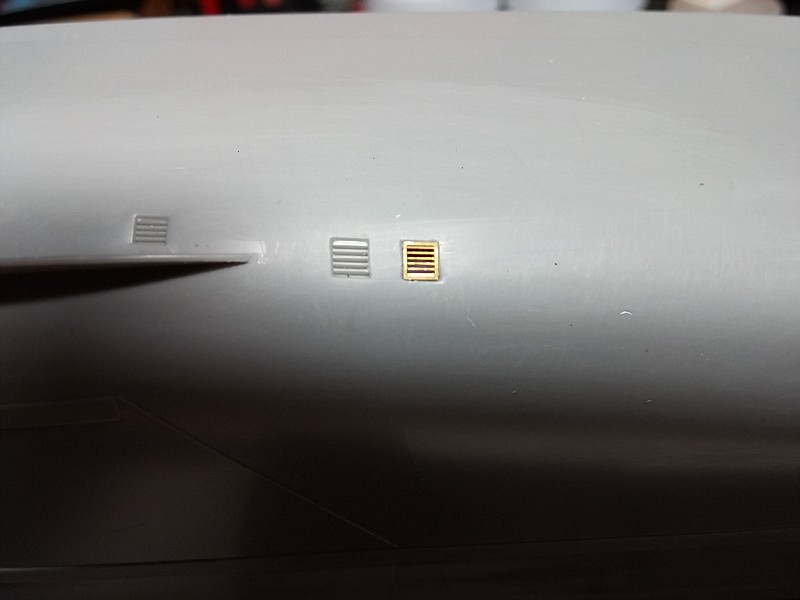
As I said in my last post, I am working on the portholes on the hull and I ran into a problem. I drilled them out and sanded off the "brows" over the portholes. I did this because I have PE pieces to replace them. Problem is, the PE items have a smaller hole than the molded ones. Therefore the PE had nothing to rest on. Now the fix. I drilled the portholes even larger and filled them with styrene rod. When dried, I sanded it smooth and drilled a smaller hole to match the PE.
Please note that none of the PE is attached yet. I have placed an order for Gator's Grip glue. This glue seems to be a favorite among ship builders for attaching PE.
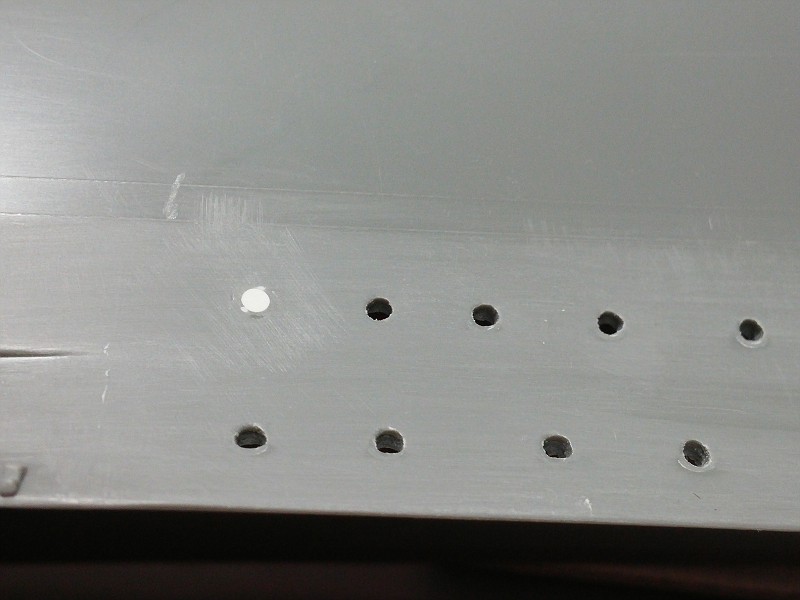
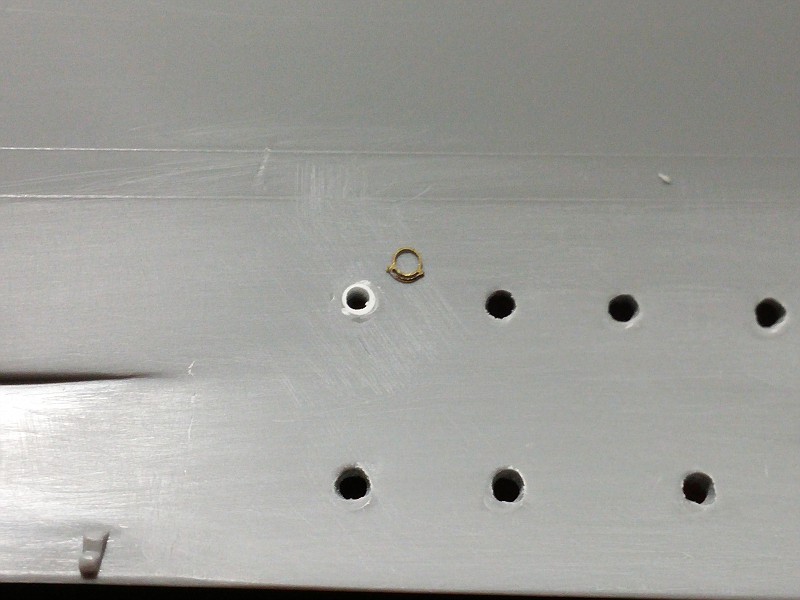 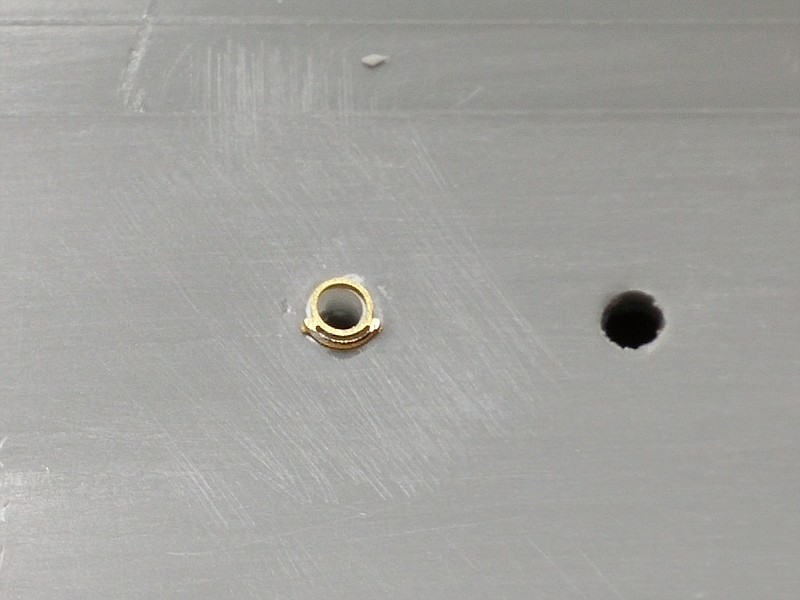
I have started cutting out the water intakes on the hull. These will also be replaced with PE. I have left a small lip, (or boarder), on the inside of each intake to have something to glue the PE to.
|
|
|
|
Post by Gary Kulchock on Jun 17, 2015 11:06:49 GMT -5
Good looking work buddy. Instead of drilling each hole bigger to match the plastic rod, stretch some sprue and pull it into the hole (with some CA glue). This will fill any hole tightly and fast. Add a little Kicker and just clip and sand off the excess.  |
|
|
|
Post by Nacho Z on Jun 20, 2015 21:11:55 GMT -5
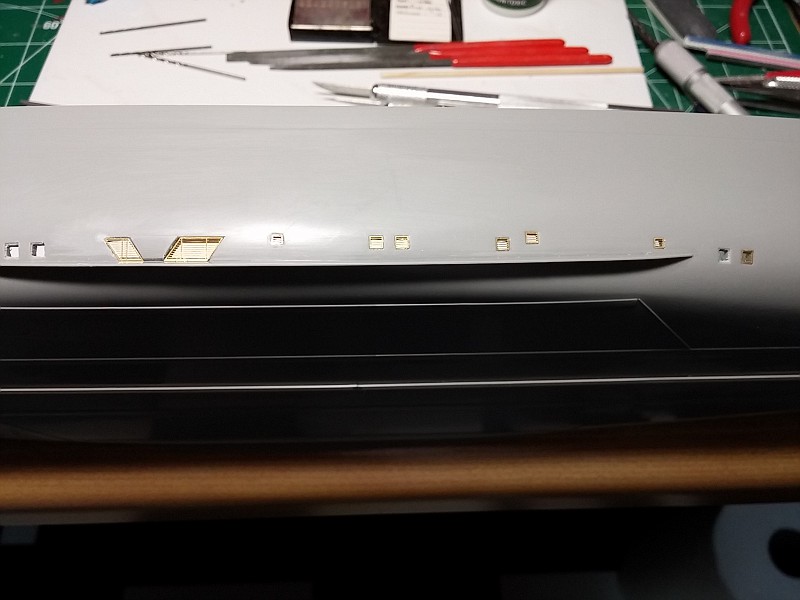
There are 26 intakes on the hull of the Bismarck. I have all of the starboard and half of the port side opened up. I have began attaching the PE intake screens to the starboard side. You have to have a lot of faith that the PE guys have the correct dimensions and that their items fit like they are supposed to! 
|
|
|
|
Post by Gary Kulchock on Jun 21, 2015 5:41:21 GMT -5
Looking great so far John. Now just another 1000 hours and ......
|
|
|
|
Post by Nacho Z on Jun 25, 2015 7:59:37 GMT -5
I have been working almost daily on this. I may be a little weird, but I enjoy, to a point, doing some of this easy, repetitive work. I can see progress daily. It is not huge progress but it is progress none the less.
All 26 hull intakes have been opened up and the PE grills installed. I have lost one grill. I believe it is on my work bench and hope to find it when I'm not looking for it.  There are 4 molded in hatches (?) on the hull that I have removed and replaced with PE, (they are the blue spots at the top of the hull). There are 4 molded in hatches (?) on the hull that I have removed and replaced with PE, (they are the blue spots at the top of the hull).
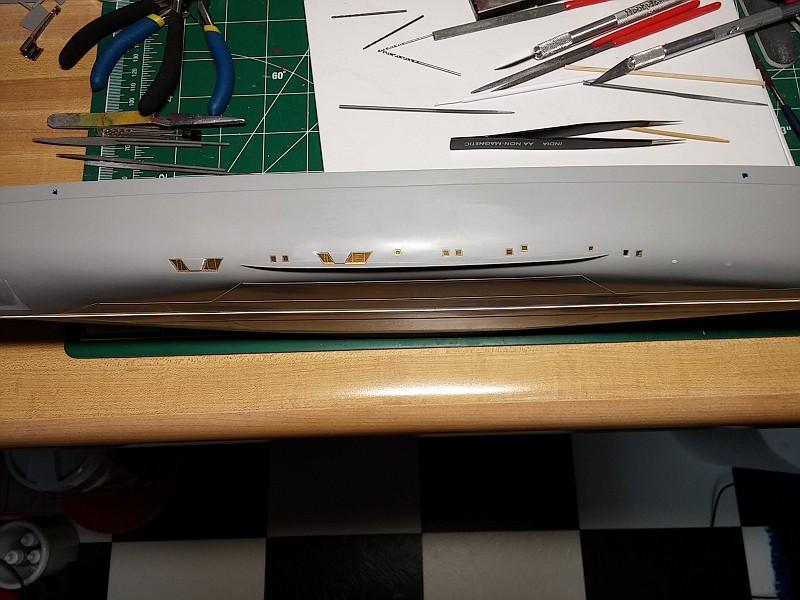
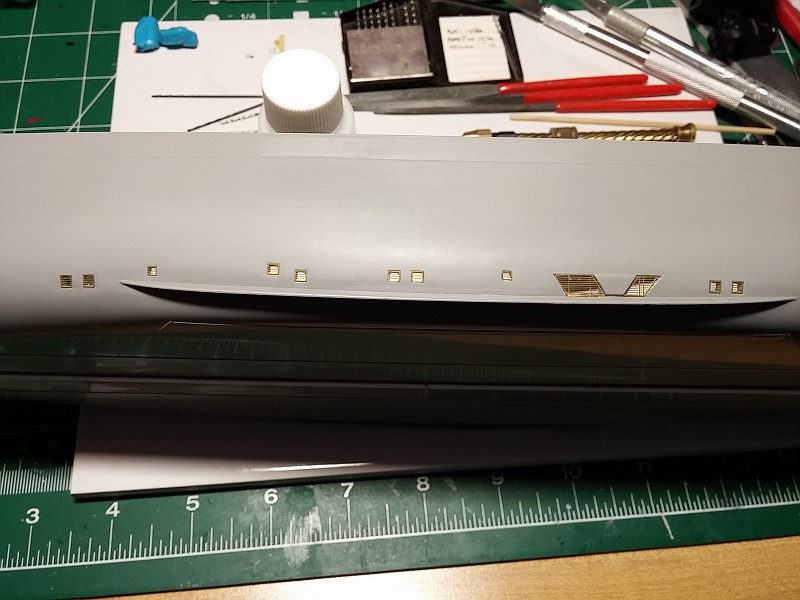
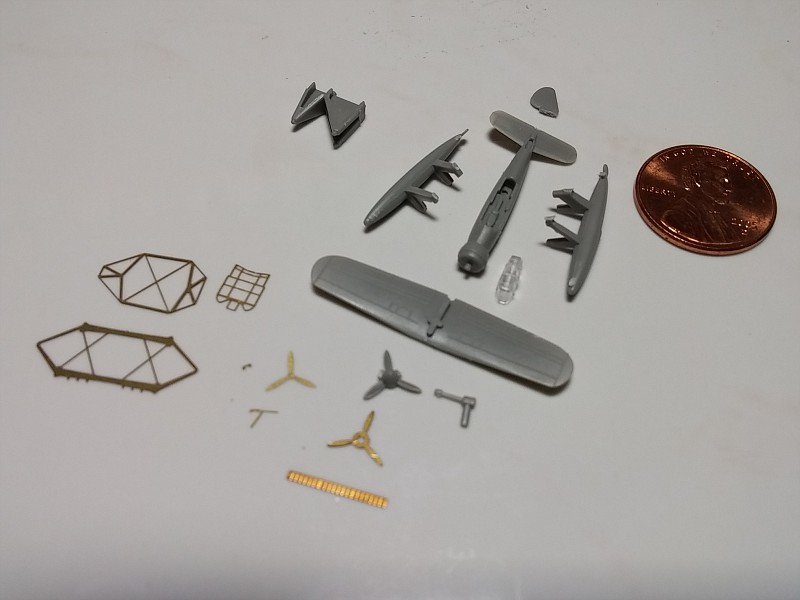
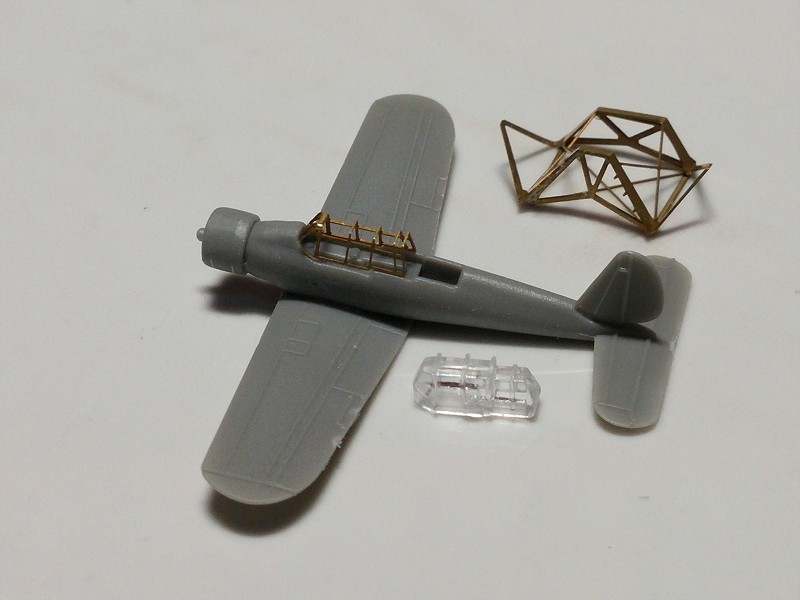
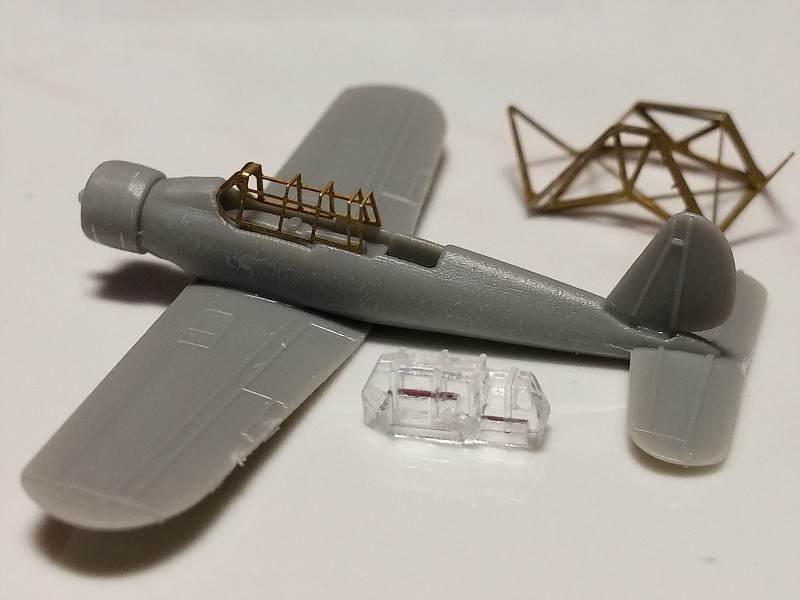
I have also been working on the airplanes that go on this ship. I will share more about them later, but will whet your appetite with this teaser picture.
|
|
|
|
Post by Gary Kulchock on Jun 25, 2015 13:38:56 GMT -5
Nice clean work John. The plane looks very interesting. Can't wait to see this together.
|
|
|
|
Post by Nacho Z on Jun 28, 2015 10:20:32 GMT -5
So the beauty of working on a model that has almost 700 parts is that there are plenty of things to work on. For right now I am just jumping around, working on what catches my fancy. Work continues on the hull portholes. Tedious and time consuming.
I have ordered paints that I need to do the two airplanes. I hope to have them in the coming week. The planes are so small that I will brush paint them. I have done a little more work on them.
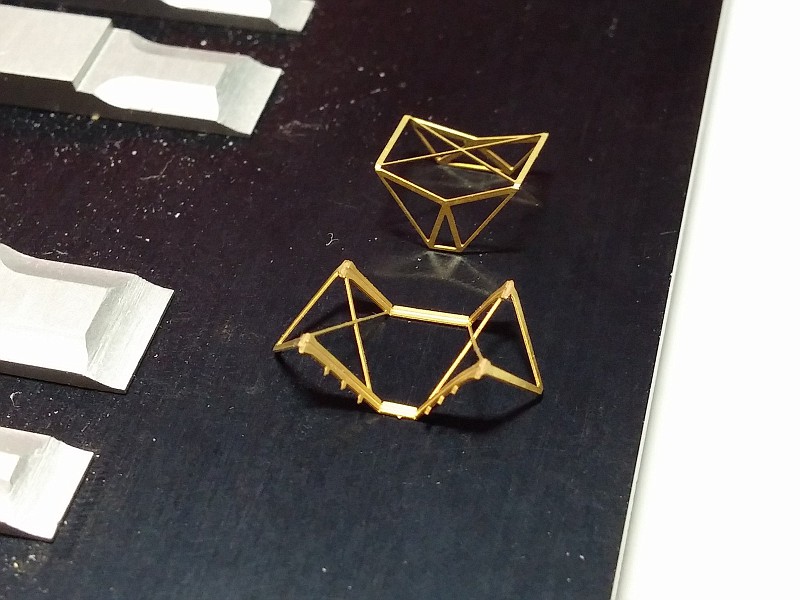
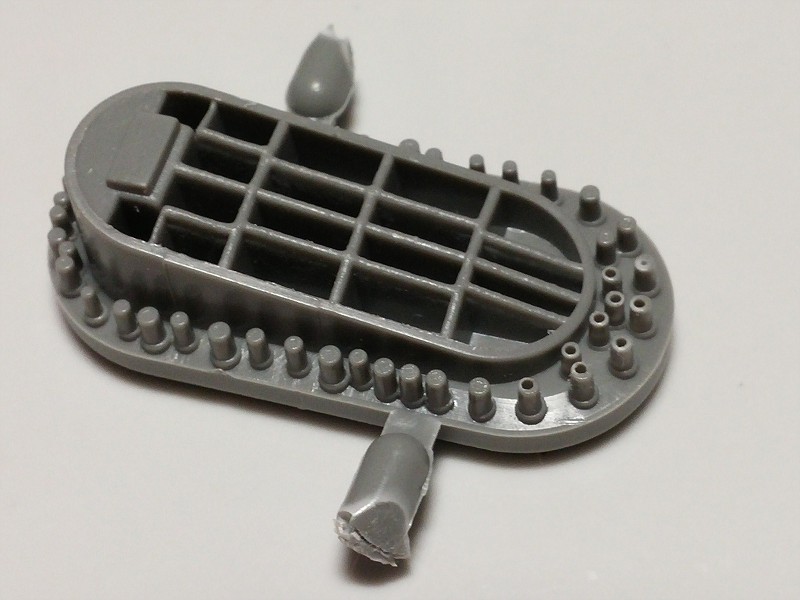
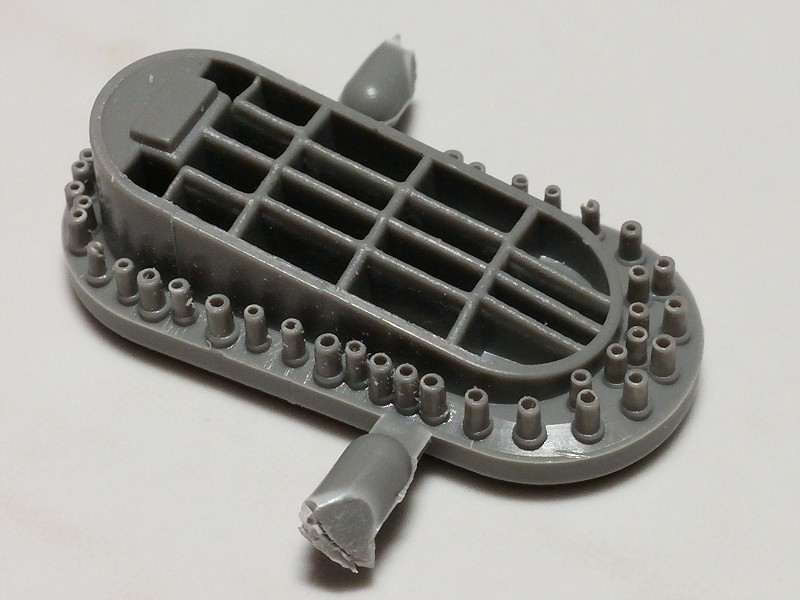
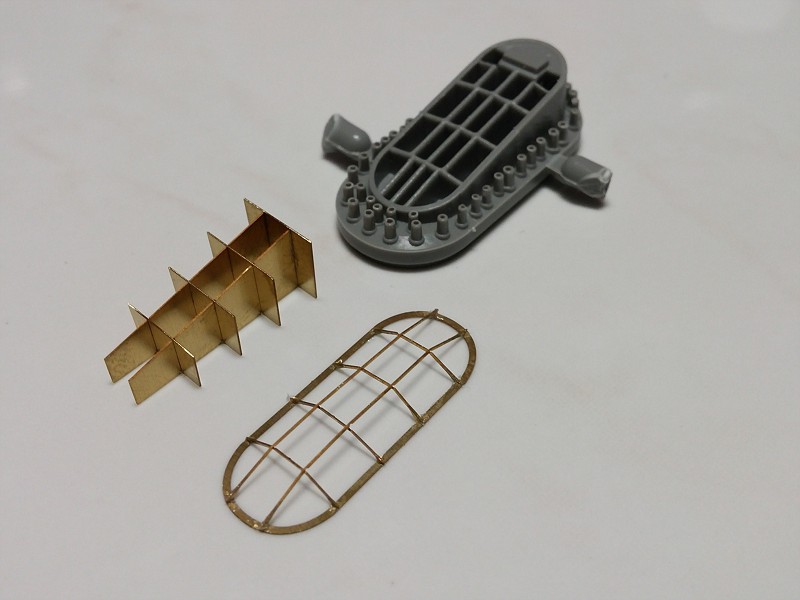
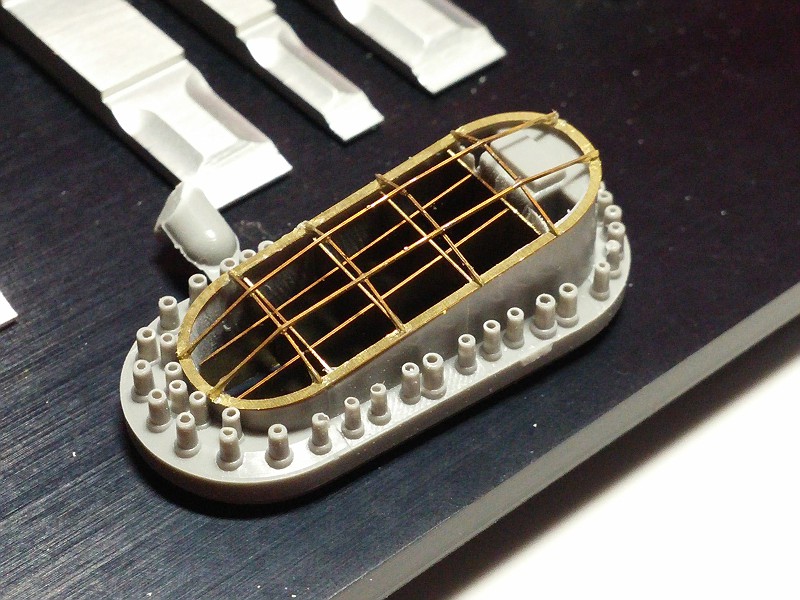
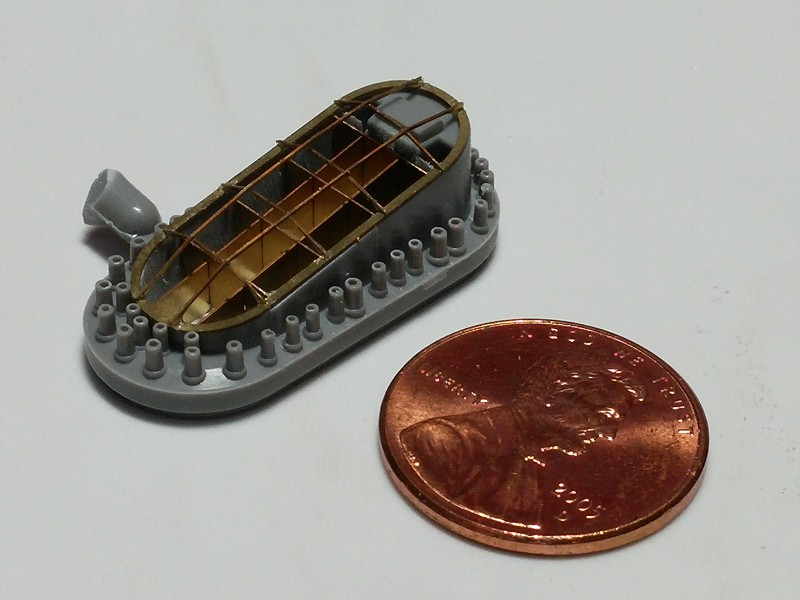
I began to work on the funnel cap. The pictures can be deceiving. It looks like a large piece. The last picture puts it in perspective. I had two or three of the smallest "pipes" that I could not get drilled out. You will have a hard time seeing it with the naked eye.
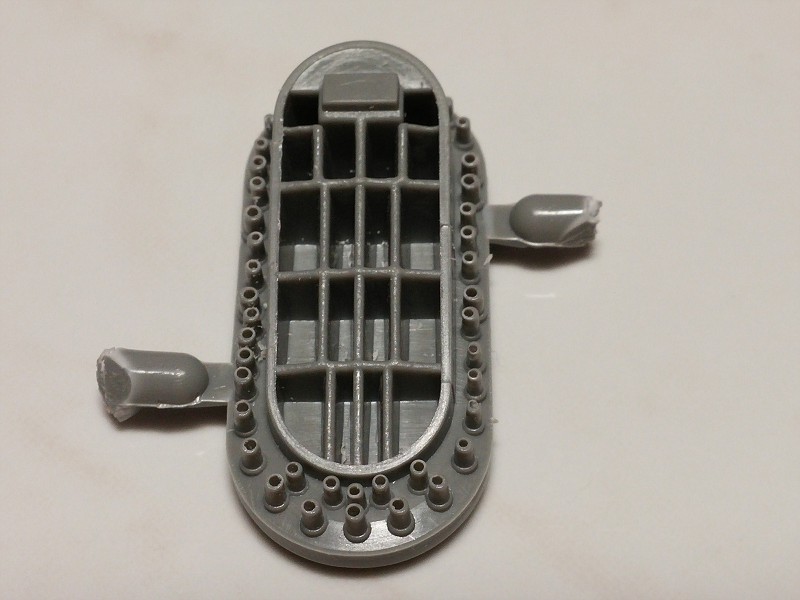
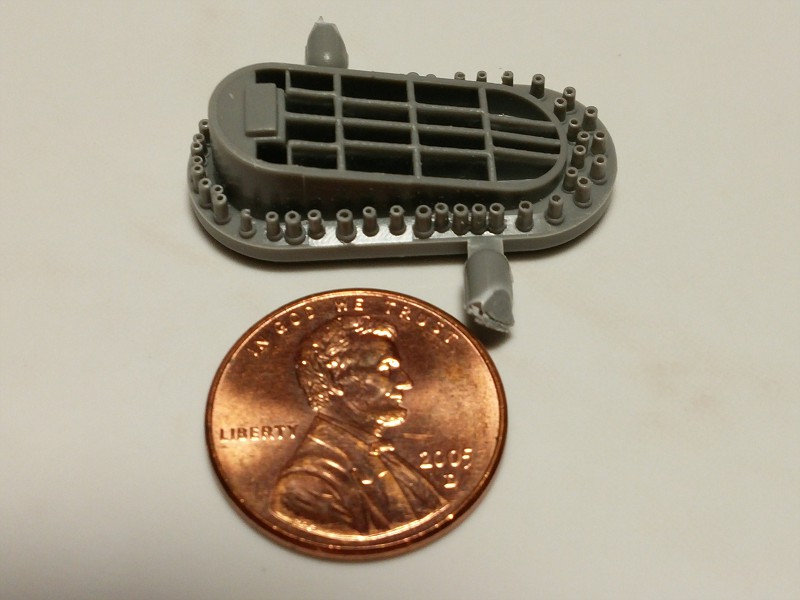
|
|
|
|
Post by Gary Kulchock on Jun 28, 2015 12:08:16 GMT -5
No hand painting John, break out that airbrush and give it a try.
|
|
|
|
Post by Nacho Z on Jun 28, 2015 15:40:48 GMT -5
No hand painting John, break out that airbrush and give it a try.
I will airbrush the majority of the ship. I may airbrush one of the greens and then hand brush the second green. Again, they are pretty small and masking them would be a pain. We'll see how it goes.
I am pretty excited about this afternoon's work. I continued to work on the funnel. I wanted to build the PE components before I removed all of the styrene parts. I wish I could convey how tiny and fine some of this PE is. It gets bent and distorted just trying to remove it. The very act of placing it where it goes can actually bend it. I am falling in love with the Gator's Grip glue. I highly recommend it. In the following pictures you will see a little extra glue that was cleaned up after it set. When everything dried I went back and hit a few spots with CA glue. The PE parts are not perfectly placed but are darn close. Trust me, it took multiple attempts to get it this close! You risk the chance of breaking the PE if you keep fiddling with it. As always, the following pictures are magnified. This looks good to the naked eye.
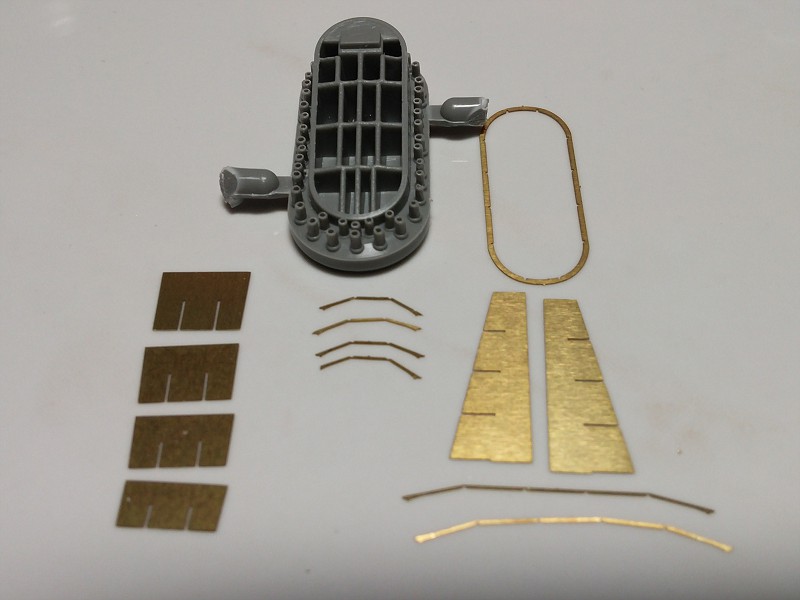
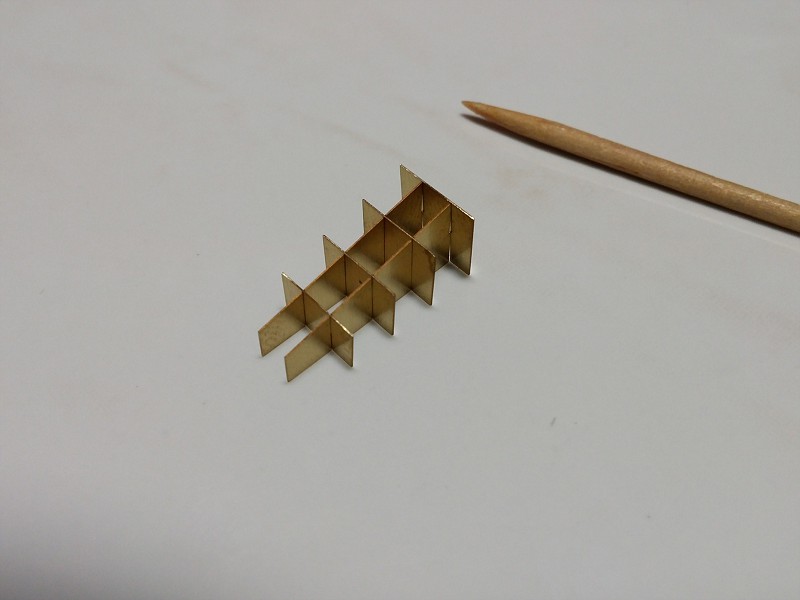
|
|
|
|
Post by Nacho Z on Jul 3, 2015 17:51:42 GMT -5
Progress, progress, progress!!!! The funnel cap is just about ready for paint. The parts are just dry fitted and not glued in. One thing about these close-up pictures, good or bad, is you see things you do not see with the naked eye.
|
|
|
|
Post by kaqbot on Jul 3, 2015 18:44:13 GMT -5
man that hurt just looking at it ,
|
|
|
|
Post by Nacho Z on Jul 7, 2015 20:39:16 GMT -5
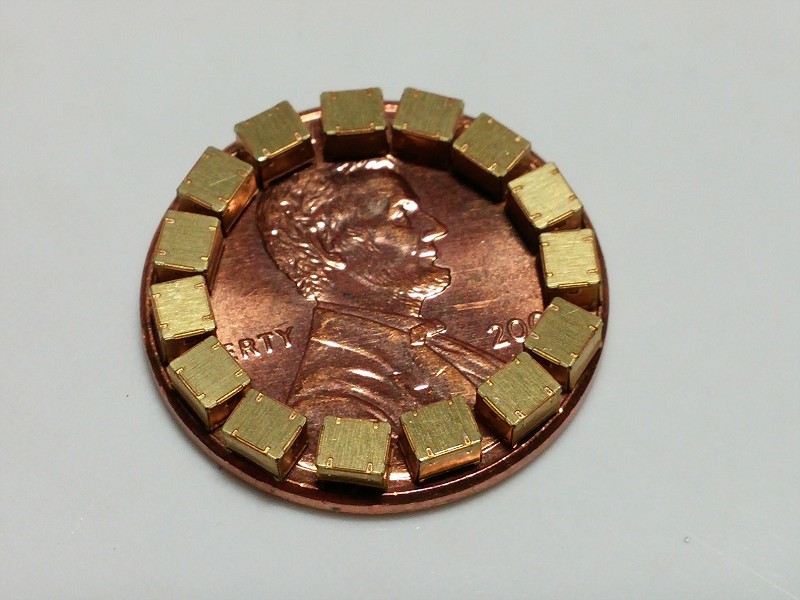
Just for fun..........here are 15 boxes/crates(?) that I made up the other night. I have to remove the molded on units from the decks and then add these.
This penny is becoming famous. 
One other thing. Looking at my post from June 25th, where I said I had lost a PE intake grill and would find it when I wasn't looking for it. Yup, you guessed it. I found it by accident. It was promptly glued on to the hull.
|
|
|
|
Post by Gary Kulchock on Jul 8, 2015 16:17:54 GMT -5
Now I know how John gets so much modeling done. An extra 6 hours in a day for him! Great clock buddy! 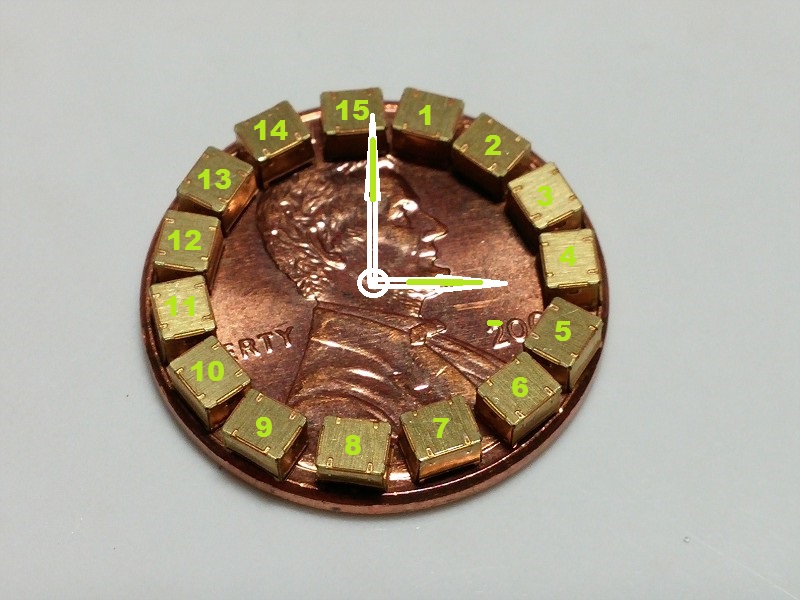 |
|
|
|
Post by Nacho Z on Jul 9, 2015 16:59:25 GMT -5
Now I know how John gets so much modeling done. An extra 6 hours in a day for him! Great clock buddy!  |
|
|
|
Post by harron68 on Jul 10, 2015 7:31:17 GMT -5
THANK YOU SO MUCH! Those of us who don't do "braille scale" models or P.E. detailing are getting a real education. I admit I envy your dedication to these projects. Again, thanx and know we'll be enjoying all the ups and downs along the build!
|
|






 I have started assembling some of the stand alone PE pieces. Crates, boxes, vent covers, etc. I think the hardest thing will be to take 3 separate kits, (Revell, Lion Roar and Pontos), and figure out what to do to each part to make it work with the other two kits. Lion Roar and Pontos share a lot of the same parts. Each has its own unique parts. On the shared parts, one kit may be better than the other. Some of the PE is so small I don't think, realistically, I'll be able to use it. I will do my best to keep everyone updated.


 There are a lot of raised seams and a lot of dimples. I don't know how many of you have used Mr. Surfacer but I think it is great stuff. Not as thick as putty. You can brush it right were you need it.

 I worked on the hull some more. I pretty much have all of the heavy filling and sanding done. I removed mold lines and filled in some small divots.


