|
|
Post by Nacho Z on Jul 4, 2011 16:23:33 GMT -5
I know there is a WIP section, but I am going to post this build and final results here. I like to keep it all in one place. This is the Fujimi kit. It is also the first model painted in my new paint booth. I'll try to remember to take pics along the way. I usually get so caught up in the build that I forget. The car is actually in paint but I forgot to take pics of it it primer, etc. I have not taken pics of it in paint yet. It is sitting in my dehydrator right now. Here is the kit..... 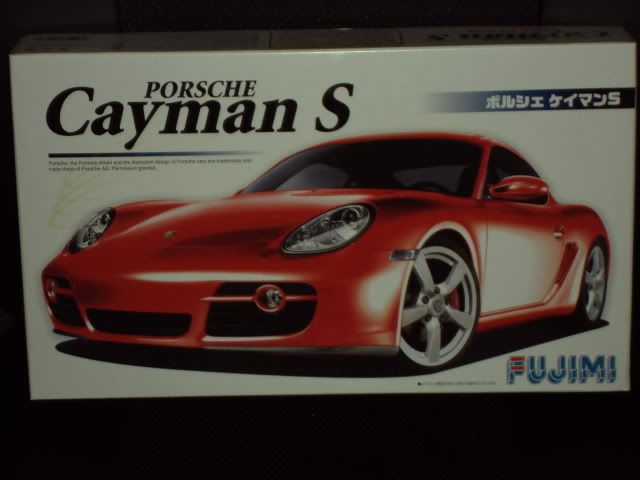 Here are two pics of the rotors. I ended up drilling out each hole. It was tedious but the results are good. Fujimi's tooling wasn't spot on, some of the hole's were a little out of alignment and not all the same depth. There may still be some drilling burrs left on the rotor. I'll have to go back and clean it up a little better. The calipers are done with a red Sharpie and a kit decal. 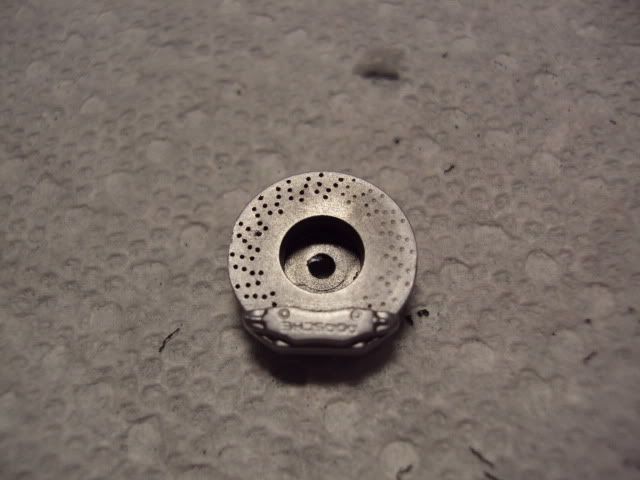 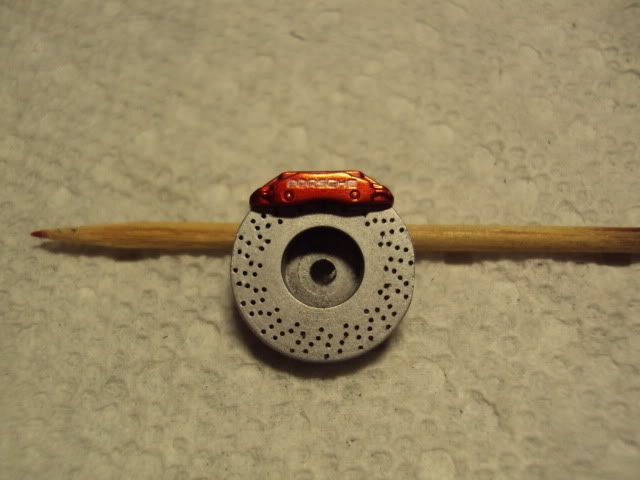 |
|
|
|
Post by 68chevy on Jul 4, 2011 18:23:10 GMT -5
Look like you are off to great start nice kit John pice I forgot to take them to. So don't feel bad
|
|
|
|
Post by Nacho Z on Jul 4, 2011 21:00:15 GMT -5
Just a little update. I counted the holes in the rotors. I got 86 or 88 total per front rotors  . 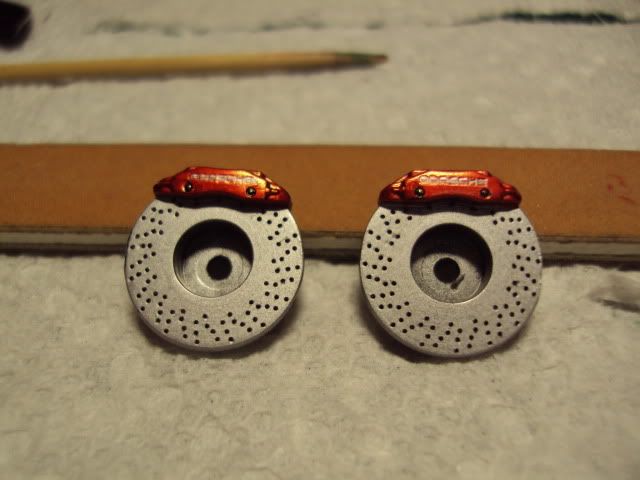 The chassis has been painted Tamiya Matte Black. I will start detail painting it this week. I really don't like to detail paint the engine when it is done in relief on the chassis plate. Oh well  . 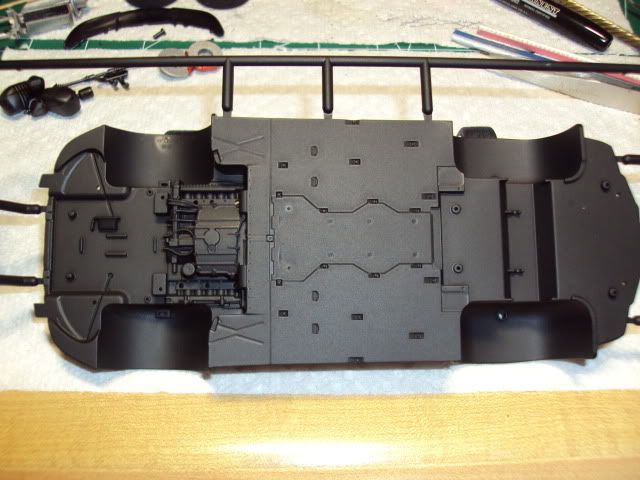 |
|
|
|
Post by zbuckster on Jul 5, 2011 11:32:09 GMT -5
Good job on those brakes.
|
|
|
|
Post by Gary Kulchock on Jul 5, 2011 12:25:48 GMT -5
Sharpie calipers look good John. For what reason would you count the holes?
|
|
|
|
Post by ferrarichip on Jul 6, 2011 20:03:03 GMT -5
get out the Silly Putty and mask off the engine!
|
|
|
|
Post by Nacho Z on Jul 7, 2011 6:06:37 GMT -5
Gary - for the same reason I want to know how many licks it takes to get to the center of a Tootsie Pop! ;D
Chip - I'm skipping the Silly Putty on this one. It is open enough to be able to brush paint everything. Actually most of it is done already. There is a suspension / skid plate / cover looking piece that will go over most of it.
Body has been cleared. I'll let it gas out for a few days and then polish it out. I'll get some pics up soon.
|
|
|
|
Post by Gary Kulchock on Jul 7, 2011 11:29:27 GMT -5
Gary - for the same reason I want to know how many licks it takes to get to the center of a Tootsie Pop! ;D |
|
|
|
Post by The Mad Modeller on Jul 7, 2011 20:38:21 GMT -5
Nice work John.
|
|
|
|
Post by Nacho Z on Jul 8, 2011 5:33:48 GMT -5
I've had a heck of a time trying to get outdoor pics of the painted body. I got some nice pics and when I went to download them to my computer the memory stick in the camera died. Fortunately, I am pretty good about downloading my pics right away. We did lose a few pics though but nothing too important. Here are two pics of the body in paint. It has not been clear coated in these pictures. The paint is Testors One Coat Lacquer - Root Beer. This stuff really is one coat! It covers very well. One tip Gary Kulchock taught me, (one of MANY tips from Gary), is to rescribe all panel lines before you paint a body. I do this now and I think it makes a big difference. 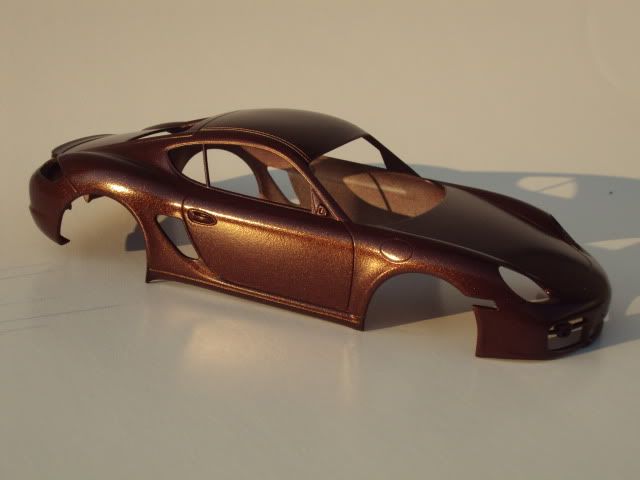 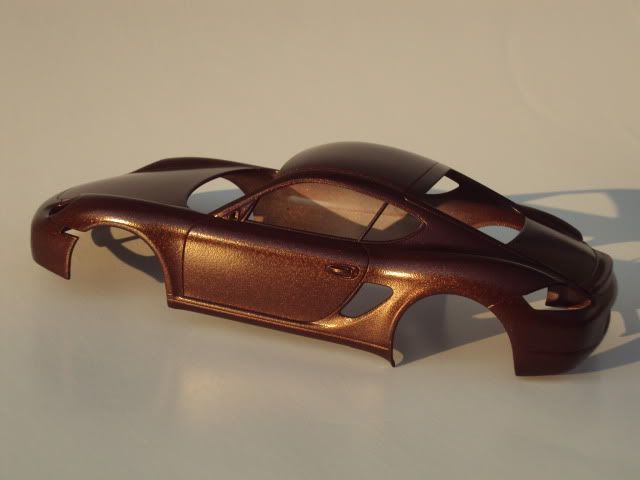 |
|
|
|
Post by fireguy14 on Jul 8, 2011 8:01:36 GMT -5
That is great John, but then I am kinda partial to the Cayman! Let me know if you want any reference pics!
|
|
|
|
Post by Nacho Z on Jul 8, 2011 10:57:34 GMT -5
That is great John, but then I am kinda partial to the Cayman! Let me know if you want any reference pics! Do you own one? I honestly don't know much about them. I do like the looks of them. My wife and I looked at one a while back. Here is a link to the actual care we looked at - www.midatlanticsportscars.com/2008_porsche.htmlIf you do have one can you tell us anything about it? |
|
|
|
Post by zbuckster on Jul 8, 2011 11:23:39 GMT -5
That "rescribe the body lines "trick is an old one but a good one. I am liking this build. Good job.
|
|
|
|
Post by fireguy14 on Jul 8, 2011 11:32:10 GMT -5
That is great John, but then I am kinda partial to the Cayman! Let me know if you want any reference pics! Do you own one? I honestly don't know much about them. I do like the looks of them. My wife and I looked at one a while back. Here is a link to the actual care we looked at - www.midatlanticsportscars.com/2008_porsche.htmlIf you do have one can you tell us anything about it? John, I owned one for a 3 day weekend 2 years ago. My wife won a weekend rental of a Cayman and gave it to me for my birthday. Awesome, awesome car. It was rated for 167. I had it a bit over 120 then had to back out. I can truly believe what I have read that with a bit of tweaking it could out perform a Carrera. Here is a link to the pics I was able to get of it. Sorry, not much underside and no engine details. s207.photobucket.com/albums/bb298/fireguy14/reference/2009%20Cayman/ |
|
|
|
Post by Gary Kulchock on Jul 8, 2011 11:55:39 GMT -5
Looking good John. ;D Your welcome for the tip.
Some nice gold BBS wheels would look so good with that brown.
|
|
|
|
Post by Nacho Z on Jul 8, 2011 14:59:27 GMT -5
Hey Sully, thanks for the ref. pics. I will say this, in the direct side on shots, the Cayman's profile is very, very similar to a 350Z. The rear end and rear fenders also look similar. That may be why I like it  |
|
|
|
Post by 68chevy on Jul 8, 2011 19:38:58 GMT -5
I love that color the Testors One Coat Lacquer is some good paint I like it. Nice job
|
|
|
|
Post by z24dude on Jul 9, 2011 0:53:38 GMT -5
Wow, nice job John!! Can we expect more of those kits to be opened and painted now?!? ;D
|
|
|
|
Post by Nacho Z on Jul 9, 2011 9:41:44 GMT -5
Wow, nice job John!! Can we expect more of those kits to be opened and painted now?!? ;D ;D ;D Yea Brian, I think so!  Here is what I'm finding about having the new paint booth. First and foremost, I have a place to paint! I don't have to worry about the weather anymore. All I do is pull the cover off of the booth and fire it up. Spray painting, (not airbrushing yet), is faster than brush painting, looks better and dries faster. There is no down side that I have been able to find. All of that makes for a new level of enthusiasm for me!  Here is a quick update on the chassis. I know that the colors I use are not prototypically correct. I like to use different colors to make it a little more visually interesting, (at least to me). 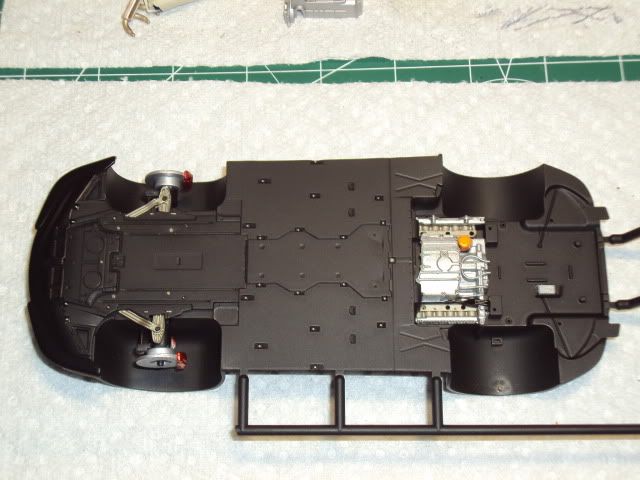 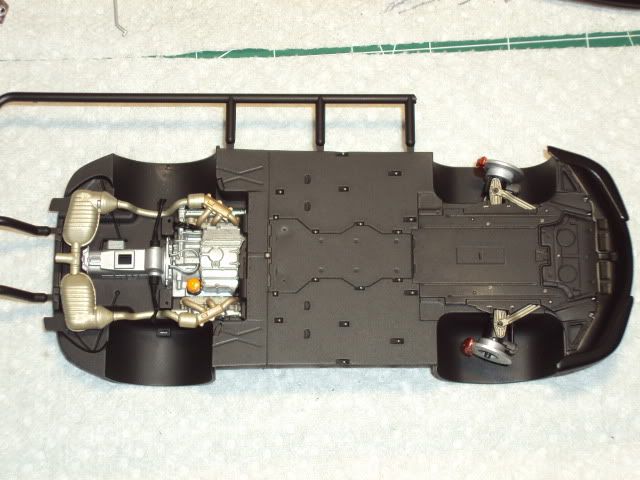 |
|
|
|
Post by z24dude on Jul 9, 2011 19:08:18 GMT -5
You put more time into the chassis than I would since it would never be seen at a show, but at least you know it was done. Looks good.
|
|
|
|
Post by zbuckster on Jul 10, 2011 10:34:08 GMT -5
The cahssis looks great. I do the same thing. I think the contrast of differnt colors adds a ton to the finished model.
|
|
|
|
Post by Gary Kulchock on Jul 10, 2011 12:52:20 GMT -5
I've always told you this John: You are a master with a paint brush. This proves it. Nice work.
|
|
|
|
Post by Nacho Z on Jul 11, 2011 4:35:39 GMT -5
Here is where I'm at. Chassis is done. Gary, you'll be happy to know that all four wheels touch the ground at the same time!  The body has been test fitted and everything looks good. The interior has been primed and painted. Next I will need to detail paint it and apply the decals. Here are a few pics of the completed chassis. 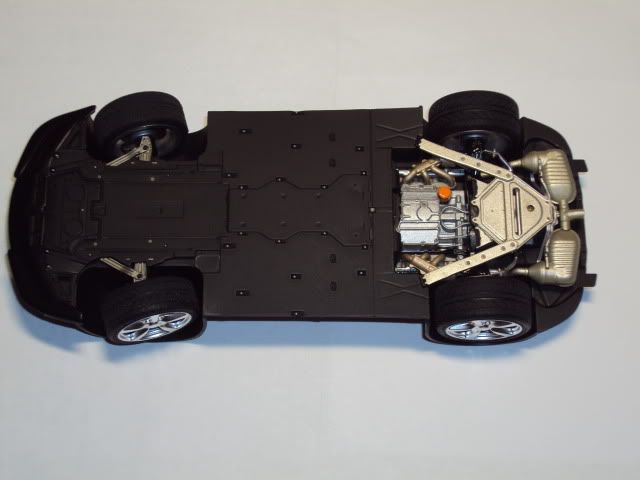 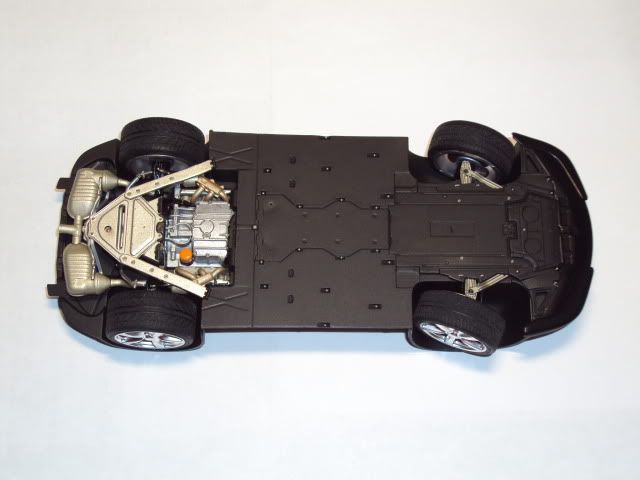 |
|
|
|
Post by roadhawg on Jul 11, 2011 9:30:48 GMT -5
Looks great!! It doesn't matter if those chassis colors are actually correct or not.....the way they work together, it just looks right. Very nice!!!
|
|
|
|
Post by Gary Kulchock on Jul 11, 2011 11:01:07 GMT -5
That oil filter sure adds just the right amount of color. Sweet John. ;D
|
|
|
|
Post by Nacho Z on Jul 11, 2011 15:46:28 GMT -5
Thanks guys!! Gary - most of the pics I saw showed a black oil filter. It would have just faded into the engine block.
I'll have pics of the interior soon!
|
|
|
|
Post by 68chevy on Jul 11, 2011 18:42:44 GMT -5
Nice work
|
|
|
|
Post by Nacho Z on Jul 12, 2011 20:13:10 GMT -5
Yea, I pretty much hate interiors!  |
|
|
|
Post by The Mad Modeller on Jul 12, 2011 21:34:11 GMT -5
Nice looking build John.
|
|
|
|
Post by fireguy14 on Jul 16, 2011 10:32:46 GMT -5
Great work John!
|
|

