|
|
Post by Gary Kulchock on May 14, 2012 20:28:20 GMT -5
Well I finally got around to building again, and I'm trying to finish up some older projects I started building ages ago. The Predator finally saw it's completion a couple years ago, and now it's time to finally finish up the 300ZX. I can't believe I've never posted photos here before of this project. Well let me bring you up to date. We are probably talking 1993 or 1994 when this project first got started. I had been working on a Lamborghini Diablo funny car project (still not finished) with the entire frame scratch-built out of plastic rod. I just didn't care for the lack of strength in the plastic, so I moth-balled the Diablo and started construction on a brass chassis for this new 300ZX Pro Street project. Check out the frame. 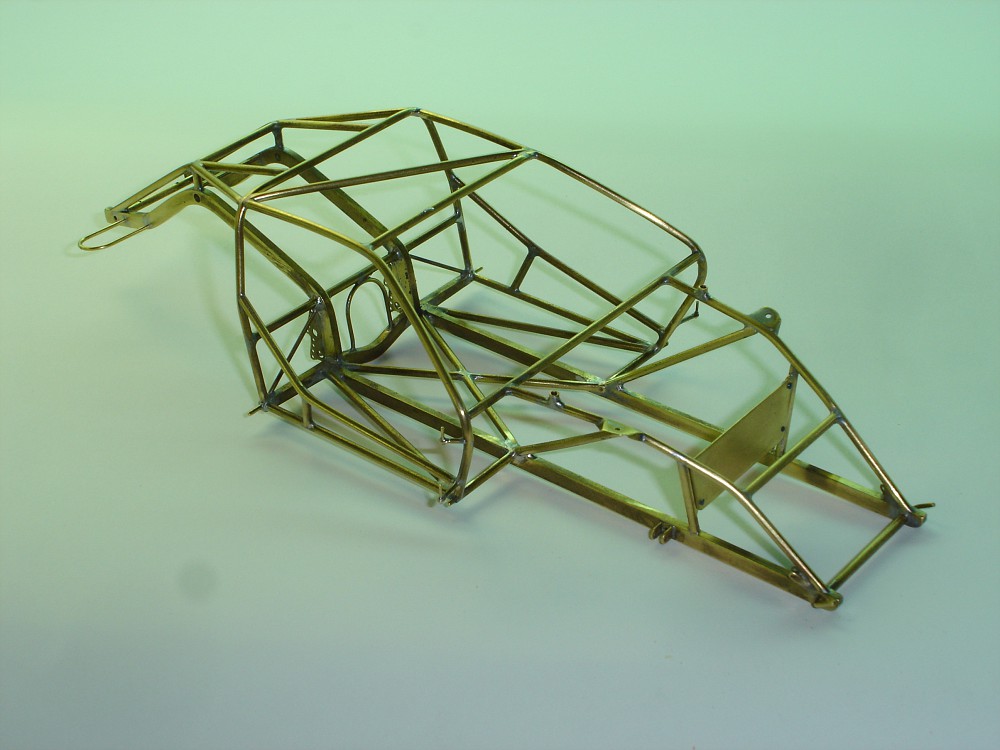 I then made a working brass rear-end. 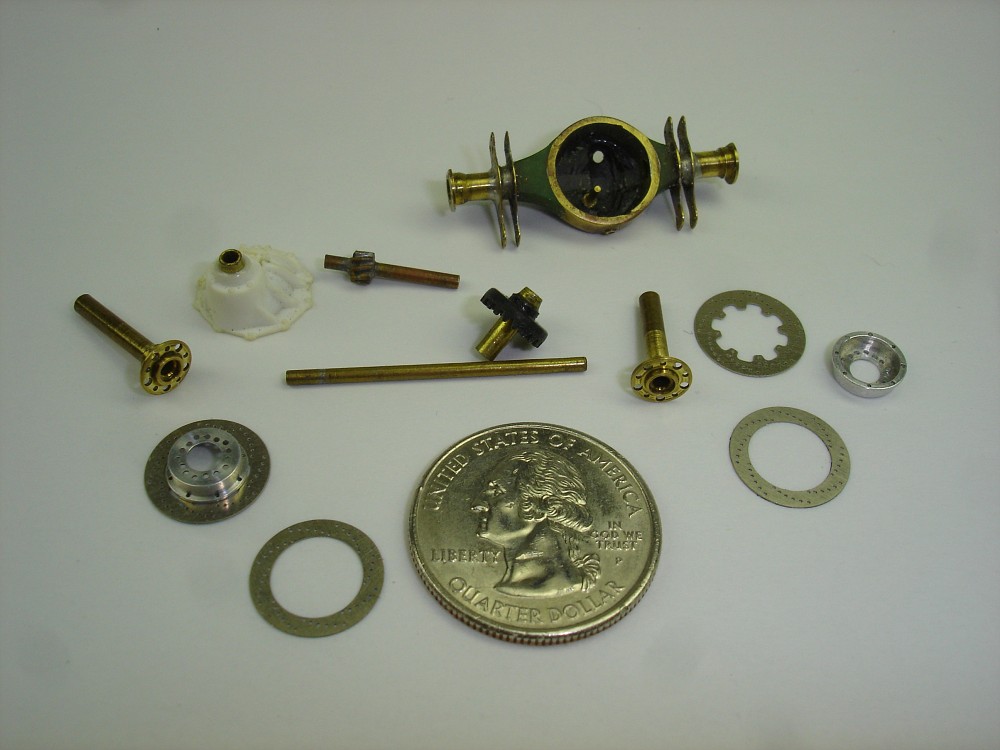  The engine will be a combination of a ZR-1 block and transmission, and the heads from the Tamiya Nissan R89C. 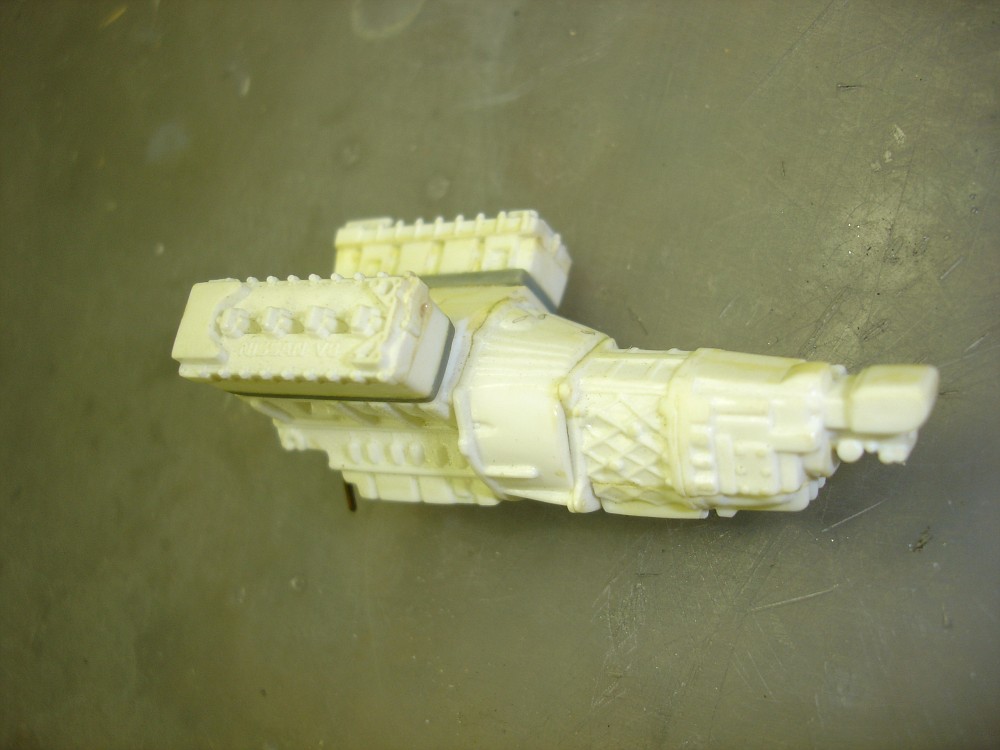 I scratch-built the Jaz fuel cell. 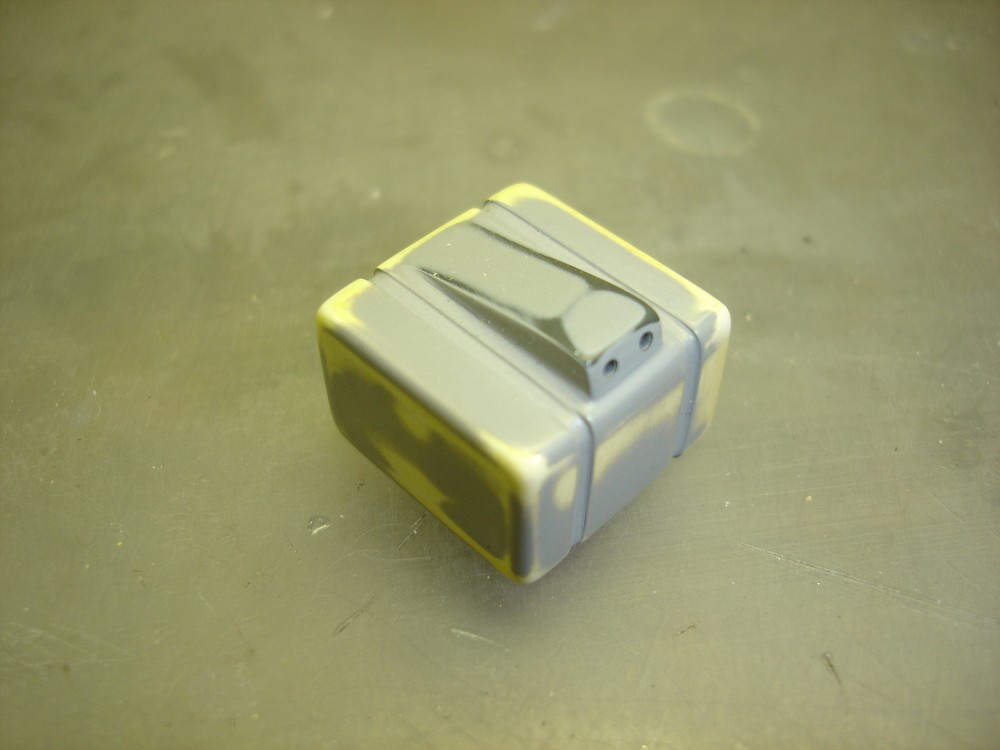 Tubs are finished and I've started on the interior panels. 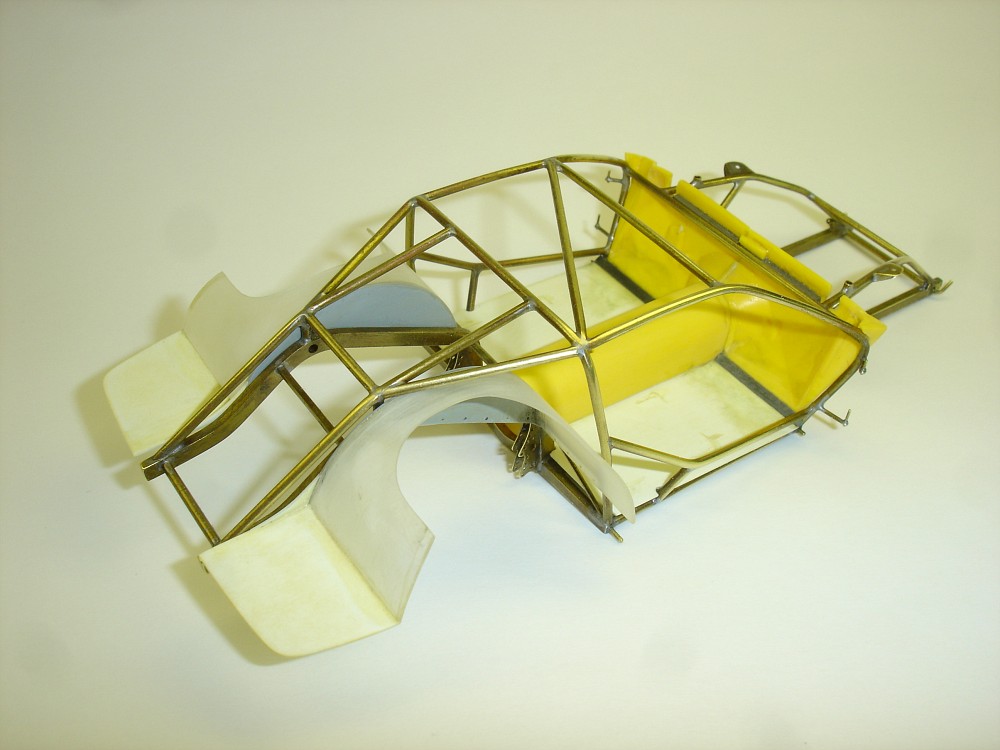 Doors are all hinged and work sweet. 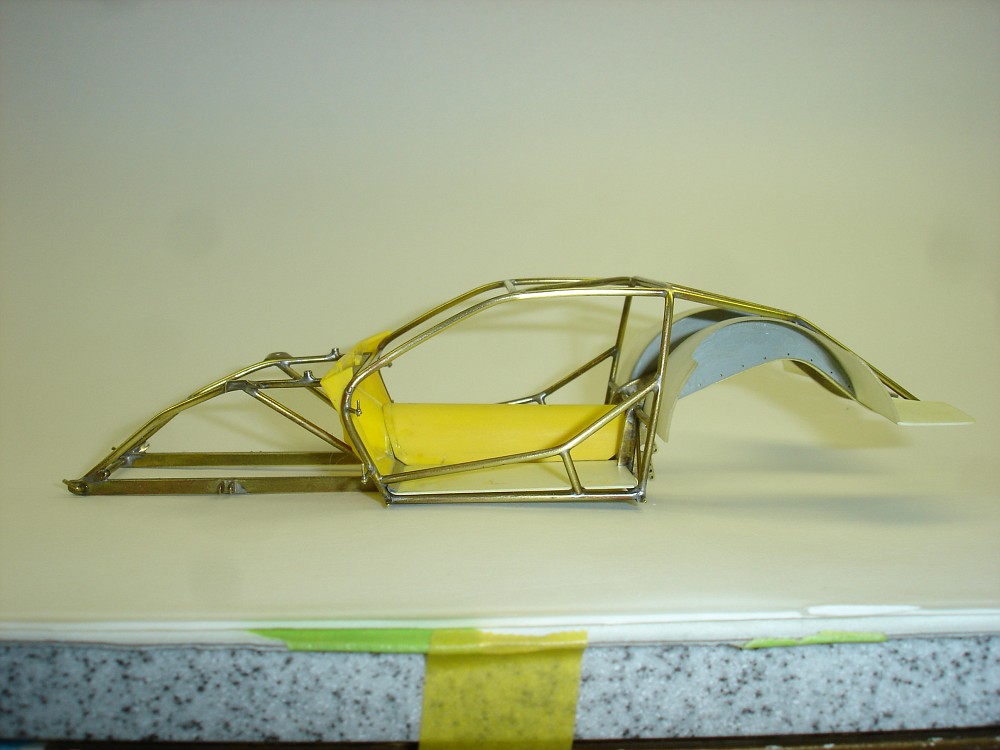 Here is what she looks like all-together so far. 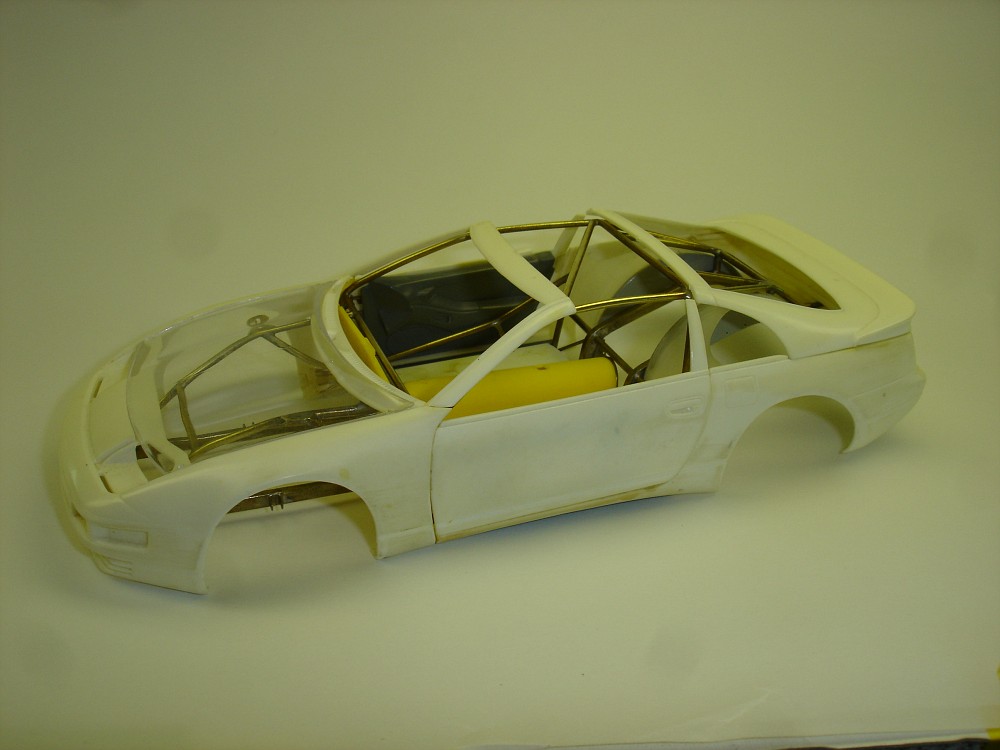 Give me till the weekend and I'll post a lot more photos of what I've been doing on the build the past couple weeks. Some custom bodywork that is turning out great. I'm planning on having her all finished for next years NNL East, followed by GSL 2013. Later ..... Let me know what you think!  There is a link in my signature that will take you to a lot more photos. Enjoy! |
|
|
|
Post by wtsf150 on May 14, 2012 21:16:52 GMT -5
She looks great so far Gary i have one small question for ya how did you bend the rear frame sections? Thanks
Willie
|
|
|
|
Post by The Mad Modeller on May 14, 2012 22:19:35 GMT -5
Awesome work.
|
|
|
|
Post by zbuckster on May 15, 2012 10:05:52 GMT -5
Amazing work as always.
|
|
tool
Full Member
  
Posts: 448
|
Post by tool on May 15, 2012 10:53:04 GMT -5
wow fantastic work !!
|
|
|
|
Post by 68chevy on May 15, 2012 15:45:52 GMT -5
EXCELLENT job you have out dun your self on this one Gary.
|
|
|
|
Post by Gary Kulchock on May 15, 2012 21:30:15 GMT -5
She looks great so far Gary i have one small question for ya how did you bend the rear frame sections? Thanks Willie Good question. Answer: I didn't bend them. They were cut from a solid piece of thick brass. I wanted to make sure there was no stressing on the brass, and that both sections were identical. I went with the rectangular frame because I was building a street car, not a race car.  |
|
|
|
Post by wtsf150 on May 16, 2012 7:54:48 GMT -5
Thanks Gary another question. How did you cut it. I am planning on making some headache racks for big rigs out of 3/8ths thick aluminum i was thinking i would have to get them cut on a water jet.
Thanks and cant wait for more updates on this.
Willie
|
|
|
|
Post by wisdonm on May 16, 2012 8:37:23 GMT -5
Love watching you work your magic craft. It is obvious we do not share the same hobby.
|
|
|
|
Post by Gary Kulchock on May 16, 2012 13:43:48 GMT -5
Thanks Gary another question. How did you cut it. I am planning on making some headache racks for big rigs out of 3/8ths thick aluminum i was thinking i would have to get them cut on a water jet. Thanks and cant wait for more updates on this. Willie The best way I found was a fine tooth metal cutting blade in my scroll saw. Take it slow and let the blade cut at it's own pace. If you push it, the blade will snap. This got me close to the mark. My spindle sander took me the rest of the way on anything that was over a 1/4" radius. Final hand finishing took out all the saw marks. Good luck on your headache racks and make sure you post photos.  |
|
|
|
Post by Nacho Z on May 16, 2012 16:51:03 GMT -5
Just one question Gary, when are you going to quit doing these same old-same old builds and start pushing yourself??   |
|
|
|
Post by Gary Kulchock on May 17, 2012 8:26:58 GMT -5
Just one question Gary, when are you going to quit doing these same old-same old builds and start pushing yourself??   I'm sorry John. I'll try to be a better modeler, and do a little more detailed work in the future.  I hate being a slacker. |
|
|
|
Post by wtsf150 on May 17, 2012 11:15:19 GMT -5
Gary thanks for the info one more question then i'll leave you alone i know i'm bugging ya the brakes for the rear are they Detail Master parts or??? I'll be sure to get some pics of the headache racks when i start them
Thanks, Willie
|
|
|
|
Post by Gary Kulchock on May 17, 2012 21:58:47 GMT -5
Gary thanks for the info one more question then i'll leave you alone i know i'm bugging ya the brakes for the rear are they Detail Master parts or??? I'll be sure to get some pics of the headache racks when i start them Thanks, Willie No bother at all Willie. The rear brakes are of my own design and artwork, sent out and photo-etched for me. The aluminum hats for these brakes were machined on my lathe to match. They are scale replicas of Wilwood units. Later ...... G |
|
|
|
Post by Gary Kulchock on May 17, 2012 22:27:54 GMT -5
Well here's some updates on the build. First some custom bodywork. Here's a photo of the stock front end ...... 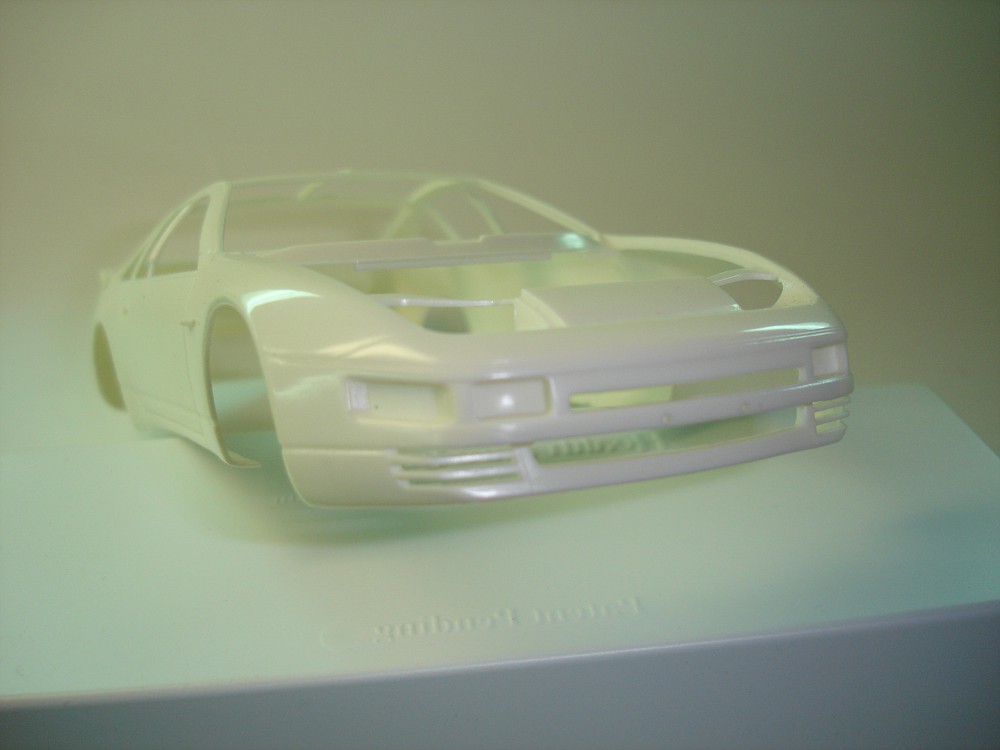 Here is my custom front end. The hood scoop is still being worked on.  Adding in some side skirts now and working on the door jambs. 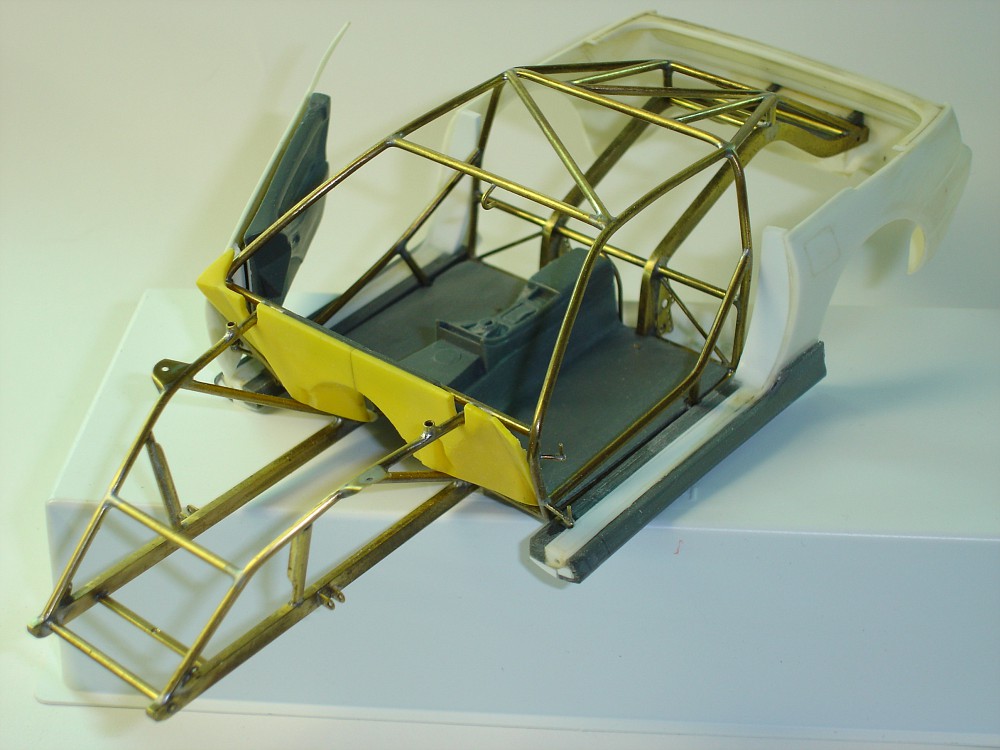 The tires I'm using for the back are made from 2 Monogram sprint car tires joined together for some extra width. They are the small diameter ones. 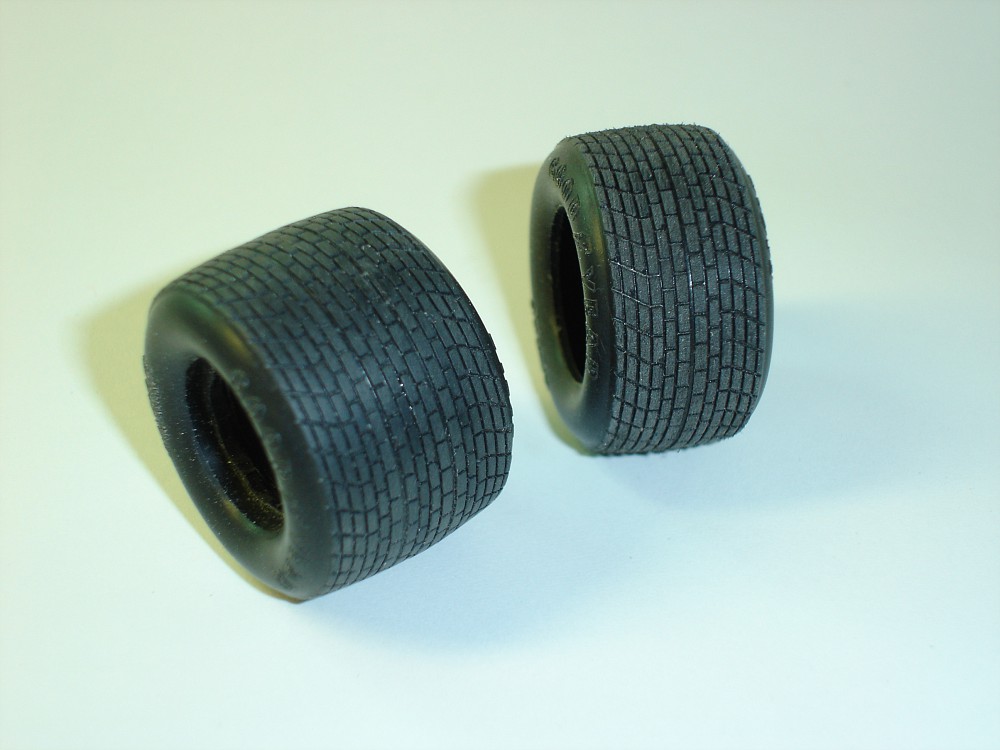 Here is the track bar for the rear end. 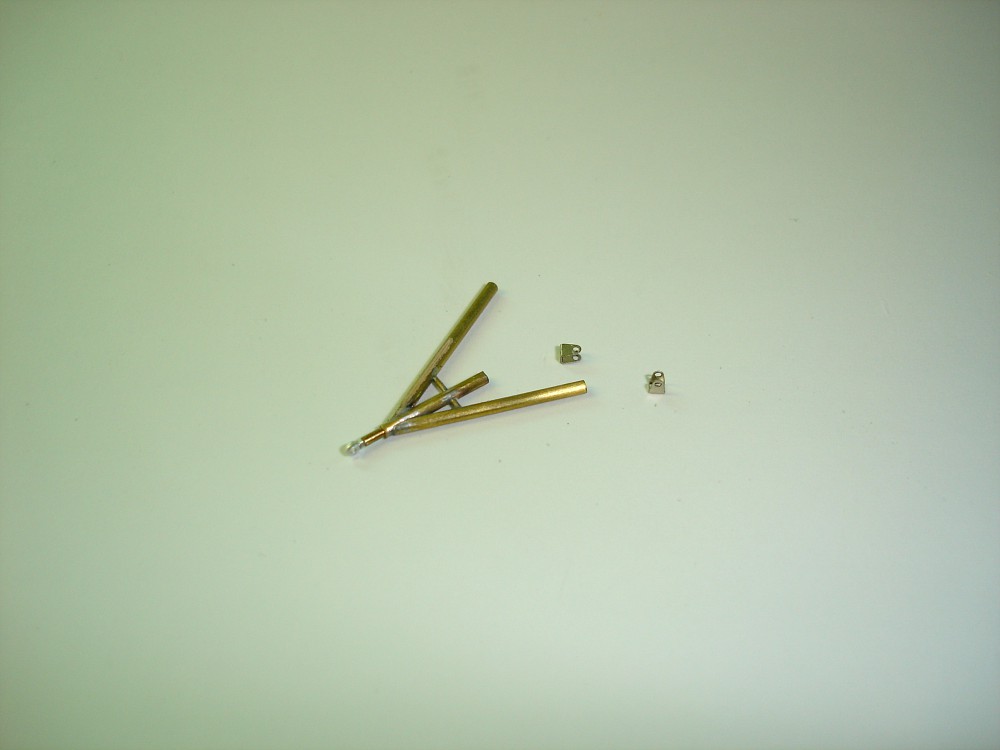 The scratch-built radiator...... 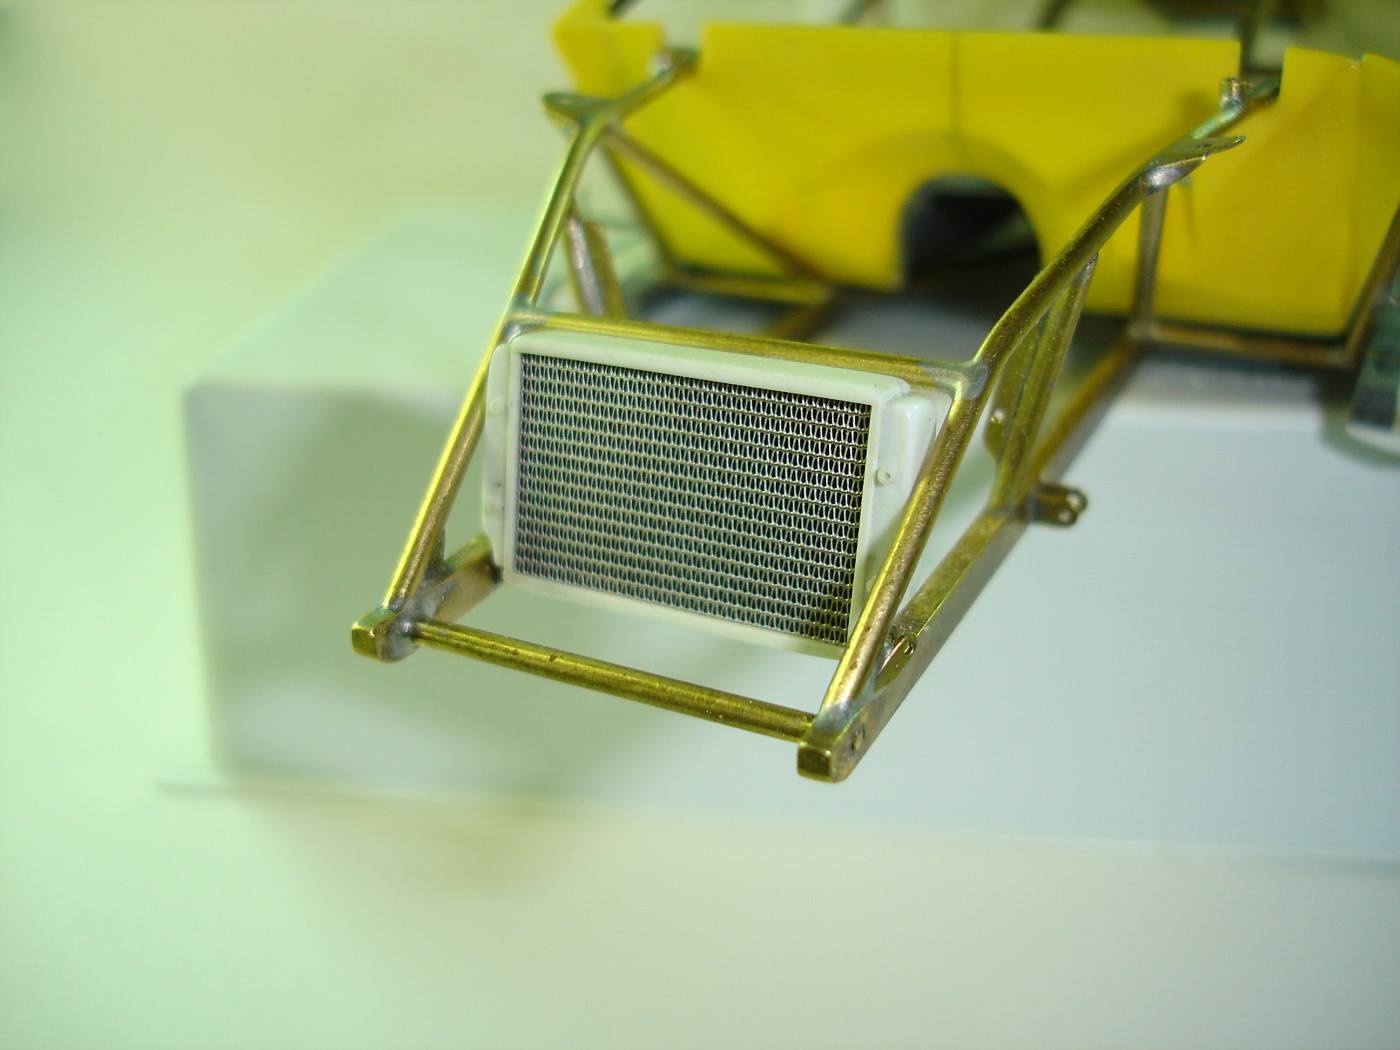 ..... and electric cooling fan unit. 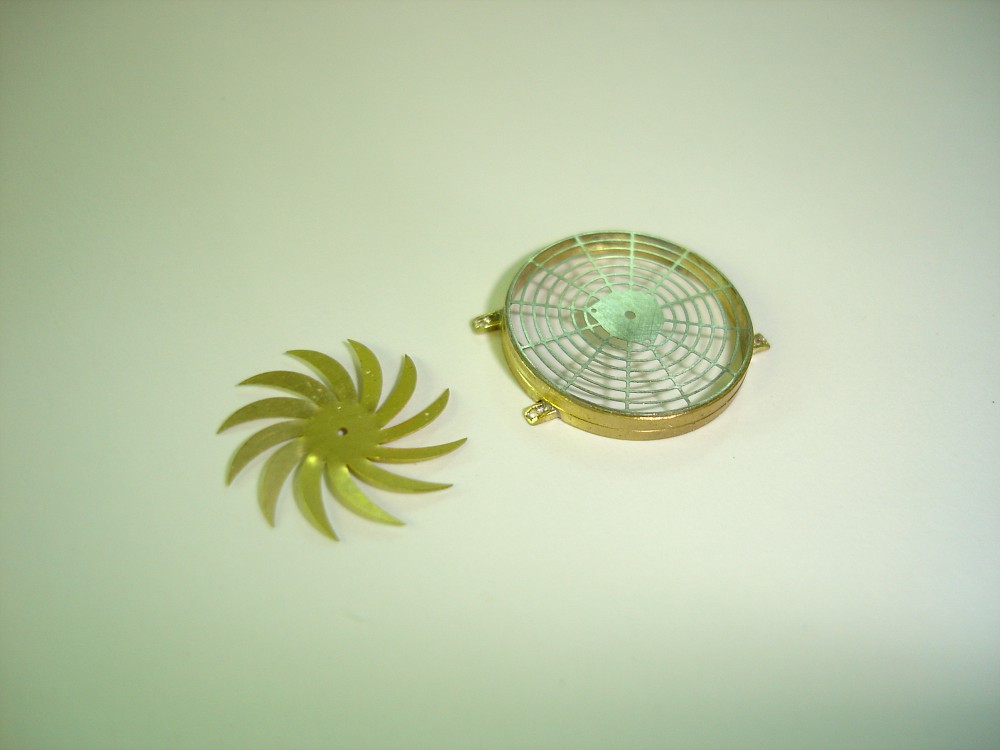 Here's the start of my Optima battery. 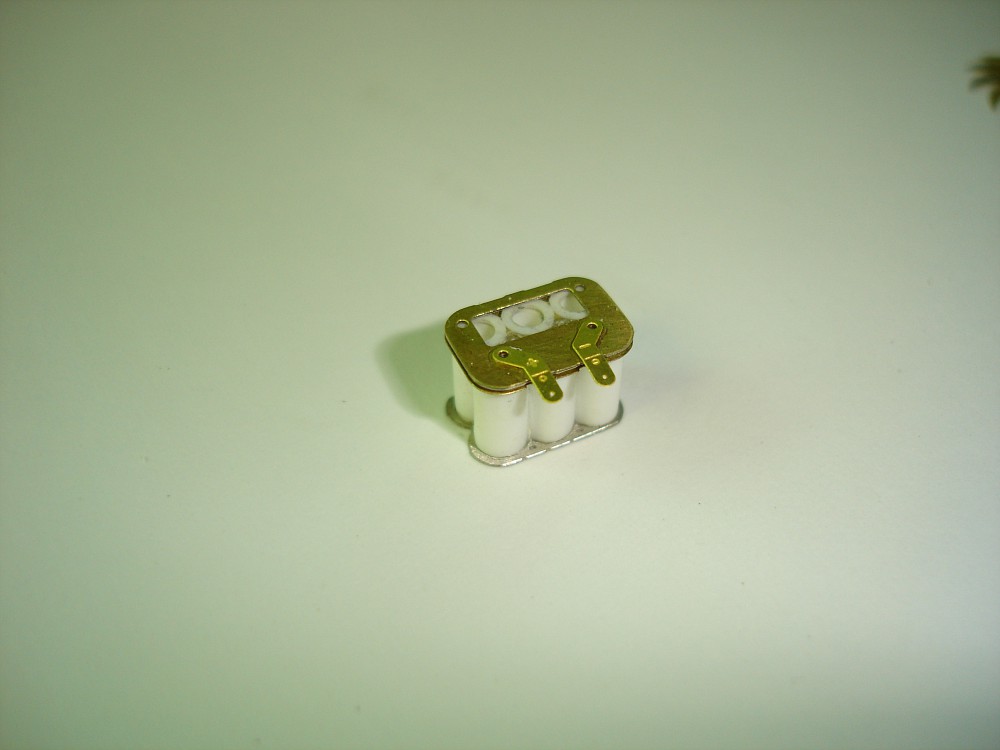 .... and finally the fuel cell with my photo-etched JAZ logo. 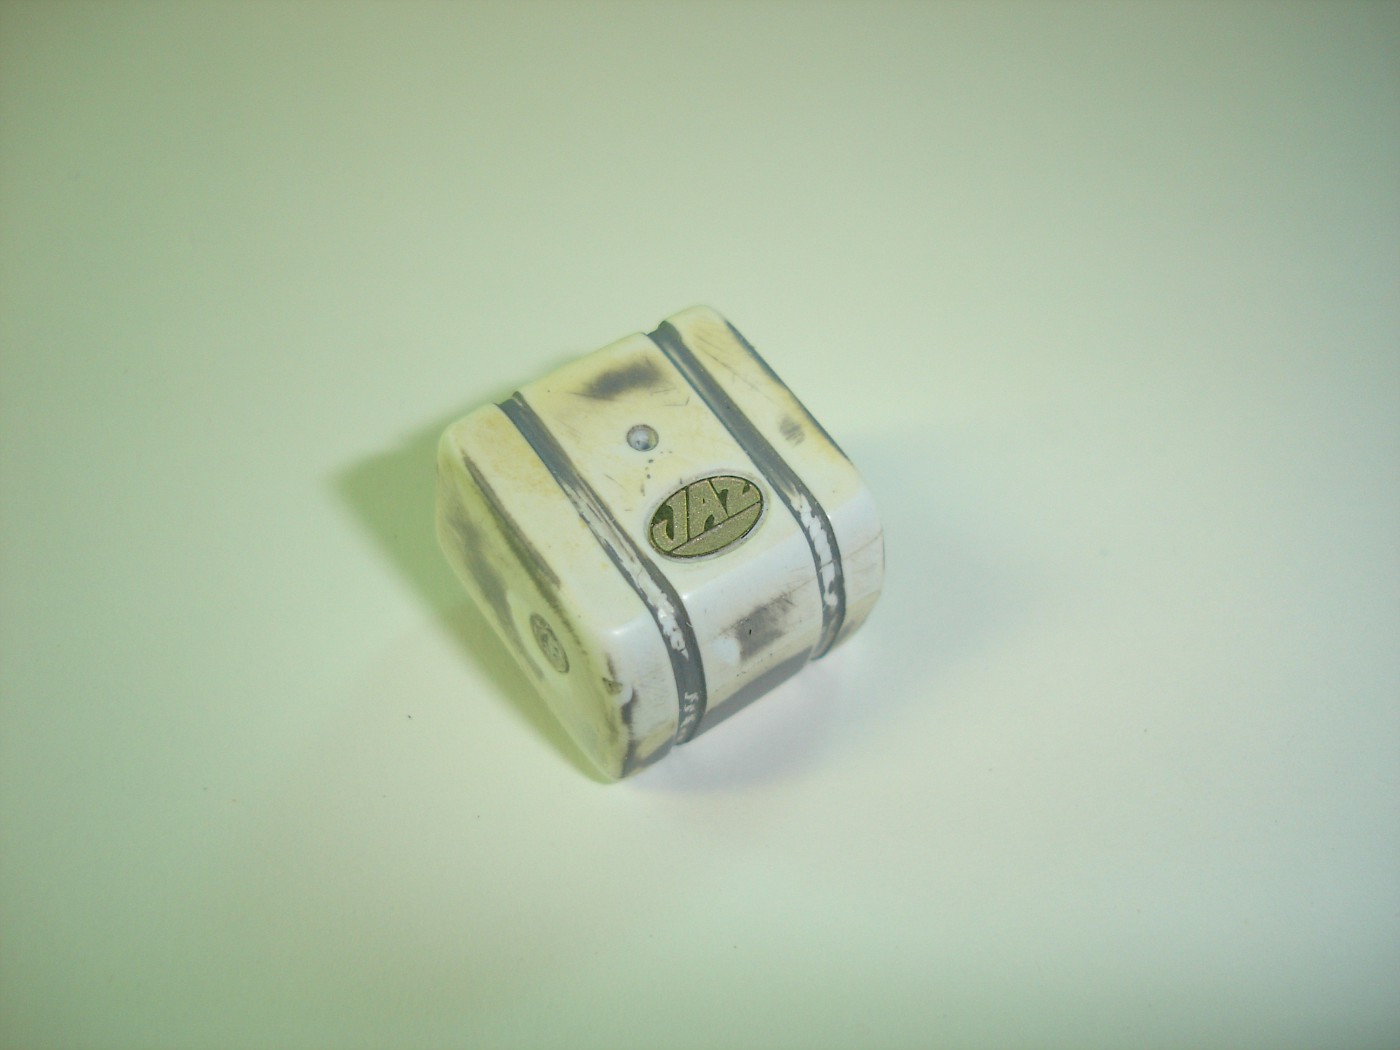 Let's see what I can get finished up this week. Later ..... |
|
|
|
Post by zbuckster on May 18, 2012 10:43:23 GMT -5
WOW, Very nice work. Now I need to go talk to me about my work. I see that I can do better. Thanks for setting the bar height.
|
|
|
|
Post by Gary Kulchock on May 19, 2012 8:21:36 GMT -5
Door framing. Most of the time, when I see modelers open the doors on cars, they just don't take the time and detail the door framing itself. Sure, they will add in every wire under the hood or a 3 square inch battery terminal, but the door framing itself, taking up an area of at least 2 square feet, gets no respect. I want to change that on this model, so here is some door framing detail for you. 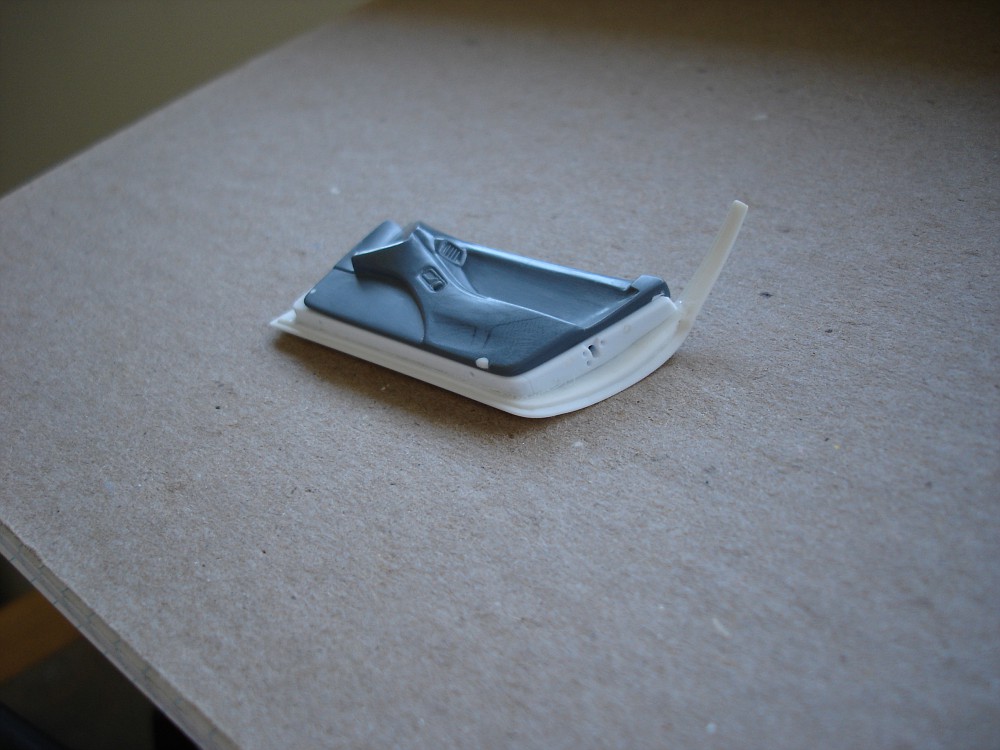 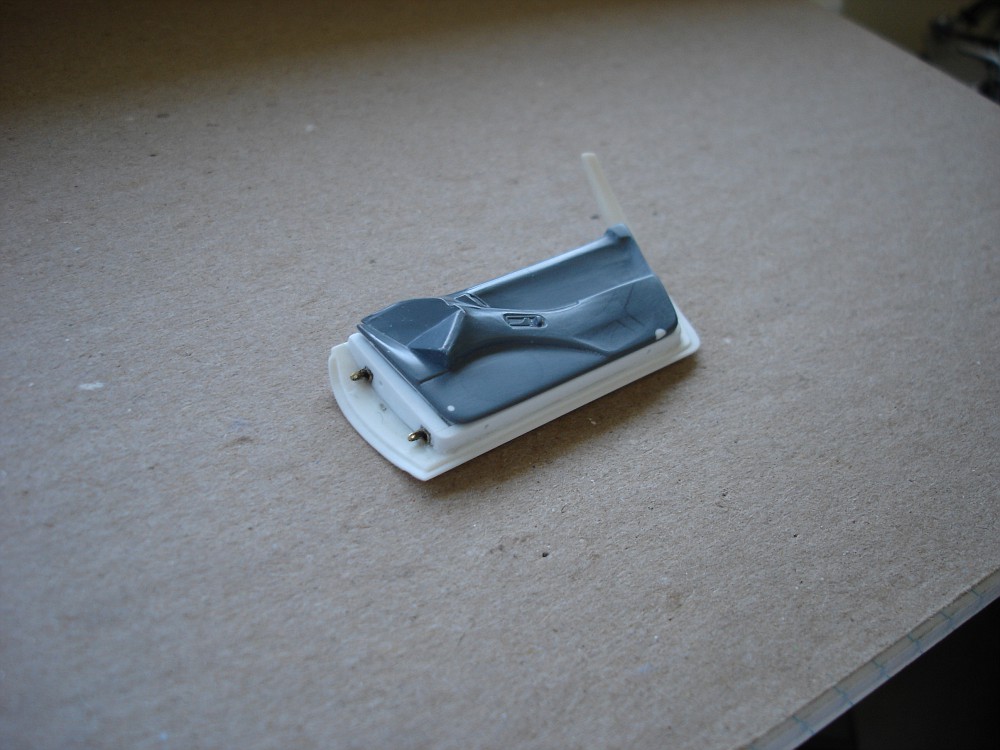 I also plan to add on some scale weather stripping, electrical connections, vent ducting, and weep hole plugs in the bottom of the door after she's painted. Let's also not forget about the switch in the door frame that turns on the dome light. Later ...... |
|
|
|
Post by zbuckster on May 19, 2012 10:48:34 GMT -5
That's what I am talking about!!!!!!!!!!!!!! That is awesome foresight. The kind of detail that I overlook every time.
|
|
|
|
Post by z24dude on May 19, 2012 10:53:47 GMT -5
Lookin good, didn't think you would ever get this one started again!!
|
|
|
|
Post by harron68 on May 19, 2012 20:17:24 GMT -5
A-MAY-ZING! True dedication to authentic detail. I am stunned. Mission control, we have met a master of metal! Thank you for remarkable craftsmanship!
|
|
|
|
Post by 68chevy on May 21, 2012 6:46:02 GMT -5
Gary this car AWESOME you do amazing work and to get to go along on this ride with you is sweet Thanks for sharing it with us. Hop to see more out standing work soon.
|
|
|
|
Post by z24dude on May 23, 2012 10:24:27 GMT -5
Do you have a color picked out yet?
|
|
|
|
Post by Gary Kulchock on May 23, 2012 20:48:15 GMT -5
Do you have a color picked out yet? Burnt orange metallic as the main color but I'm still working on the graphics and multi-color layout. I'll be pushing myself on this paint job. |
|
|
|
Post by fireguy14 on May 27, 2012 7:03:46 GMT -5
Impressive Gary!
|
|
|
|
Post by Gary Kulchock on May 30, 2012 20:25:45 GMT -5
OK, one custom door panel, 90% finished. I still need to add on the door pull, and remove the door latch. The speakers will have custom made photo-etched grills, and I'm also photo-etching the door latch, vent grill and window switches that Tamiya chose to leave off all together. So what do you think of the Speakers? I like the 6x9 in the lower panel, but I don't know if I'm too crazy about the 2 upper round ones. Should I keep them or fill them in?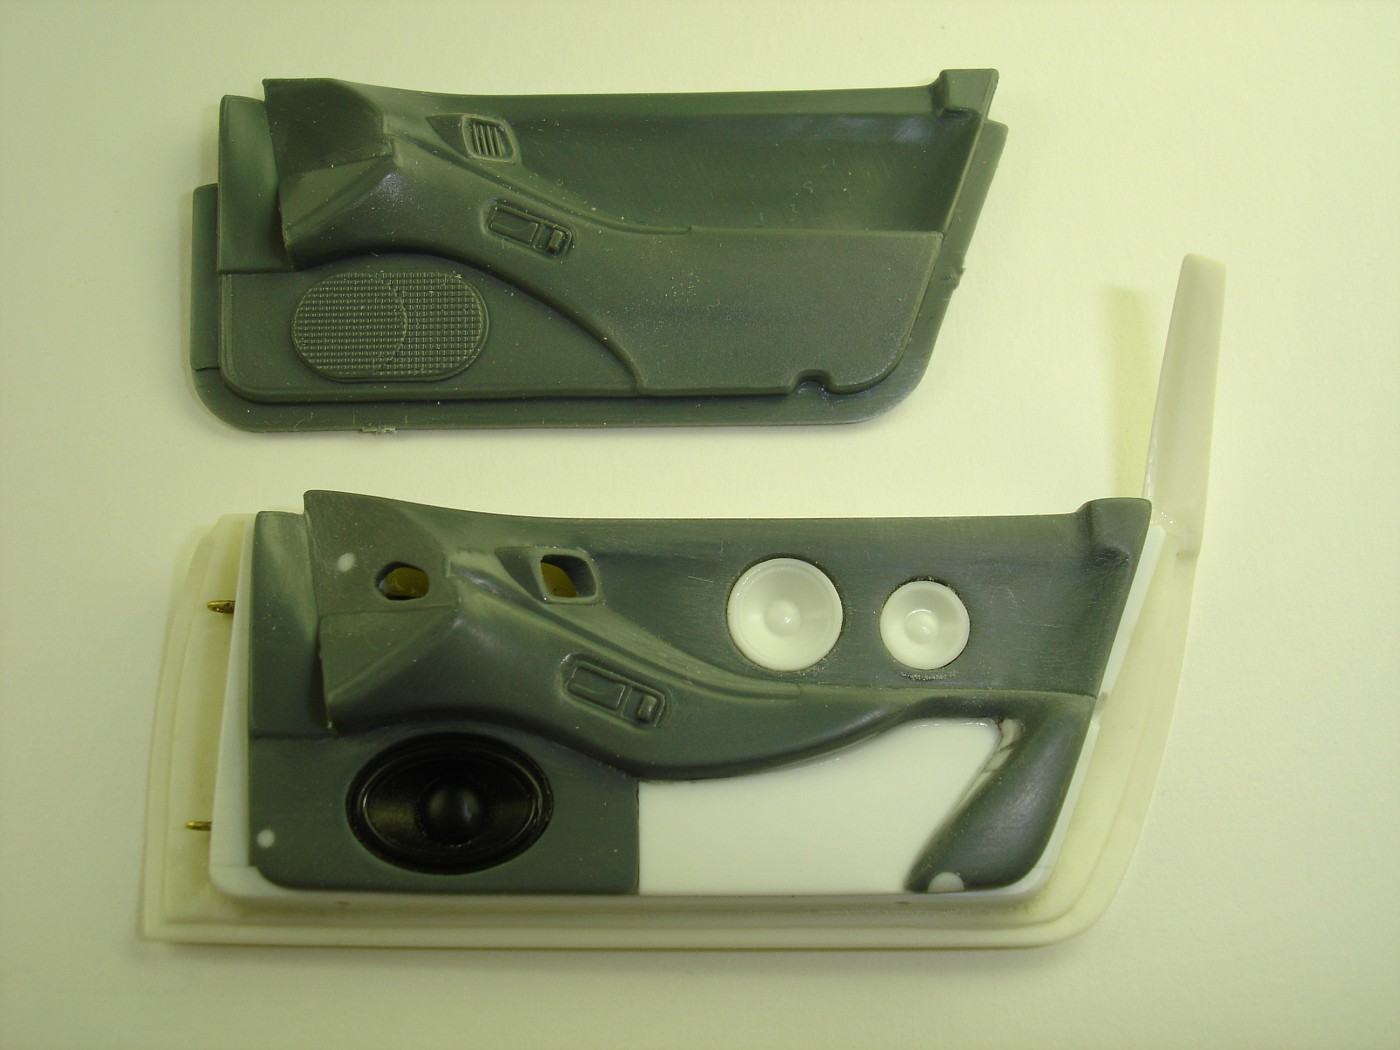 The deep recess in the door panel was made to clear the roll cage as seen below. 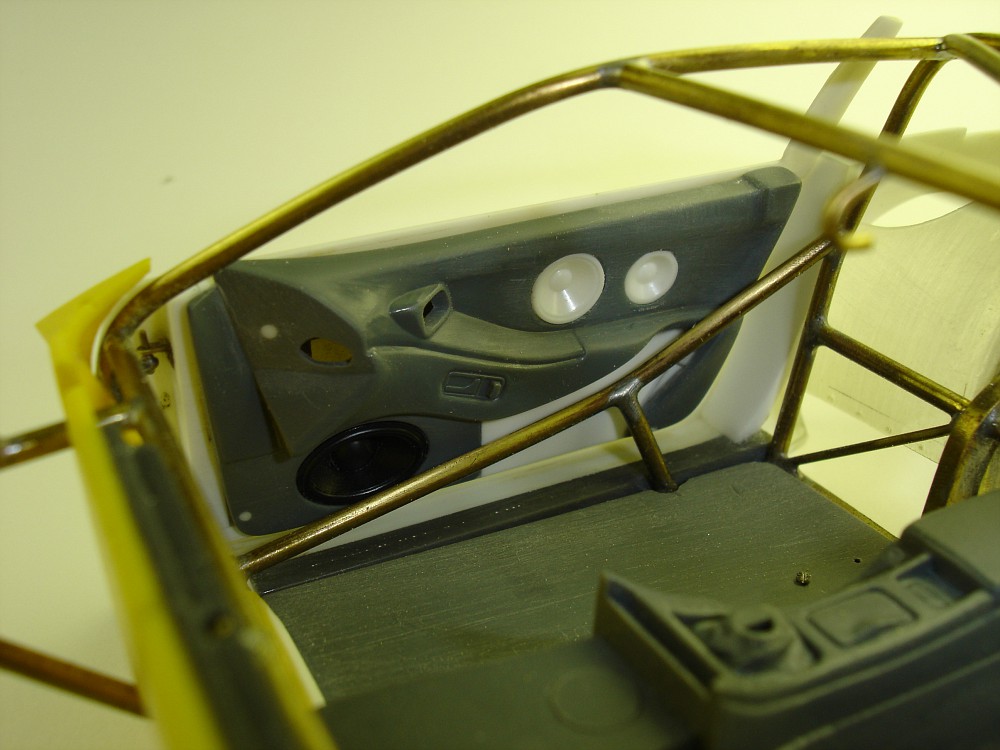 Now after spending 3 nights on this, I need to do the other door. Let me know what you think. Later ...... |
|
|
|
Post by z24dude on May 31, 2012 10:52:39 GMT -5
Who would actually be able to hear the radio in a street machine like this? The sound of the engine would be music to my ears!! ;D
|
|
|
|
Post by zbuckster on May 31, 2012 11:09:43 GMT -5
When I first saw the photos I didn't like the 2 round speakers all that much. But then when I got to the picture of the door installed I think it looks perfect as is. I would leave the two round speakers.
|
|
|
|
Post by Gary Kulchock on May 31, 2012 12:51:52 GMT -5
Who would actually be able to hear the radio in a street machine like this? The sound of the engine would be music to my ears!! ;D After you Cruzzzzz to where your hangin' out, you can crank up the stereo. I can feel it. So ..... in or out? |
|
|
|
Post by The Mad Modeller on May 31, 2012 20:11:54 GMT -5
Very nice work.
|
|
|
|
Post by z24dude on Jun 1, 2012 12:47:05 GMT -5
Leave em in, need some music to dance with the chicks at that wild beach party!!  |
|

