erik
Newbie

Posts: 20
|
Post by erik on Jan 24, 2012 8:20:22 GMT -5
WOW! Not sure what else to say!
|
|
|
|
Post by zbuckster on Jan 24, 2012 11:59:51 GMT -5
The detail is looking good. Nice work.
|
|
|
|
Post by z24dude on Jan 24, 2012 15:52:34 GMT -5
Lookin good, love the detail pics you are posting.
|
|
|
|
Post by Nacho Z on Jan 27, 2012 7:05:14 GMT -5
|
|
|
|
Post by zbuckster on Jan 27, 2012 12:19:26 GMT -5
Very nice detail. Yes I am enjoying this very much. This OTB is well written and the photo's are top shelf.
|
|
|
|
Post by Nacho Z on Jan 27, 2012 16:12:32 GMT -5
Very nice detail. Yes I am enjoying this very much. This OTB is well written and the photo's are top shelf. Thanks Buck! For me personally, most times, I find the journey more interesting than the final model, so that is how I tend to post my builds. I also realize there is an "in-progress" section here but I like to be able to see everything in one place. |
|
|
|
Post by zbuckster on Jan 28, 2012 11:35:04 GMT -5
Great detailing. It just gets better with each update.
|
|
|
|
Post by racerx1964 on Feb 10, 2012 23:15:51 GMT -5
Fantastic work. I'll be looking forward to future updates. My hats off to ya.
|
|
|
|
Post by The Mad Modeller on Feb 12, 2012 14:36:55 GMT -5
Awesome work John. What detail in this build,
|
|
|
|
Post by Nacho Z on Feb 14, 2012 17:47:38 GMT -5
Just a little something to post in between major sub-assemblies. Here is something I have learned from this build. When adding detail that is not in the kit, not only do you have to plan how to add the detail, (i.e. braided lines, PE, turned aluminum, etc), you also have to plan on where it goes, will it fit, will it interfere with other parts, etc. Case in point. I wanted to add some simple wiring and plumbing to the instrument cluster. That was fairly easy. But now, where do they go and how do they get there? I had to add the body cowling to the interior tub. Then I had to add the body panel on top of the cowling. But before I could do that I had to temporarily assemble the body panel pieces. When it was all put together, I could finally see where I needed to drill a hole in the cowling to drop the wires and plumbing through. Hope that made sense. I apologize for the quality of some of the pictures. Some of them are old, paper prints that were scanned.   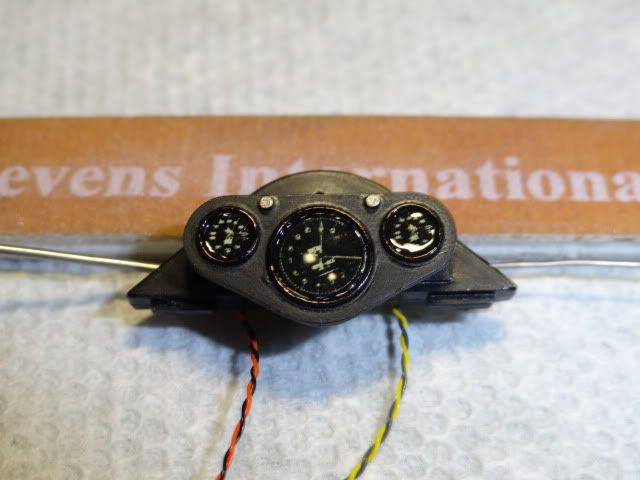 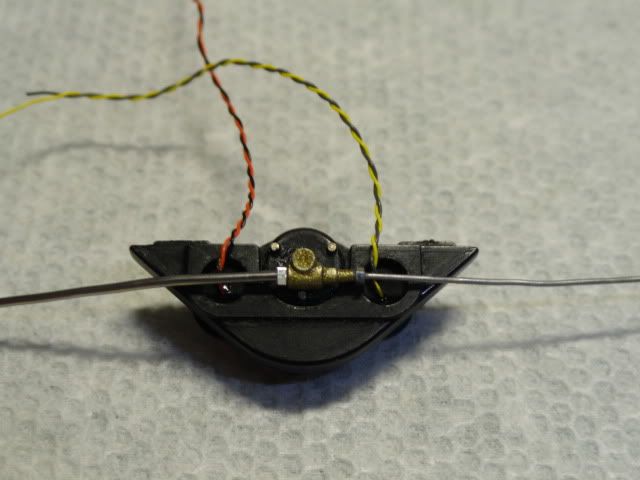 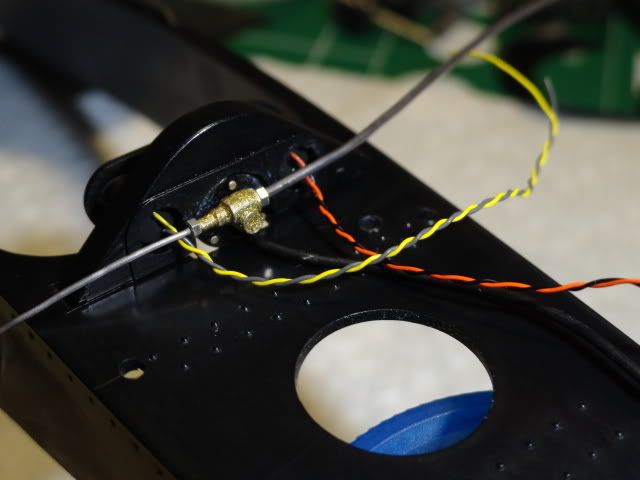 |
|
|
|
Post by plasticcrafter on Feb 14, 2012 18:58:43 GMT -5
|
|
|
|
Post by ferrarichip on Feb 16, 2012 22:05:56 GMT -5
Lookin' good John, can't wait to see more.
|
|
|
|
Post by Nacho Z on Feb 20, 2012 5:26:22 GMT -5
Thought I would give you a quick update. I have been working on a lot of smaller sub-assemblies. This is very time consuming  . Lots of seam cleaning, sanding and filing. I have also been doing work on body pieces. I am surprised at the poor fit of the body panel pieces. I am having to use a lot of filler. One good thing about working on multiple sub-assemblies is that all of the sudden, (or so it seems), things just come together and you've got a nice, big piece of the model completed ;D. For example:  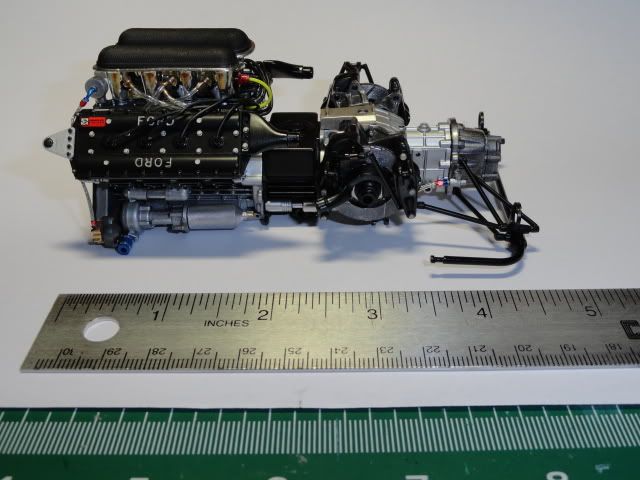 The engine and gearbox are not complete. I still have a fair bit of plumbing to add. There is a lot of plumbing to do once the engine and gearbox are added to the main tub. |
|
|
|
Post by zbuckster on Feb 20, 2012 12:39:10 GMT -5
That is a sweet looking powertrain. Nice workmanship.
|
|
|
|
Post by 68chevy on Feb 20, 2012 20:33:49 GMT -5
John how did I miss this one till now this is awesome the detail work is in Incredible I love it. It's nice clean work Great job man.
|
|
|
|
Post by Gary Kulchock on Feb 20, 2012 22:50:12 GMT -5
Sweet john. Can you bring it with you Sunday? Thanks!
|
|
|
|
Post by ronr on Mar 3, 2012 22:36:48 GMT -5
Cool!
|
|
|
|
Post by Nacho Z on Feb 12, 2013 21:23:12 GMT -5
FAIR WARNING!! The Lotus is back on the bench!  ;D So here it is, another year gone by. If you have read the previous posts you know I will go like gang busters for a couple of months and then just kind of fade away. I have every intention of finishing this one this year. I am much further along then I thought I was. Over the next few days I will try my best to post some more WIP pictures. Looking over the last three pages I see I have been kind of random in my picture posting. We'll see if I can do better.
|
|
|
|
Post by Nacho Z on Feb 14, 2013 6:34:52 GMT -5
I'll call this post "fun with Radio Shack wire". I have used two different sized wire for two different parts. As with the front, the kit supplied rear springs looked too small to me. I used the kit spring to select the correct sized drill bit and made my own springs. The new springs are also the correct color. 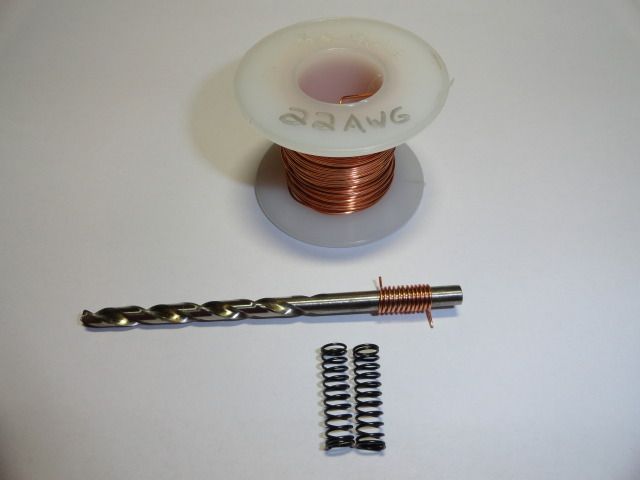 Next up was ducting. Tamiya gives you two spring like pieces that are flexible. The problem I encountered is they were undersized, diameter wise, and they were very unruly. Think of a Slinky. I thought I would try to make my own. Once again I selected the appropriate sized drill bit that would allow the duct to fit over the fitting. I made them long enough so that I could make smooth curves and keep the coils fairly close together.  After I got the duct work in place I made a mixture of white glue and water. Now here is the part I just don't remember. I know I tried to "tint" the mixture with the shade of gray I wanted. What I don't remember is how it worked out. I am pretty sure the color took and mixed in evenly. (Your results may vary). I brushed the mixture on the duct work. Some of the wider spaces took several applications. This is how both items turned out. 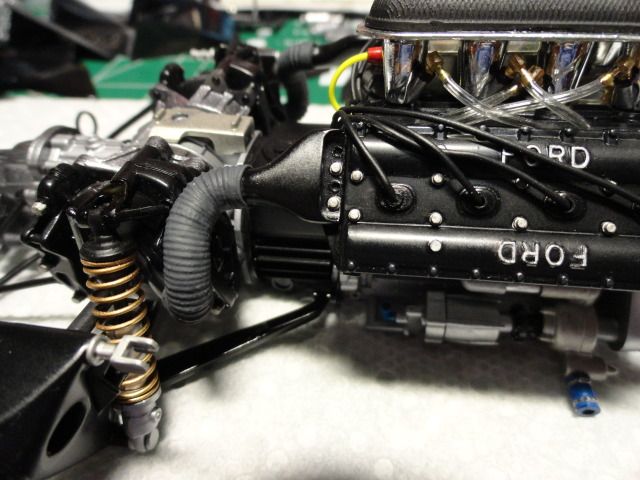 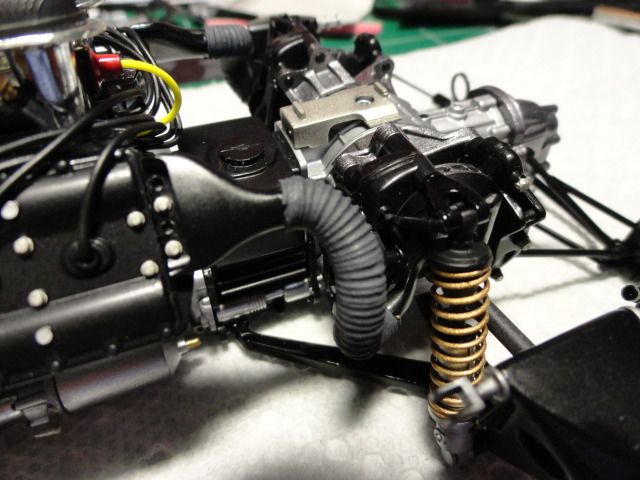 |
|
|
|
Post by Gary Kulchock on Feb 14, 2013 8:27:36 GMT -5
You do great work John. Nice attention to detail.  |
|
|
|
Post by halfpint33 on Feb 14, 2013 18:00:52 GMT -5
Outstanding work John.
|
|
|
|
Post by Nacho Z on Feb 20, 2013 6:35:27 GMT -5
|
|
|
|
Post by Gary Kulchock on Feb 20, 2013 20:46:57 GMT -5
Nice John. Good to see you doing scratch-building.  |
|
|
|
Post by Nacho Z on Feb 26, 2013 6:35:34 GMT -5
|
|
|
|
Post by fireguy14 on Mar 1, 2013 5:40:11 GMT -5
Nice work John! Really like this car, can't wait to see this one finished. Going back to your duct work, I do like how you pulled that together. Have you ever tried using heat shrink tubing over the coils?
|
|
|
|
Post by Nacho Z on Mar 5, 2013 6:20:33 GMT -5
Thanks Sully! I have read about using heat shrink tubing but have never tried it. I didn't have any tubing. Using the glue method, I was able to get the color I wanted and I won't have to worry about it, (the paint), flaking off.
|
|
|
|
Post by Nacho Z on Mar 5, 2013 6:39:10 GMT -5
|
|
|
|
Post by Nacho Z on Mar 8, 2013 6:41:57 GMT -5
A little update for this Friday. These are the wing uprights. As you can see they have some pretty wicked ejector pin marks. I use a trick that Gary Kulchock showed me. I use super glue and accelerator for filling these. It works great! The super glue puddles up in the ejector pin mark and fills it pefectly. I put on the accelerator and give it just a minute to set and sand the super glue. 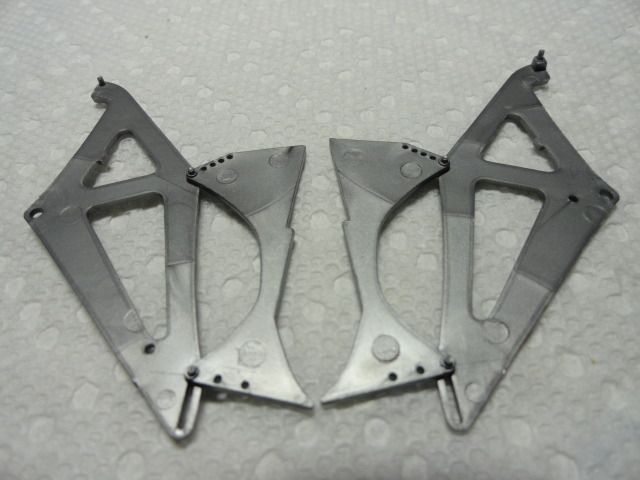 After a little elbow grease they came out like this.  |
|
|
|
Post by Gary Kulchock on Mar 10, 2013 21:12:20 GMT -5
Beautiful job John. I want to see this one finished,  |
|
|
|
Post by Nacho Z on Mar 16, 2013 8:10:40 GMT -5
It is time for another update. I have been making steady progress on this one. As of today I have the drive train (engine and tranny / gear box) just about wrapped up. As I have mentioned before, I have more work done than the pictures show. First up is a tip for you. Many of you may already do this. I have found that using a Sharpie works very well to add color to A/N fittings. IMHO, the color is just right and it takes just a few seconds to do. I am happy with the red but have not found a blue that I am happy with. On the plus side it is fast and does not build up and flake off like paint does. On the negative side is it does wear off easily. But again, a few swipes with the marker and you are back in business. 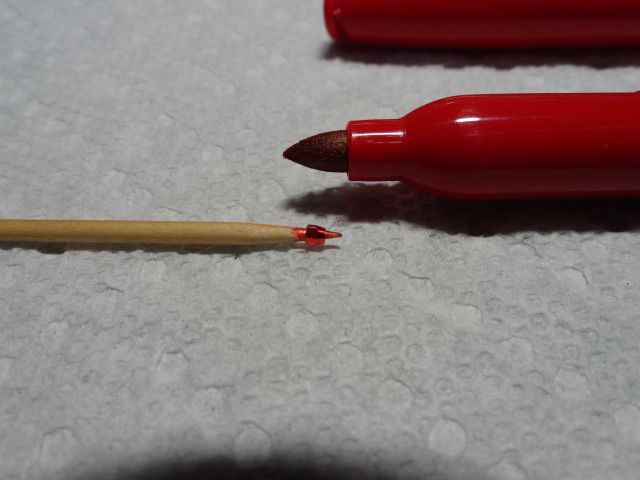 As I said in my last post here are pictures of the installed exhaust. I am not happy with the fit of the pipes into the collector. I tried multiple times but could never get all four pipes to fit perfectly. Interestingly both sides fit the same way. I have noticed that I have worn off the "FORD" paint on the valve covers from all of the handling. It will be touched up. 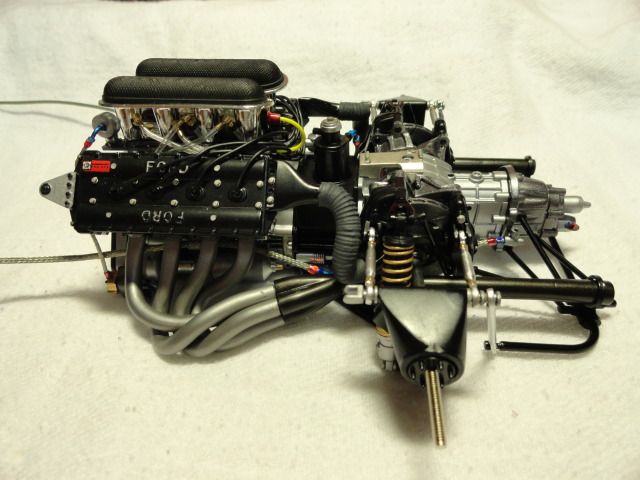 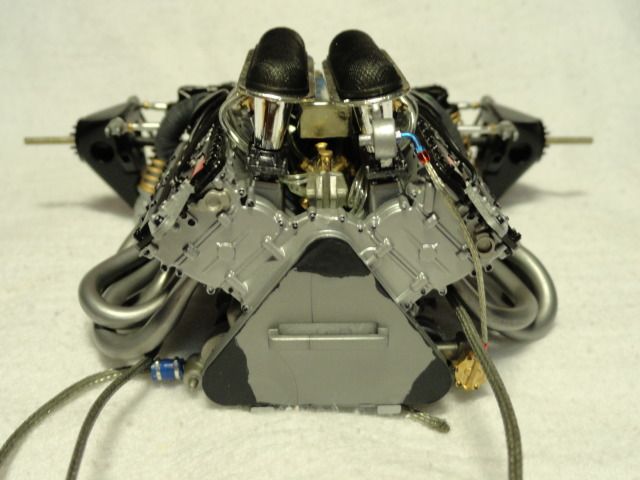  |
|

