|
|
Post by Nacho Z on Mar 18, 2013 17:50:38 GMT -5
A little update for this Friday. These are the wing uprights. As you can see they have some pretty wicked ejector pin marks. I use a trick that Gary Kulchock showed me. I use super glue and accelerator for filling these. It works great! The super glue puddles up in the ejector pin mark and fills it pefectly. I put on the accelerator and give it just a minute to set and sand the super glue. 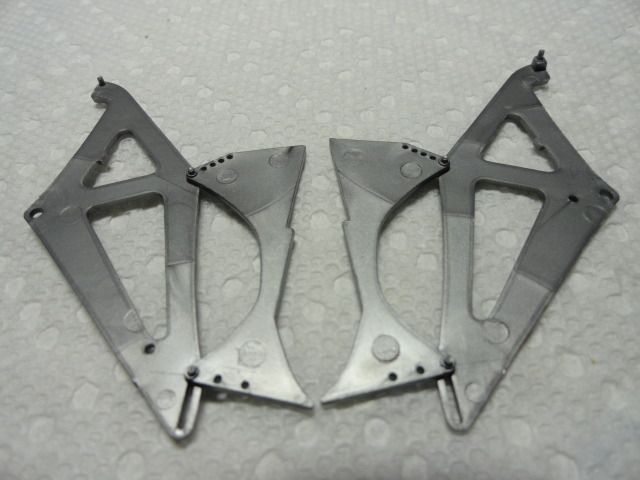 After a little elbow grease they came out like this.  Bad news. I was installing the rear wing uprights and snapped one in half. Tamiya's tolerances are so tight that once I got primer and paint on both it was too tight. I had just test fitted everything and I knew I had to get it very close in place on the first shot.....I didn't  I tried to move it forward just a bit but the super glue must have set and I snapped it right in half  |
|
|
|
Post by z24dude on Mar 20, 2013 10:33:56 GMT -5
That sucks.
|
|
|
|
Post by Nacho Z on Mar 20, 2013 15:46:47 GMT -5
Here is a quick mock-up. Just wanted to see what she is going to look like. I was checking to see how level the rear wing was. This thing is big!!  |
|
|
|
Post by Gary Kulchock on Mar 20, 2013 19:45:57 GMT -5
Moving right along John, with great results.  |
|
|
|
Post by Nacho Z on Mar 20, 2013 20:15:49 GMT -5
I can't believe it....  When the upright broke off, (see earlier post), it scuffed the underside of the rear wing. It also dinged up the decal. Tonight I pulled out the rear wing and buffed out the scuff. I then grabbed my bottle of Novus #2 and shook it up. As I did this the bottle slipped out of my hand, (with great force I might add), and landed right on the wing. It cracked the paint at the joint between the two pieces that make up the wing. WTH? It also chipped the paint. I touched up the paint but it looks like crap. I'll figure something out. I can't believe it....  |
|
|
|
Post by harron68 on Mar 20, 2013 21:40:38 GMT -5
The 1/12 Tamiya kits were, and still are, pricey but they ARE the best in detail. You are doing a superior job and I appreciate all the pix, thanks!
|
|
|
|
Post by Nacho Z on Mar 31, 2013 10:10:03 GMT -5
I will show you a little work on the interior. This was done a while ago. Using pictures in one of my reference magazines I tried to add this feature. There is a "blister" on the right hand side of the c o c k pit, (I have to put the spaces in the word c o c k pit, it won't let me post it the normal way), for the driver to shift. I tried to replicate the frame work around the blister. It is by no means perfect but it sure looks a lot better than nothing. I traced the opening and transferred that to a sheet of styrene. I cut out the shape and filed the inside and outside shape as close to the opening as I could. Please note that none of the ejector pin marks will be seen when the model is assembled.  Time for a little masking. I may have said it before but masking is one of my least favorite things to do.  I taped a ruler to the cowling to try to get the spacing of the rivets right. 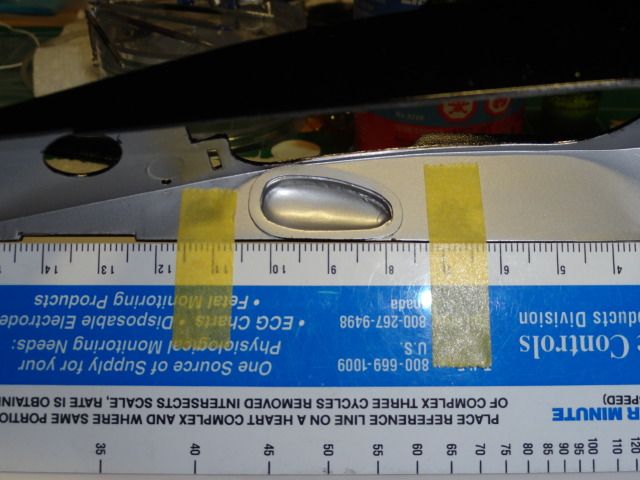 The one thing about using PE is that some of the items are just sooooo small they are nearly impossible to use.  Here is the final result. Of course the pictures are magnified vs. the real thing and you can see where I did not get the shape exactly right. I can assure you to the naked eye it does not look that bad.  Trust me, my finger is not that big  . 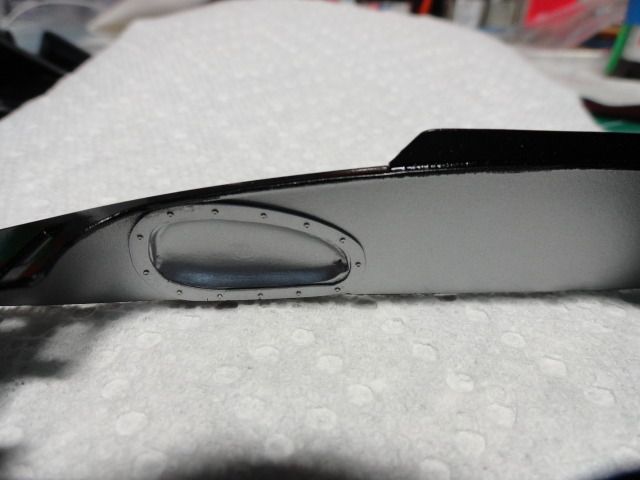 |
|
|
|
Post by fireguy14 on Apr 2, 2013 7:58:45 GMT -5
That is awesome, John. I really liked the real version of this build, and am enjoying seeing this one come together. Sorry to hear about the issues with the wing, that really sux. Seems like everyone in the hobby has a very similar story, involving at least one build that just did not want to go together. Mine was the Tony Nancy rear engine dragster. Took a dive off the rear seat of my truck, then broke the wing off loading it up to go to a show, rebuilt it in the motel the night before, then broke it off AGAIN the next mornig loading up to head over to the show hall. Keep at it, tho. And the rivit detail looks fantastic! Even enlarged in the picture the rivits look great!
|
|
|
|
Post by Nacho Z on Apr 5, 2013 5:18:53 GMT -5
|
|
|
|
Post by Nacho Z on Apr 8, 2013 4:18:33 GMT -5
|
|
|
|
Post by fireguy14 on Apr 10, 2013 8:38:51 GMT -5
Bravo, John!!!
|
|
|
|
Post by Gary Kulchock on Apr 11, 2013 18:55:05 GMT -5
Looks good John. question for you. Silver headers and a black collector? Is this correct?   |
|
|
|
Post by Nacho Z on Apr 11, 2013 20:12:51 GMT -5
Looks good John. question for you. Silver headers and a black collector? Is this correct?   Good eyes and good catch, (kind of  ). The pictures are a little deceiving. Lighting and shadows and photo exposure all change what you're seeing versus what you will see standing next to it. One of my worries with this build, (and any build really), is painting everything one shade of silver and one shade of black. I try to use different shades within a brand, i.e. Tamiya, and different brands, i.e. Tamiya, MM, Krylon, etc. This is what I tried to do here. The exhaust pipes were painted MM Titanium. The collectors and pipes were painted Rustoleum Metallic Charcoal. Although not 100% prototypically correct, I do have photos of a relatively shiny bundle of snakes going into dark collectors. I'm sure they did not stay shiny for long  . I don't have a lot of pictures of this car's exhaust. In a few pictures the straight pipes look corroded and rusted(?) So to answer your question, I did take some modelers license and used Titanium and Metallic Charcoal. It is, to my eye, visually interesting and still close to the original. |
|
|
|
Post by Nacho Z on Feb 9, 2014 14:53:00 GMT -5
It has been close to one year since I last played with this one. I would like to finish her up this year. I would like to have her done by NNL East. Not sure if that is going to happen. I packed it up last year and stored it away. I pulled out the instructions and made a list of what needs to be finished. Here she is all packed away.  |
|
|
|
Post by harron68 on Feb 9, 2014 17:48:45 GMT -5
The 1/12th Tamiya F-1s are incredible! They also are huge and cost a pretty penny. I've never built one, but have seen the old red and white Marlboro McLaren of that era done and I have the kit I'll probably never get to. I am glad you're fulfilling the dream of a lot of builders! Thanx for sharing!
|
|
|
|
Post by wtsf150 on Feb 9, 2014 23:40:13 GMT -5
Where has this been!!!! incredible work John i too want to see this finished
Willie
|
|
|
|
Post by Nacho Z on Feb 10, 2014 20:53:49 GMT -5
Still trying to get back into this monster. I thought I would pull out some of the sub-assemblies and do a quick mock up. This thing is BIG! See the ruler on the cutting mat. She will be about 16 inches in length when complete. 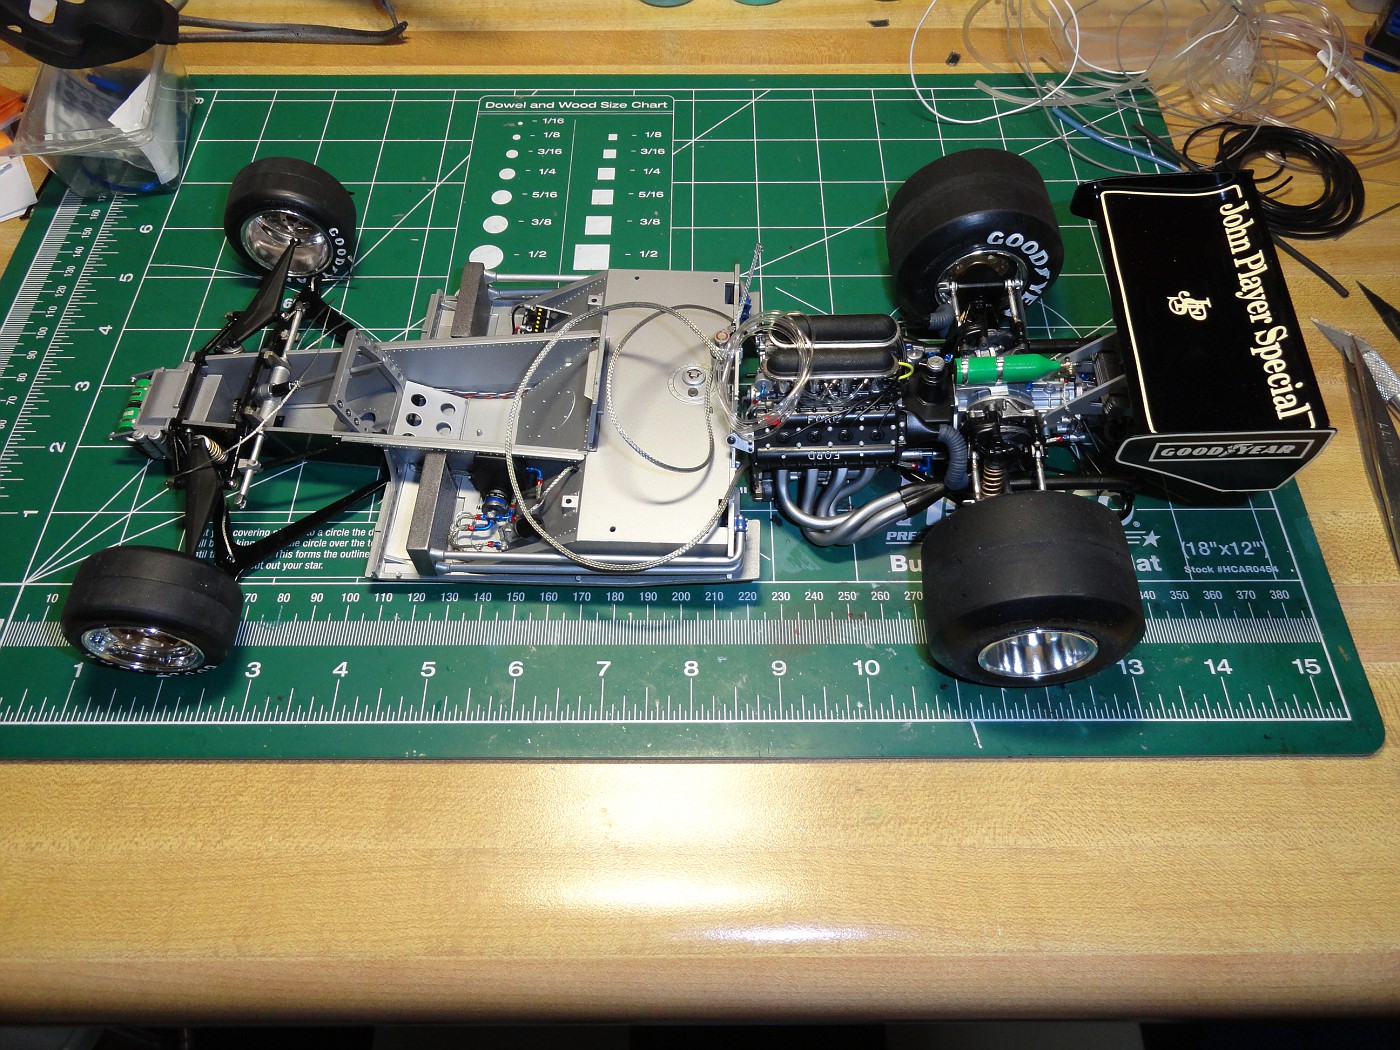 |
|
|
|
Post by ferrarichip on Feb 16, 2014 20:55:57 GMT -5
Lookin' good John, you need to get that on the table at NNL East.
|
|
dogfish7
Junior Member
  So many models.... so little time.
Posts: 119
|
Post by dogfish7 on Feb 20, 2014 16:58:25 GMT -5
Fantastic modeling going on here! 
|
|
|
|
Post by Nacho Z on Feb 26, 2014 13:58:31 GMT -5
I have been busy working on this. I am trying to get the c o c k pit finished. I have said it before in this thread and I will say it again. I do not know a lot about this car nor do I have tons of reference pictures. Most pictures you will find are of the car on the race track, not the detail shots us modelers like. Plus I don't believe they took pictures back in the day like we do now. With that being said I can find some pictures of the interior of this car but I don't know what some of the items in the pictures are. I am making my best guess as to what they do and where certain cables go. There are some cables and hoses I am just going to "loose" in the interior or chassis. This part I am showing is some type of either the rear wing or suspension adjustment. The kit part is just glued to the interior with nothing attached to it. I have found where the cable goes and will add it. The kit part is the black piece. Not very nice. (The other parts in the picture are just experiements). 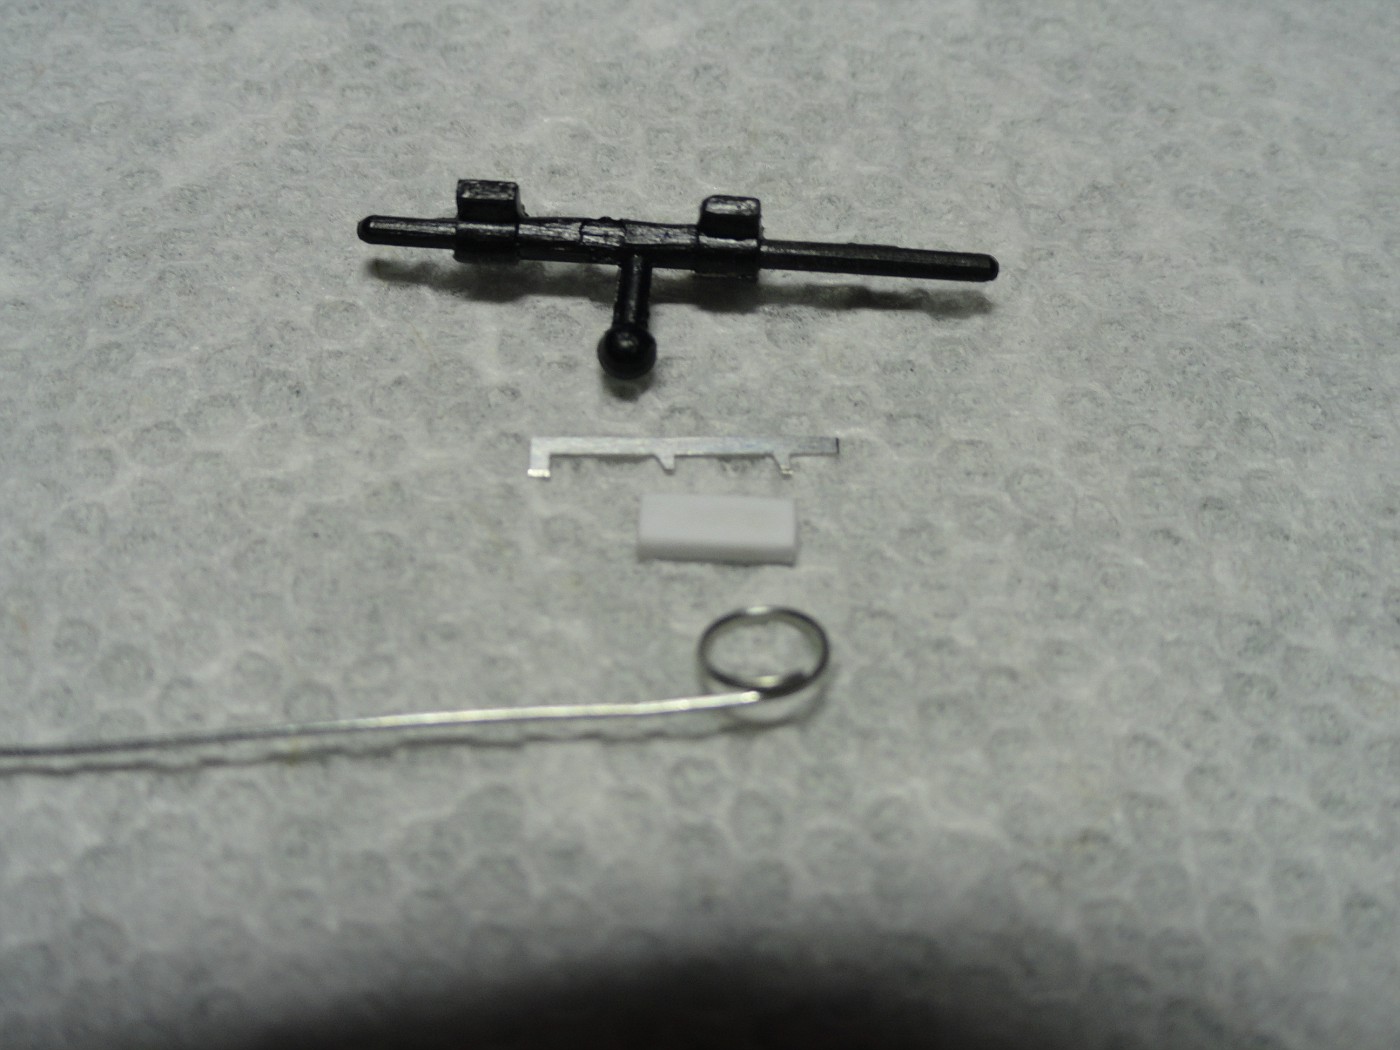 The adjuster is moved front to back and put in a "gate" much like a shifter. I made the "gate" from a left over PE runner. I also cleaned up the kit part to make it a little more presentable.  The little handle was too much like a blob so I cut it off, drilled a hole and will use a straight pin instead.  And this is what I ended up with. It is not perfect but it is a much truer representation of what is in the 1:1.  |
|
|
|
Post by harron68 on Feb 26, 2014 16:16:24 GMT -5
I think you're right on the stiffness of the suspension can be adjusted in the thingypit. While some other forms of racing allowed that, others didn't. What you've done so far is really beautiful and I hope you finally get it done. Adding the blister on the thingypit is in itself a remarkable job! Keep going!
|
|
|
|
Post by Nacho Z on Feb 27, 2014 12:18:34 GMT -5
Thanks harron68! I should clarify one thing. The blister for the shifter is a kit part. Once glued in, I had to fill the ugly seams. That is one of the main reasons for putting the framework around the blister on the interior. It covered the seam. On the outside of the body, I think I did a pretty good job. There are pictures coming shortly. I am polishing out that body part today.
|
|
|
|
Post by Nacho Z on Mar 2, 2014 16:04:09 GMT -5
Time for an update! I am still busy working on the items that will allow me to complete the c o c k pit. I will post just one picture this time. But first a little background info. about the decals. As a reminder, this is an original issue kit from 1977(?) I did not feel very confident that the kit decals would be safe to use. I found a set of Studio 27 decals and purchased those from Japan. For the most part the Studio 27 decals are a copy of the kit decals. The problem is they are not labeled as to where they go! Obviously it is easy to tell where some of the decals go but this sheet is mostly pinstriping. Just long lengths of pinstipes! So I have to look at the kit instructions, find the right kit decal part number and then match it to the Studio 27 sheet. Nothing is ever easy...hahaha. Something to keep in mind when looking at the pinstripes in the picture. These things are over a half foot long and about 1mm wide! I did my dead level best to get them straight. Actually they curve so I should say "straight and not wavy". They came out pretty well but not perfect. I did have to cut some of them in half in order to work with them. I should note that the body piece has a bulge/curve in it at the top of the side. This makes the decal look like it is drooping. It isn't. Let me know what you think! 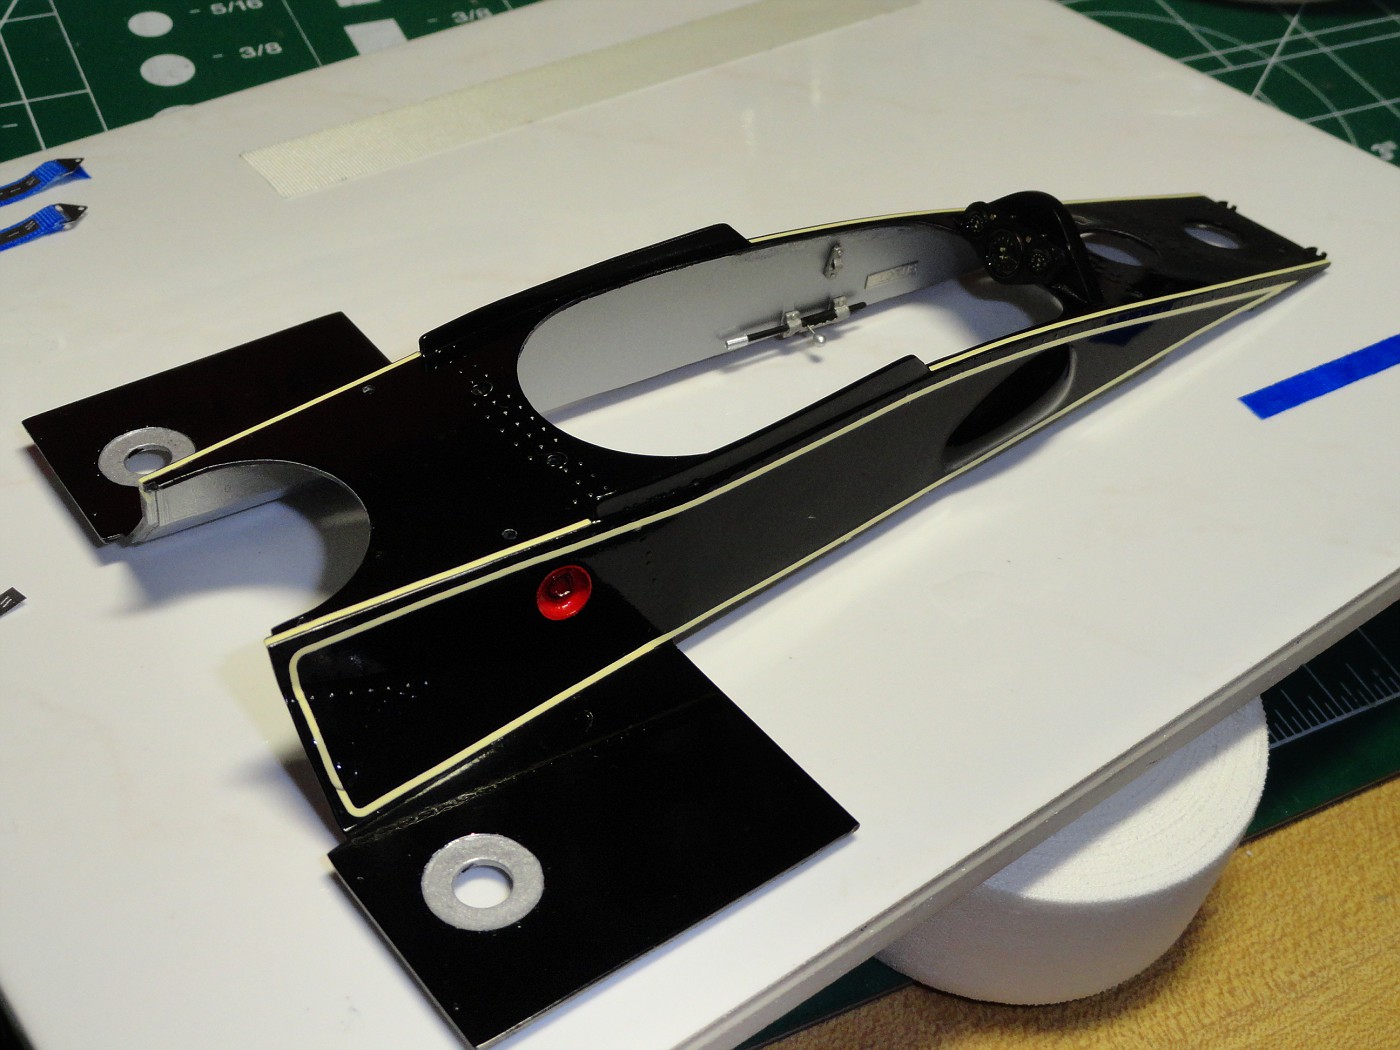 |
|
|
|
Post by harron68 on Mar 2, 2014 17:06:12 GMT -5
Flawless, very beautiful!
|
|
|
|
Post by ferrarichip on Mar 2, 2014 19:45:34 GMT -5
Looking good John, can't wait to see the seat belts!
|
|
|
|
Post by Nacho Z on Mar 3, 2014 20:35:20 GMT -5
|
|
|
|
Post by IceMan555 on Mar 3, 2014 22:56:02 GMT -5
That's looking super clean, bud!
|
|
|
|
Post by krazykarl on Mar 5, 2014 10:23:23 GMT -5
Just stunning John!!
|
|
|
|
Post by Nacho Z on Mar 5, 2014 23:09:22 GMT -5
I'm getting ready to hit another milestone in this build. I am just about ready to wrap on the interior tub, or monocoque, as I believe it is called. The main body part in the previous post is ready to glue on to the main tub. Actually I will use epoxy as the main body part has a pretty good twist in it. It does not want to sit flat on the tub. Epoxy should do the trick. Anyhow, some of the work that I have done will be covered up and I don't think anyone will ever see it. I thought I would take a picture or two to show my friends here on TMM what I'm talking about. There are three switches on the piece that surrounds the steering shaft. I wired them and added grommets. There was a wicked ejector pin mark in the tub that I missed or wasn't sure what to do with, (it was so long ago I don't remember). I covered it with a square piece of sheet and put PE bits on it to make it look like an access panel. That's my story and I'm sticking to it.....lol. I'll make another post dealing with the seat and harness. 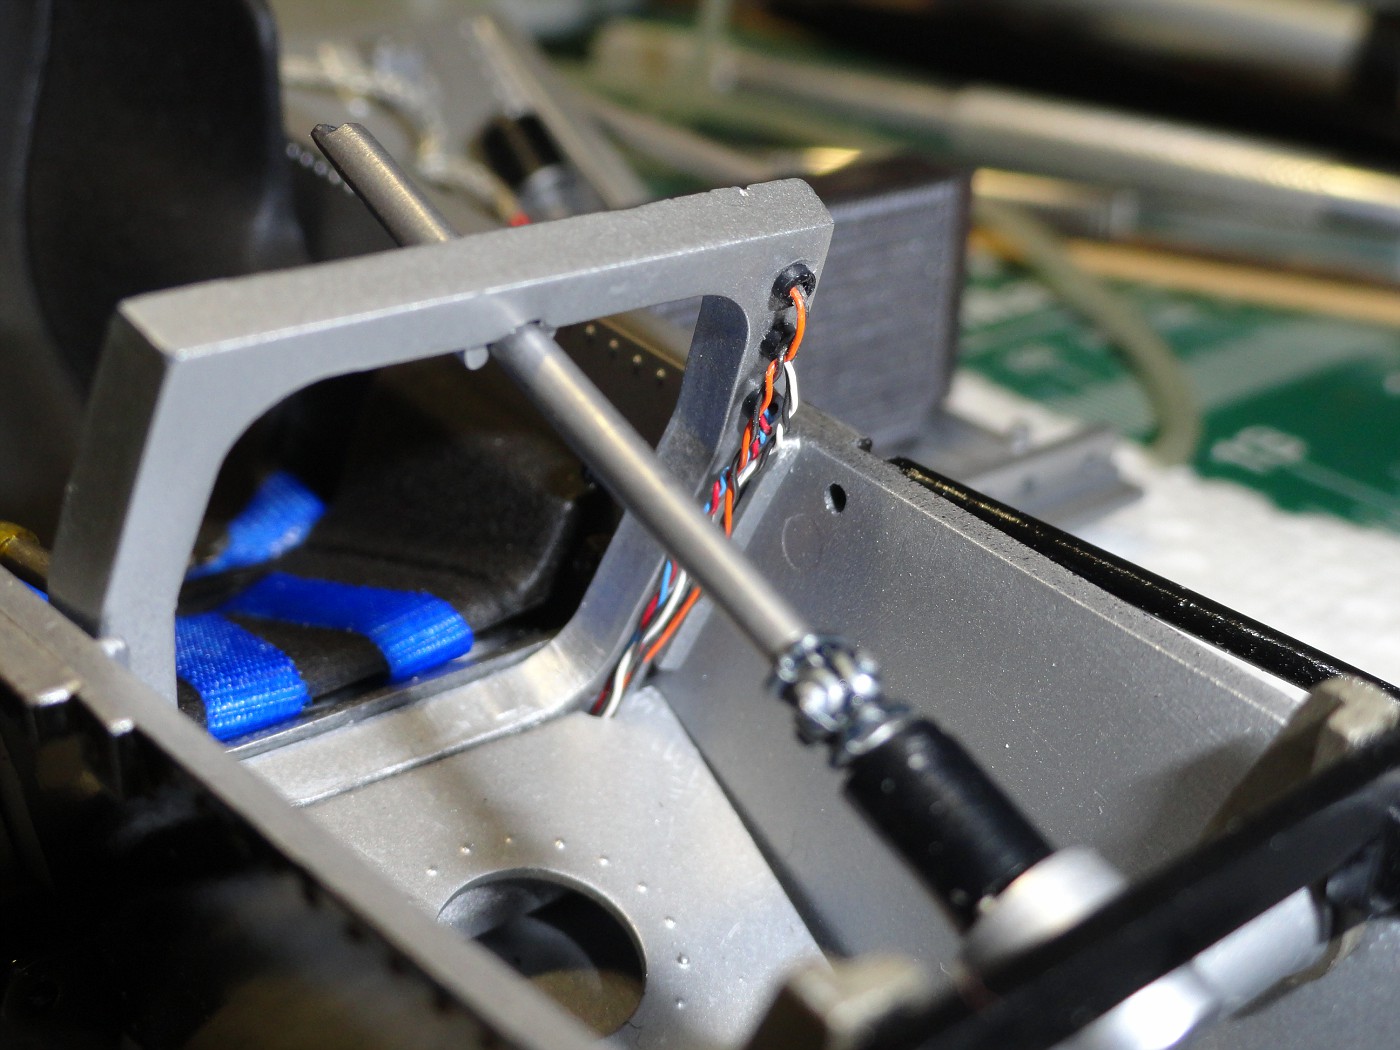   |
|
|
|
Post by harron68 on Mar 6, 2014 14:26:32 GMT -5
WOW! and WOW!! and WOW!!!!!!! Thanx for the detailed fotos and description
|
|

