|
|
Post by fireguy14 on Mar 9, 2014 7:24:27 GMT -5
John, this is just stunning!
|
|
|
|
Post by Nacho Z on Mar 9, 2014 21:43:36 GMT -5
|
|
|
|
Post by Nacho Z on Mar 10, 2014 21:11:40 GMT -5
I have a lot of vacation time to use up so I am burning a few days this week. My goal is to get the car done by NNL East which is April 26, 2014. I prepared all of these parts by sanding the botched paint jobs from last year. I gave them a good washing up and let them air dry. I was able to prime them today. First up is the botched paint job from last year. This is just one of a few things that went wrong. 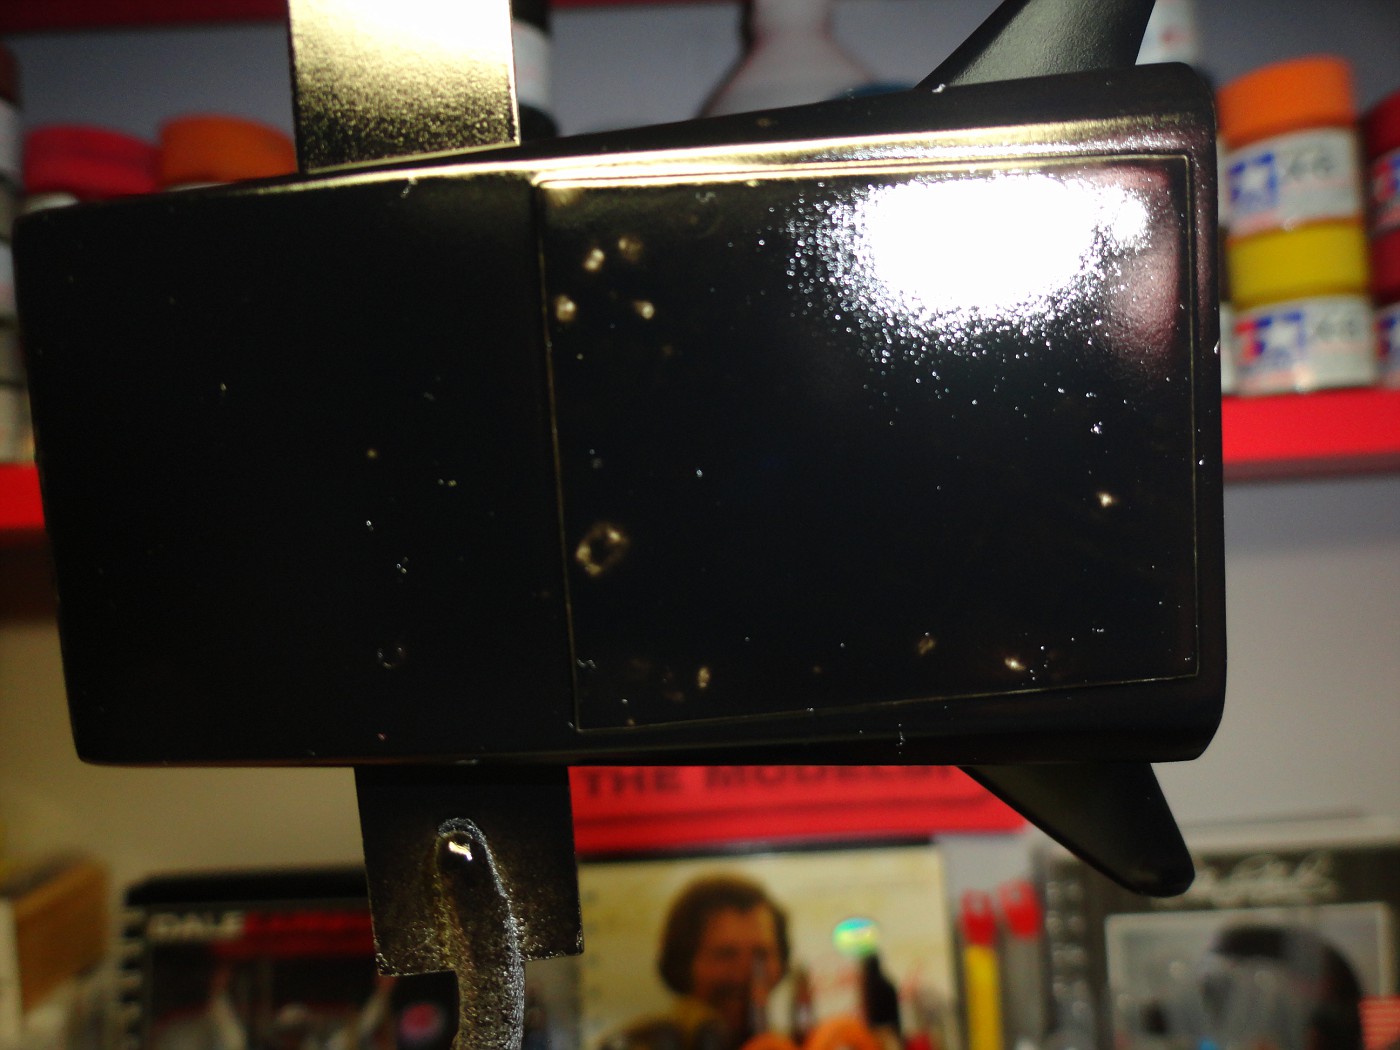 After sanding, washing and priming.  While the primer is drying I am working on another plumbing headache. I am running lines from the front radiator to the engine. Tamiya gave you black tubing to use. I wanted it to be a little more realistic. I am trying to figure out the braided line and hard line plumbing. I am just trying to figure out the proper lengths for everything.  |
|
|
|
Post by harron68 on Mar 11, 2014 14:07:26 GMT -5
WHEW, awesome! Thanx for the fotos!
|
|
|
|
Post by Nacho Z on Mar 12, 2014 17:59:05 GMT -5
Since my last post I was able to lay down three coats of Tamiya black. I did have big problems with at least two pieces. Pretty sure I will have to sand them down to bare plastic and repaint them. Sigh. All of the pieces are in the dehydrator. While I am waiting for the paint to cure I am working on the front radiator. (See my previous post). I always have trouble figuring out how long to make the braided line pieces. It is easy to get them close but not as easy to get the fittings and lines just right. But first I want to prove that I really do put my blood, sweat and tears into my models......  . (Just a small puncture wound). 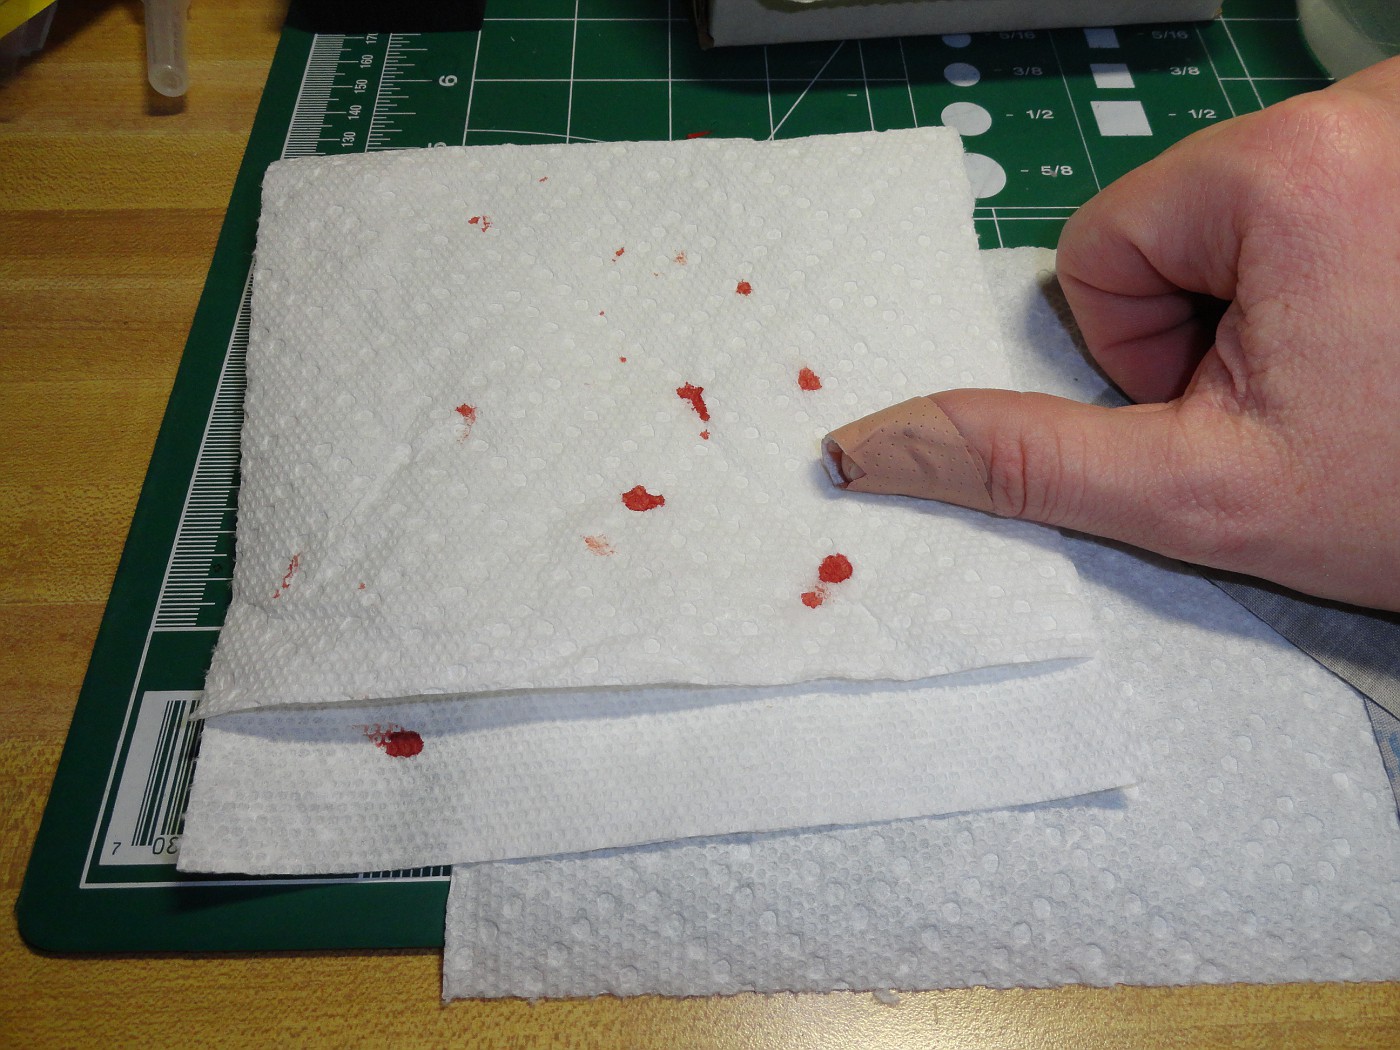 In the first picture you can see that Tamiya would have you push a piece of black vinyl tubing unto the radiator. Not gonna happen! The kit piece, (the stub), is not long enough to put the three fittings on so I had to lengthen it. I used 1.5mm rod for the extension. I sanded the stub down flat so I could join the rod to it. How to keep it lined up and straight? I used the aluminum tubing as a sleeve to keep the pieces lined up. I let the glue set up and dropped the fittings on.  I will cut the rod down to size and insert the braided line into the red compression fitting.  |
|
|
|
Post by Nacho Z on Mar 13, 2014 20:35:42 GMT -5
Seems like I am doing a nightly update. Well that is a good thing. It means I am making progress on this thing  . I was able to finish installing the front radiator and one side of the plumbing. I have great reference pictures of the front radiator and the braided line but have zero reference pictures of how the hard line is plumbed at the rear of the car. I am only going by Tamiya's instructions of where the plumbing goes. On to the pictures. First is just an overhead shot showing the entire length of the run. 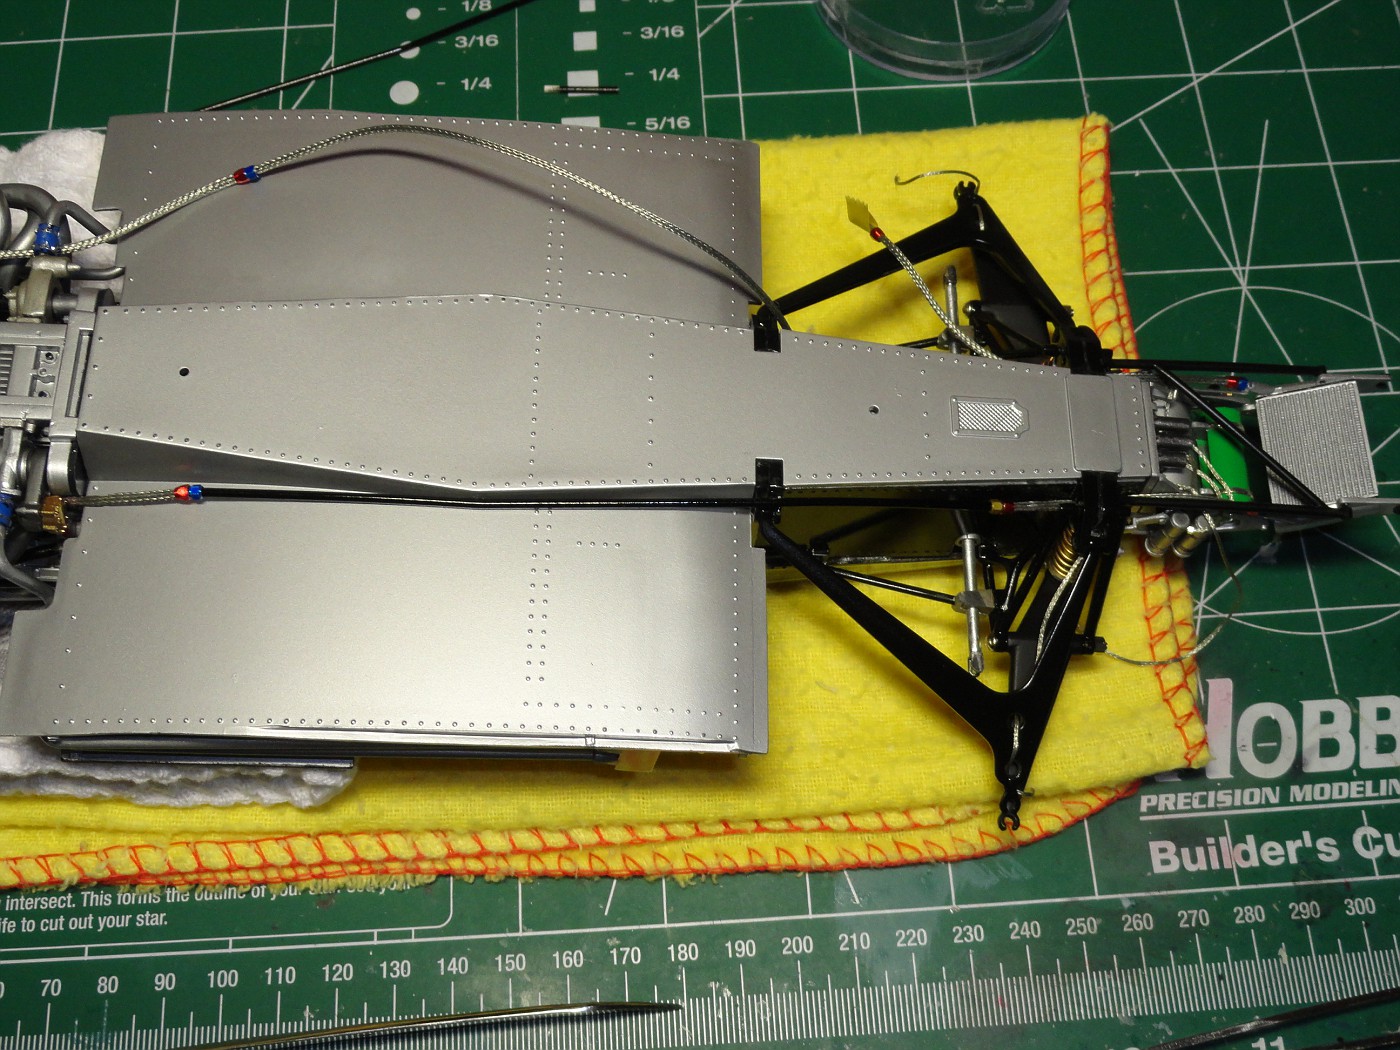 Next is a side on shot of the radiator and plumbing. It is a VERY tight fit where the braided line runs through the front suspension. There is not a lot of room to maneuver the thick line or fittings. I had to do a lot of planning and testing before I cut the braided line and rod to their final length.  And a slightly different angle and lighting.  |
|
|
|
Post by harron68 on Mar 13, 2014 21:00:01 GMT -5
Just excellent and an A+ model to add to the collection. Thanx for sharing, and in case you wondered, we've all donated blood in the cause. Ever saw into a finger? Old memories!
|
|
|
|
Post by Nacho Z on Mar 20, 2014 21:00:48 GMT -5
I am seeing light at the end of the tunnel and for the first time I don't think it is a train heading my way  . I have finished up the plumbing from the previous post and can flip this thing right-side up. I am currently just polishing out the paint of the final body parts. I have talked to the guy I am building this for and explained that I am not going to put a mirror finish on this model. I also am not going clear coat it. I have plenty of pictures of this car while it was being raced and it DID NOT have a perfect paint job. Nice? Yes. Perfect? No. Did all of the pinstriping line up on all of the body panels? Nope. Shoot, the body panels themselves did not alway line up. Nicks and scratches in the paint was common. This may sound like an excuse to do a half-arsed paint job or decaling job but it isn't. It is the way I'm going to build it. With that being said, and with the possibility of opening myself up to criticism I will show you a picture of the level of finish I am going with. Glossy with a hint of orange peel. One other thing to remember. The size of the parts in the photo are at least half what you see. The fact that the picture is zoomed in exaggerates the orange peel. 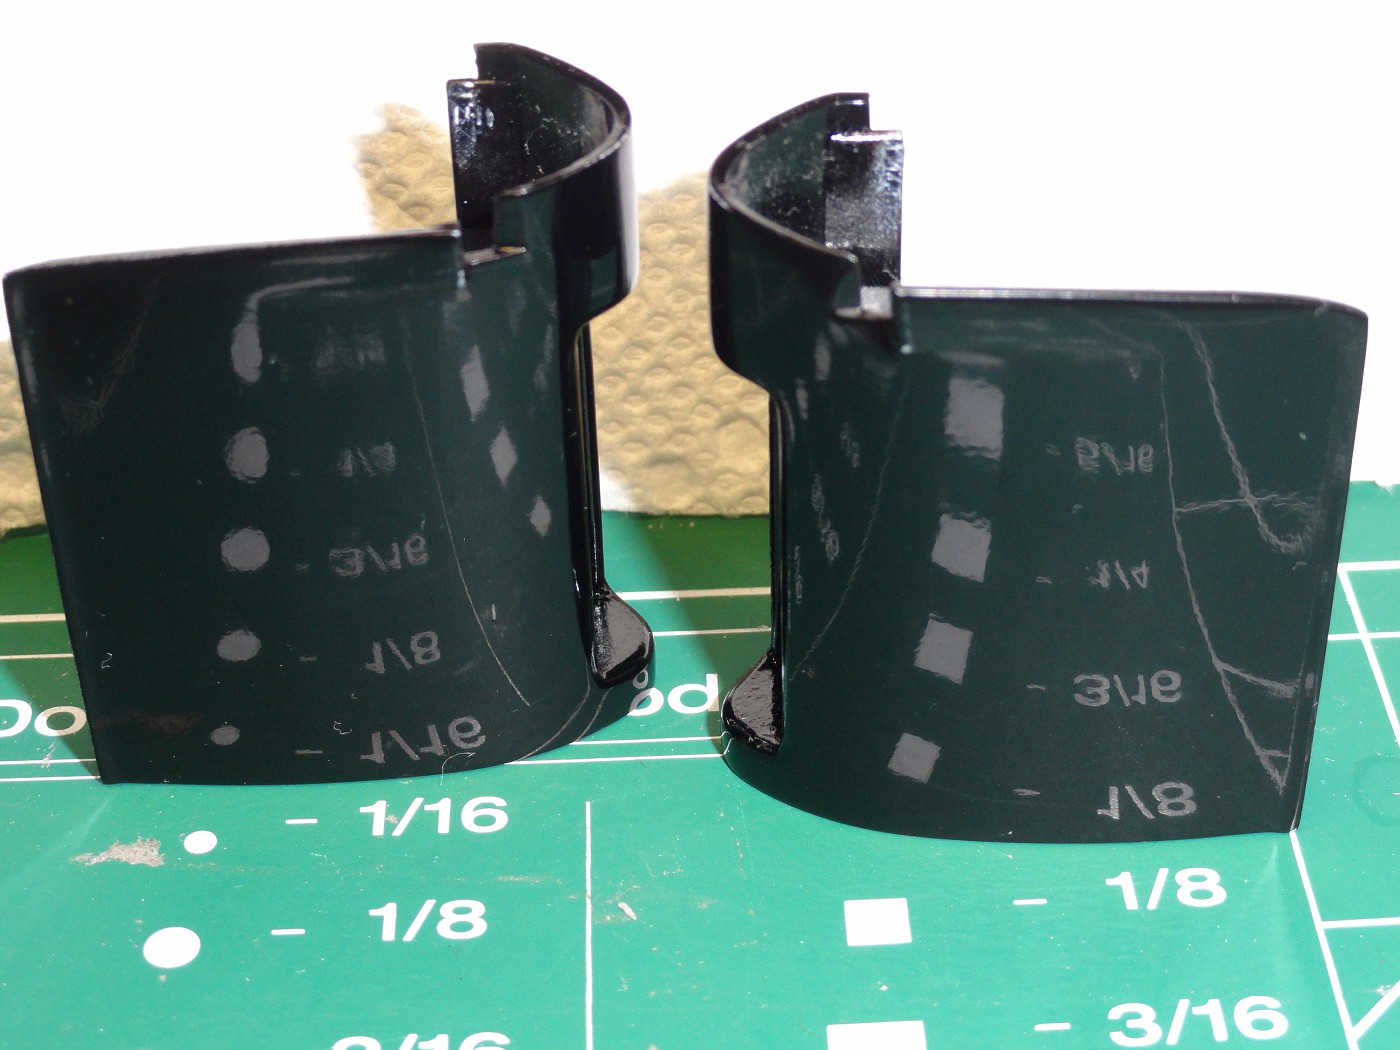 |
|
tool
Full Member
  
Posts: 448
|
Post by tool on Mar 21, 2014 15:54:30 GMT -5
wow brother this is out of this word i love it !!!!!!!!!!
|
|
|
|
Post by Nacho Z on Mar 23, 2014 11:40:46 GMT -5
Thanks for all of the nice comments guys, I really do appreciate them. This is the only board that I am posting this model on so it is nice to get feedback. I sometimes think that I post too much and too many pictures but I get pretty excited when I make progress and I want to share with others that "get it". I was able to get the front radiator ducting and the front suspension fairing on. Tamiya kits are great but they are not perfect. I had a heck of a time getting these two items to fit together. Also the fairings did not want to fit over the suspension. It took a lot of work getting it all to fit together and properly. As always, I have to clean up a few things. I also did another mock-up. Thanks for looking! First up, driver's left side is on. It is a shame that a lot of work is going to be covered up. 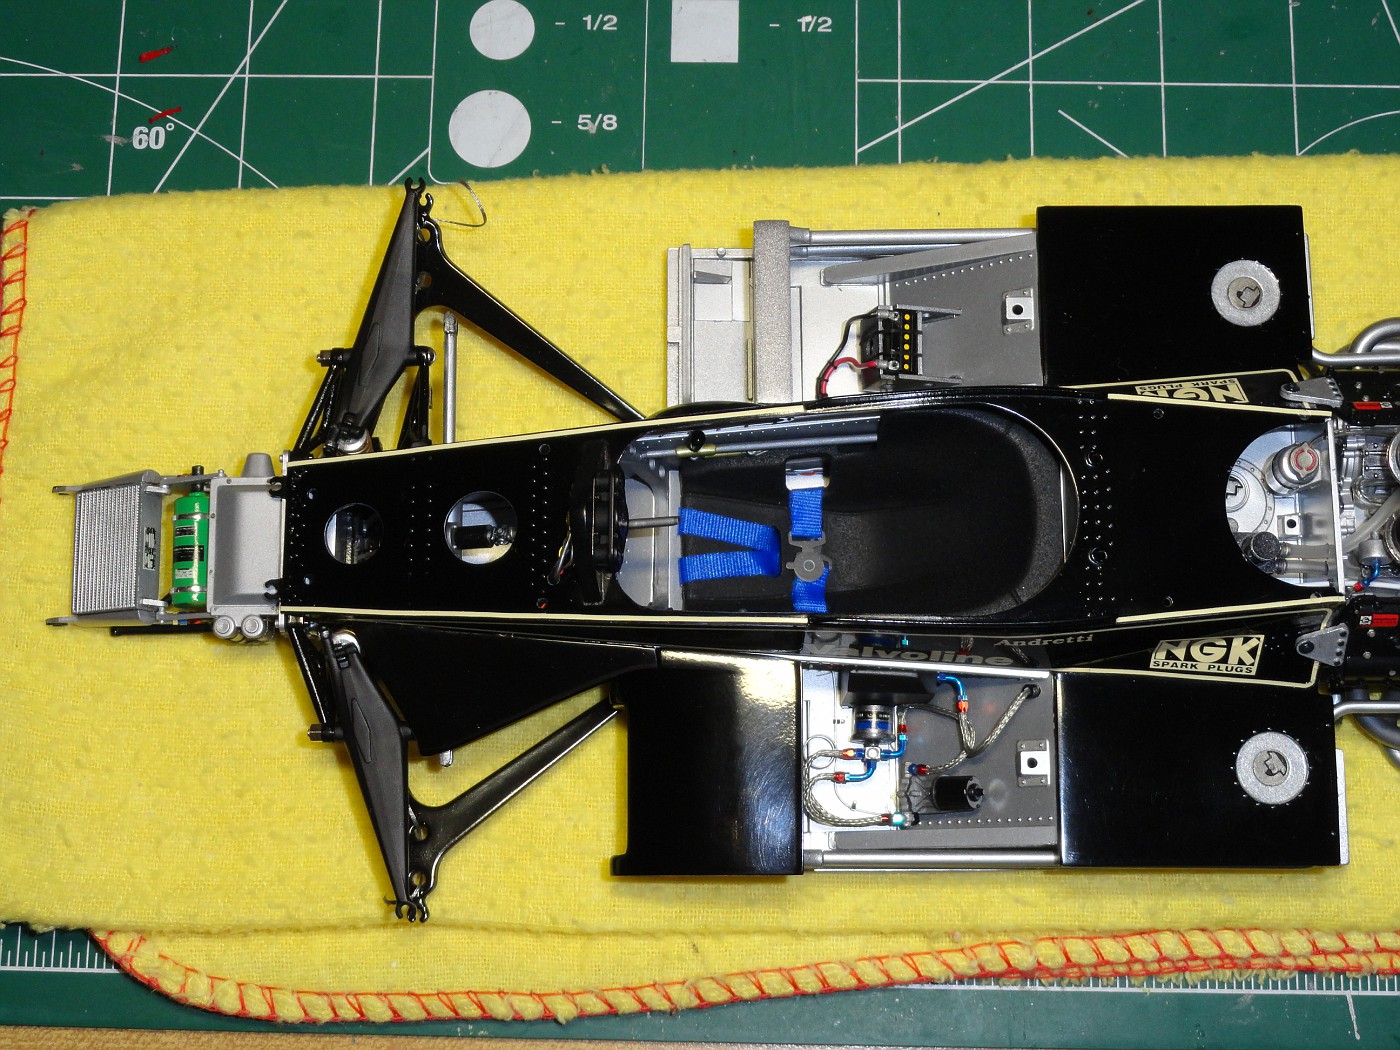 Next, driver's right side. 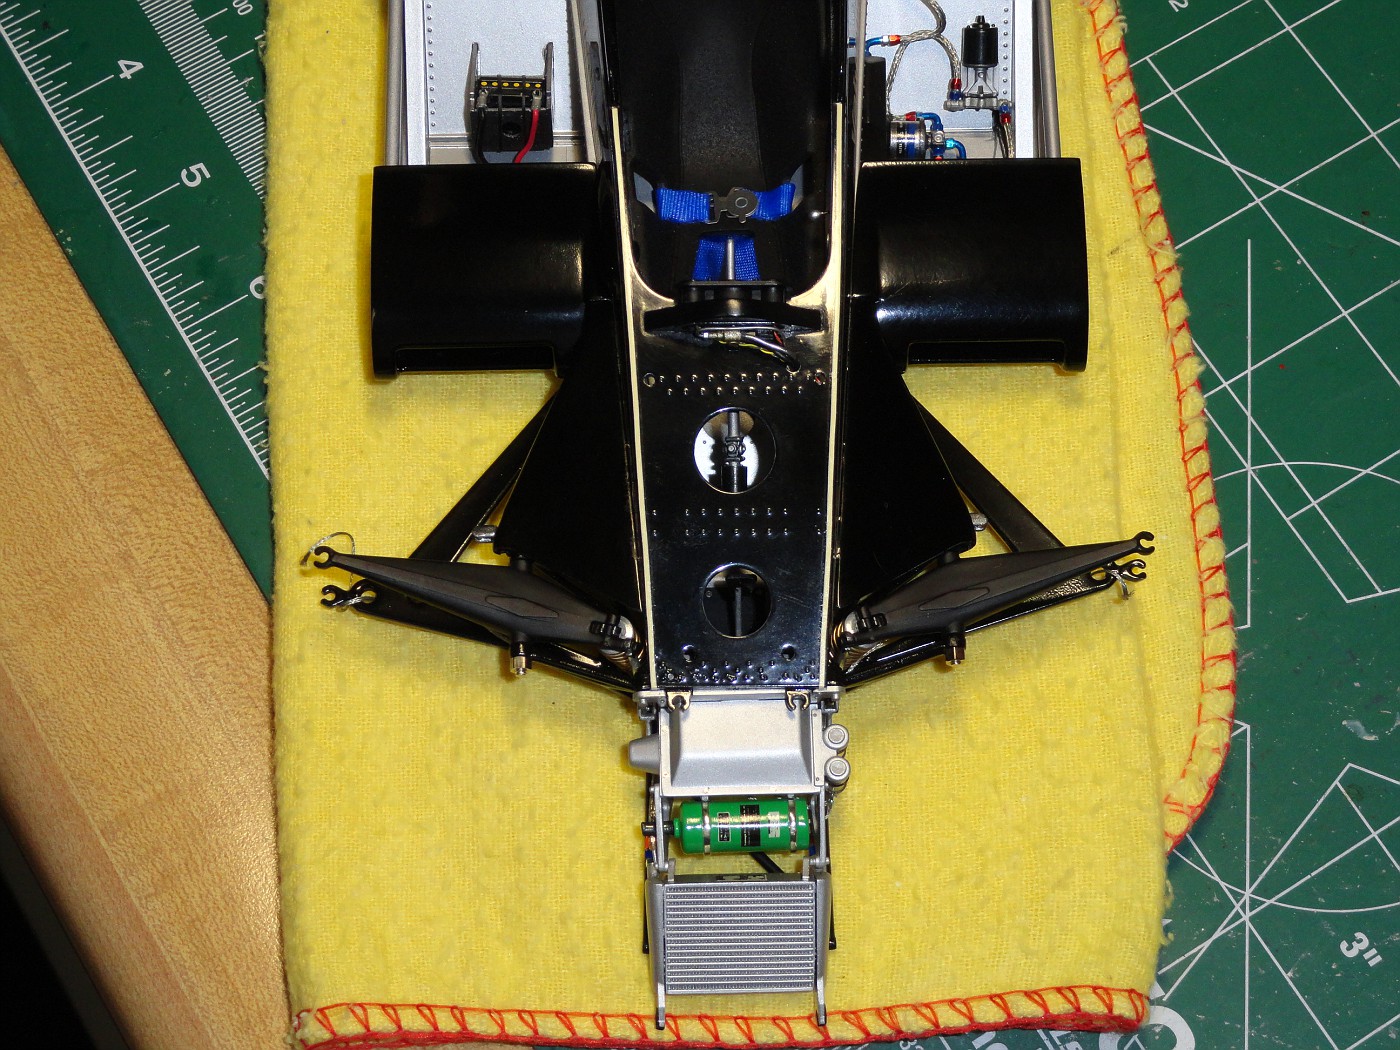 And another quick mock-up with the front cowling and engine air intake cowling.  |
|
|
|
Post by IceMan555 on Mar 23, 2014 17:06:19 GMT -5
There's no such thing as too many pictures, at least I think.
|
|
|
|
Post by Nacho Z on Mar 27, 2014 20:18:27 GMT -5
Once I had the front suspension fairings on I was able to plumb and install the front rotors, wheels and tires. There is nothing in the kit to represent the brake plumbing but I did have a couple of pictures to go by. I gave it a shot and it turned out fairly well. It is not 100% complete at the time I took these pictures but I thought I would share what I have so far. I started with #1 size fittings from Detail Master, some wire, #1 braided line that was installed at the beginning of this build some 10 years ago and lastly, a "T" that I made by soldering two pieces of brass wire together. 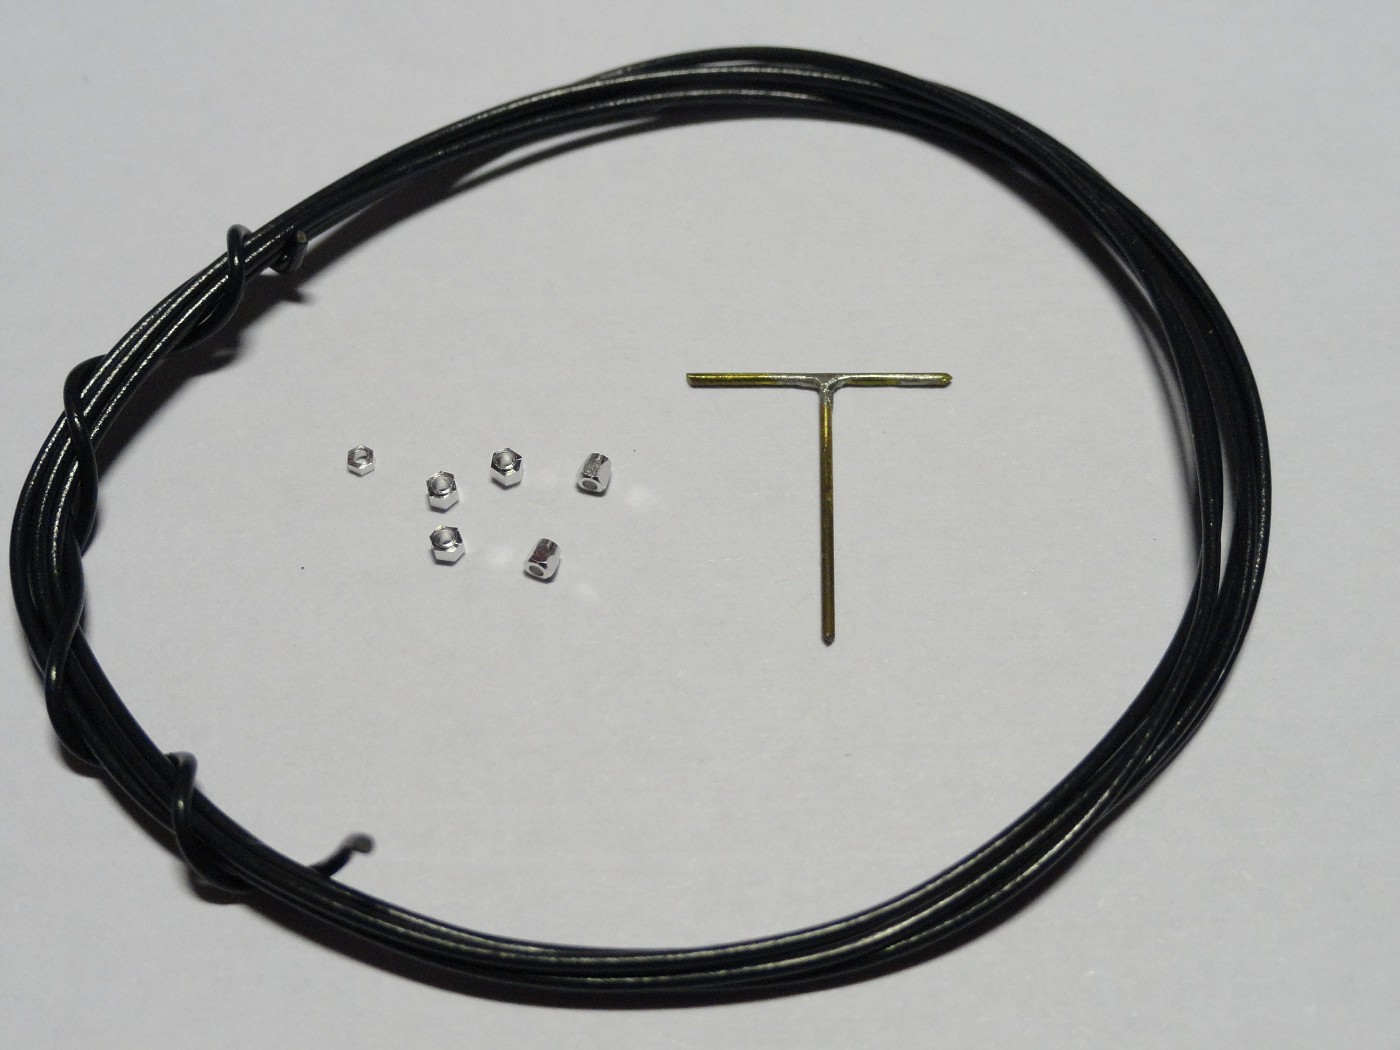 I drilled two small holes in the brake calipers. Cleaned up the brass "T", painted it silver than used a blue marker. Fittings are made gold with a marker too. I used eyeball engineering to determine the size of the "T" and cut it to size.   I installed it as it was on the 1:1. I used thread as a cable tie. I ran the thread through wax to get the fuzzies down to a minimum.  There is enough line to allow the tires to be steered.  |
|
|
|
Post by Nacho Z on Mar 30, 2014 20:20:32 GMT -5
I didn't get as much done as I wanted to this weekend.....man, where does the time go? I was able to finish up the plumbing of the front brake rotors. This was the last major hurdle for me to get over. Everything from here should be, relatively, easy sailing. I tried to get some symmetry between left and right. Not a lot of room to work and the lines and wires have a mind of their own. I think they came out fair, not great. Please keep in mind there is distortion in the first two pictures. Let me know what you think. I would appreciate any comments or suggestions! 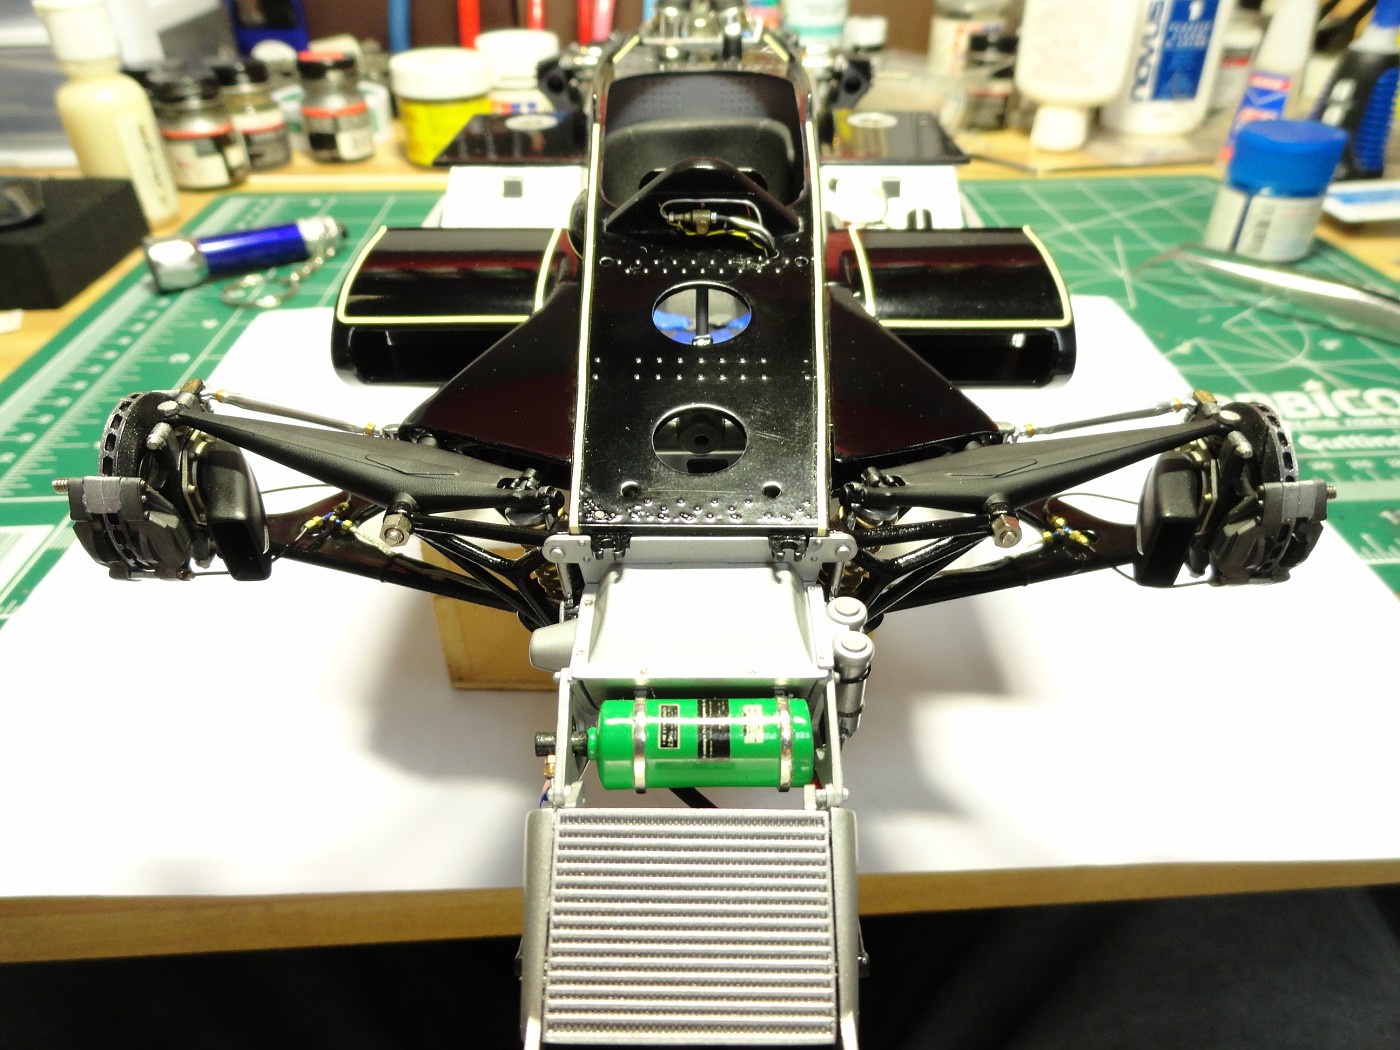   |
|
|
|
Post by harron68 on Mar 31, 2014 15:25:51 GMT -5
A shame about the painting problems, we've all been there! All the extra detailing really makes a difference. As to pin striping decals, I'm surprised Tamiya would come up short. For a premium kit, they should've done better. Best of luck on the completion!
|
|
|
|
Post by Nacho Z on Apr 6, 2014 21:44:23 GMT -5
I have hit a milestone this weekend. I now have 500.25 documented hours on this car. I am getting closer to finishing every day. The latest section getting my attention has been the nose cone. I will admit right up front that this piece has the crappiest paint job of any section on this car. I am so use to looking at it through double magnification and /or macro pictures and I see all the pits, bumps, etc in the paint. I will let you all be the judge on whether or not it is acceptable. The nose is not completed. I still need to install the mesh screen and the wing end plates. Let me say again what a huge pain in the butt it is laying down pinstripes, especially long straight runs. Uggghhhhhh! I hope you like what you see. Please leave a comment, good or bad. An extra set of eyes is always a good thing! You may notice something I totally missed. 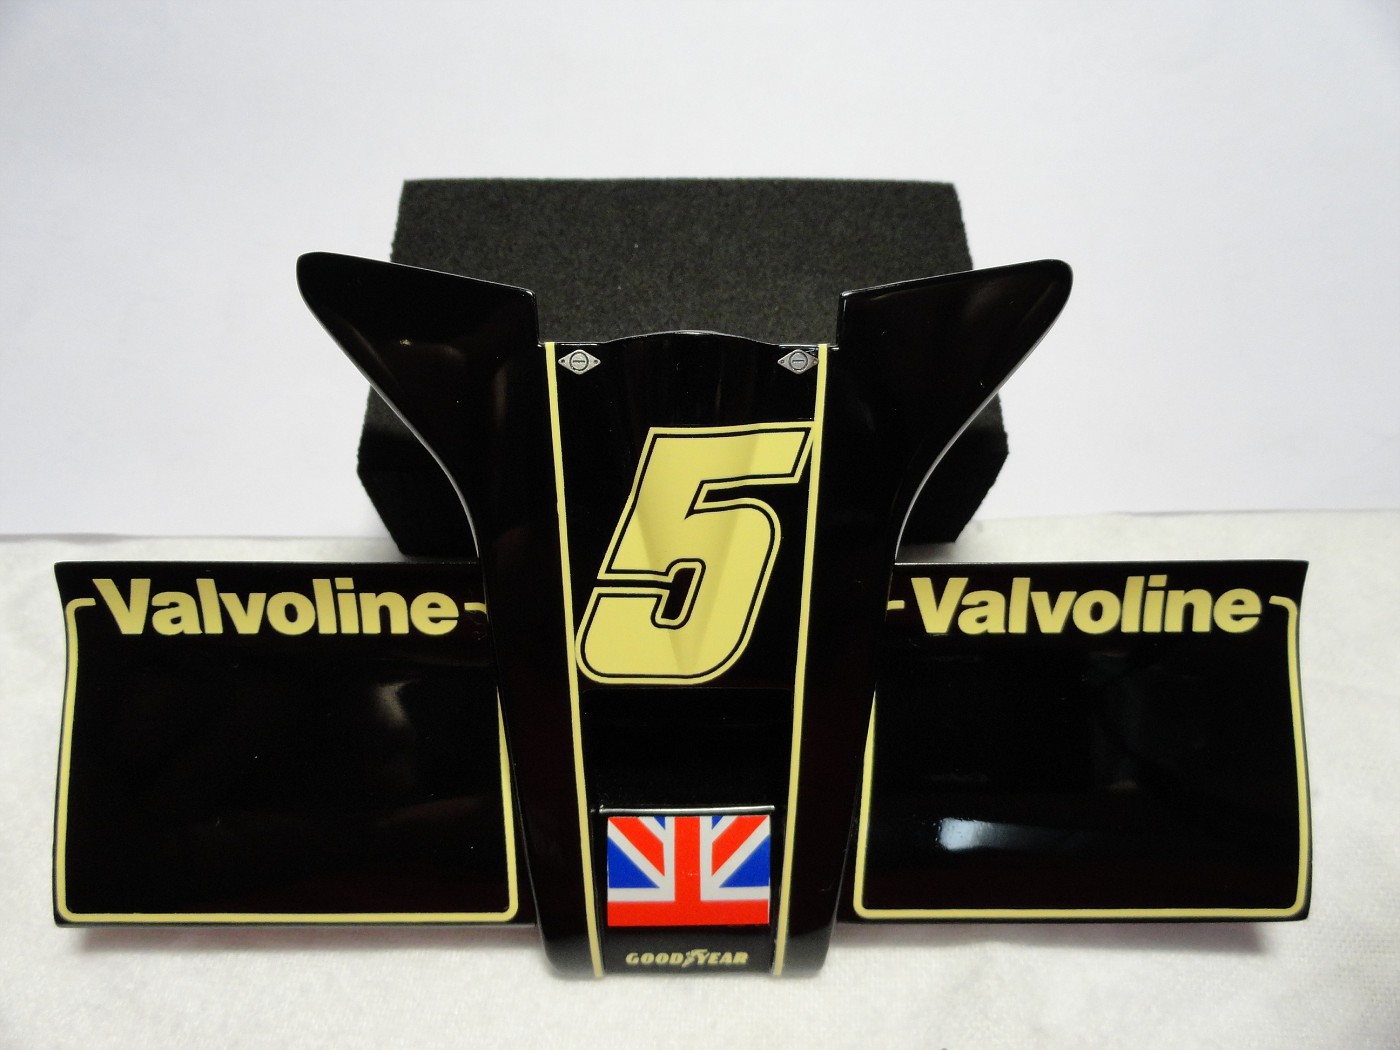 |
|
|
|
Post by Nacho Z on Apr 7, 2014 20:44:08 GMT -5
Just a few things left to do. I have the side panels left to paint. As you can see in the pictures there are some very large ejector pin marks. It will take a little elbow grease to get the side panels in shape. 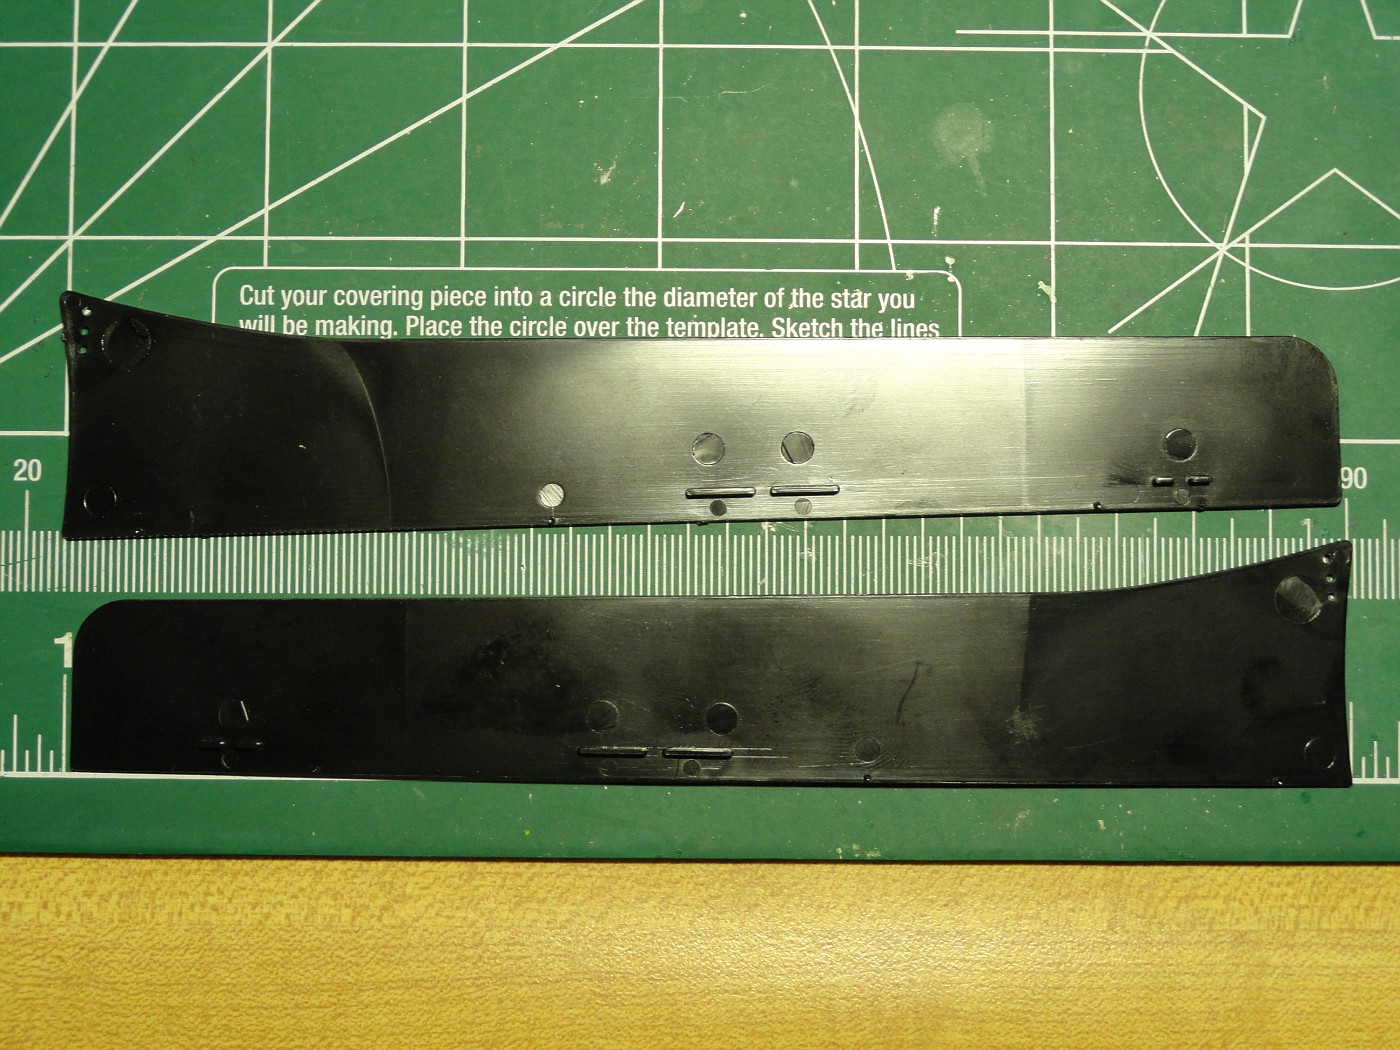 The other items to paint are the nose wing end plates. This will be the third time I have painted them. Not sure what is going on with them. I may just take a black marker and color them.....lol. You may have seen the tires in the background of a few of my pictures. They are done. The original kit tires were actually the wrong tires. Thank goodness my buddies knew about this problem from way back. Gary Kulchock was gracious enough to give me the correct, slightly larger rear tires.....Thanks Buddy! The incorrect tires were painted and glued on to the wheels and had to be just about pried off. I had to paint the new tires. That is a total of 8 "Goodyear" logos painted for the rear tires alone. I added valve stems to the wheels. Pictures show both the front and back view of each.   |
|
|
|
Post by harron68 on Apr 9, 2014 18:12:23 GMT -5
Nothing to add except my admiration for the research and careful altering for a true perfect scale model.
|
|
|
|
Post by Nacho Z on Apr 13, 2014 9:16:27 GMT -5
Here is another part of the build that I struggled with. I am talking about the harness. I wanted to scratchbuild all of the hardware myself and actually made a number of the fittings. But nothing looks as good as metal. I had a PE set that was designed specifically for this car. It is made by Acu-stion. I used their hardware and I can tell you it is not correct. (Actually, I used very little from the PE set. Nothing seemed correct or to fit the kit parts correctly.) It has to do with 2" vs. 3" belt widths. Theirs is all the 3" variety and even then they are not correct. As I have said before, this is not a perfect build and some concessions have been made. The first picture shows the evolution of the straps, from right to left. My wife was a real trooper with this process. We bought several types of tape to use for the straps. She tried several ways to color the straps. Everything from markers to food coloring to clothing dyes with mexed results. We finally found a good combination of tape and marker. The tape texture is not perfect but I like it. I actually attempted to sew in the stitching but the results were less than stellar. My wife also helped me with the Willans logo on the belts. That process was also difficult. I had no instructions on how to thread the belts so I looked on the internet for pictures. I think I have them correct. The end results may not be good enough for a professional builder but for a guy who is trying to do as much scratchbuilding as he can with a limited amount of talent, I can live with them. 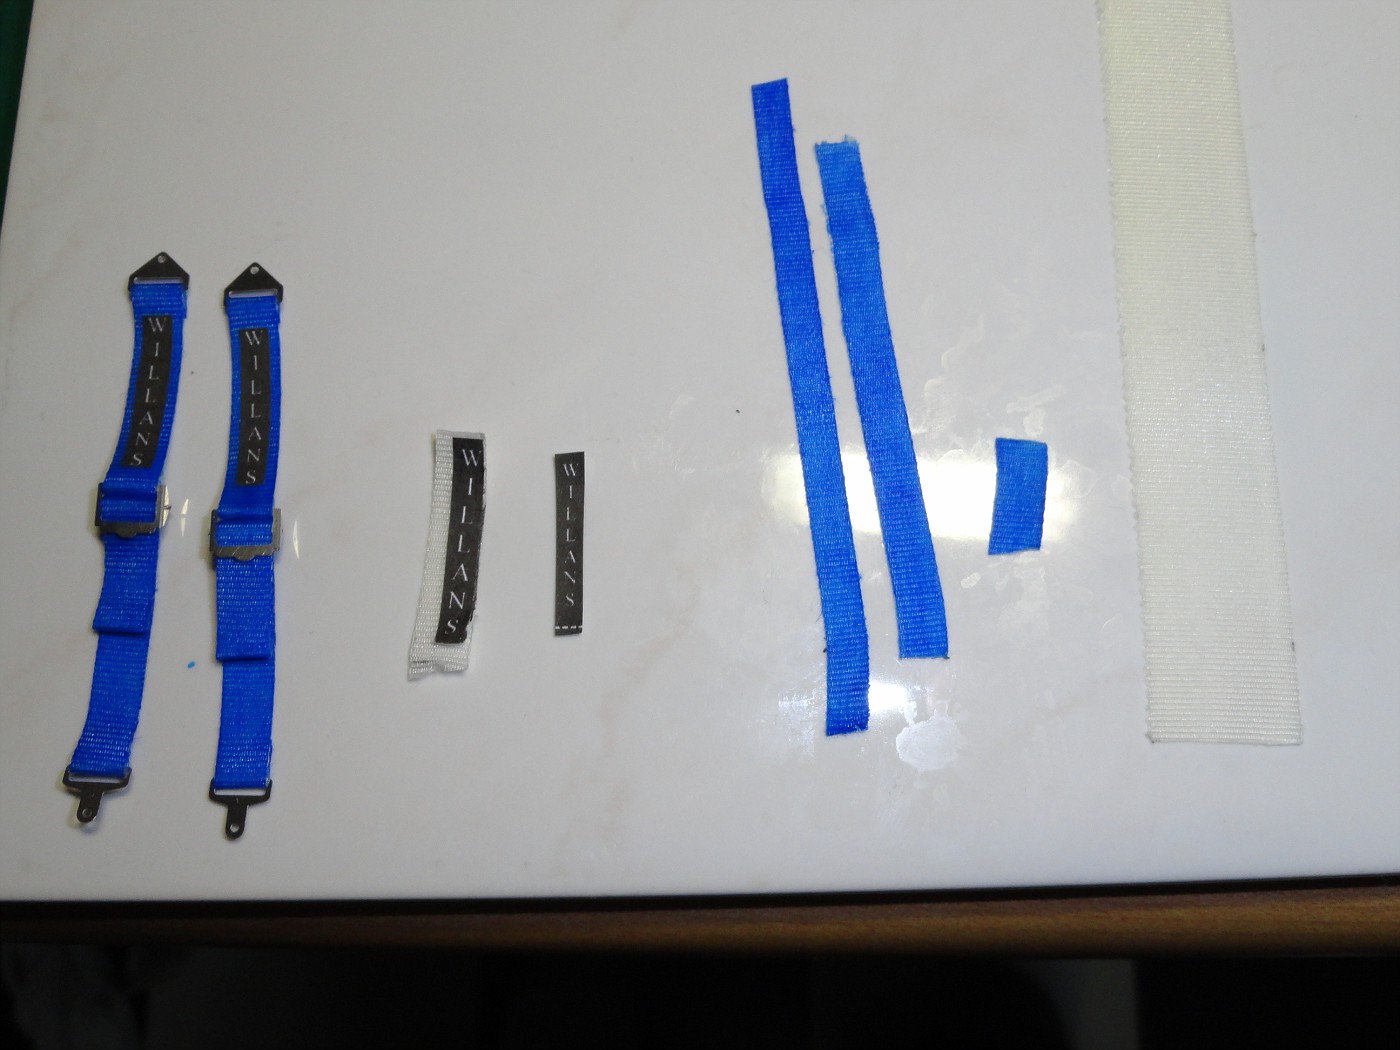 Installing them on the car also gave me a few problems. Due to rivets detail where the belts mount on the body I have very limited glueing surface. I drilled a hole and ran a small piece of brass wire in it. I peened the end of the wire to hold the hardware in place.  I installed the harness on the car. I used plain old Elmers glue to hold them to the seat. I tried to get them to lay as naturally as possible. I also installed the roll hoop and the steering wheel.    |
|
|
|
Post by harron68 on Apr 13, 2014 19:38:18 GMT -5
I wouldn't be surprised if you pushed the starter button, it would crank up! Excellent museum quality work. I keep meaning to check the web for when they started using the "aircraft" style braided hoses. Have patience on the wind up. We've all taken short cuts to finish a long build and regretted it later. All the best to you and thanx! Ditto on comment can't have too many fotos!
|
|
|
|
Post by Nacho Z on Apr 16, 2014 21:59:18 GMT -5
Thanks for the comments harron68! You are the only one commenting on this lately. I see there are a lot of views but very few comments. I am beginning to think that I am overloading this thread with posts. Well, I'm in it to the end so I'll keep on posting until then. It is funny how we as modelers can work, for what seems like forever, on various sub-assemblies and then all of the sudden the model just seems to come together all at once. That is where I am at. As of tonight I have two pieces to paint. They are matt black so no polishing is needed. I only have one panel left to polish out. Several pieces to decal, although these pieces are 6 inches long. I will add various PE nut and bolt heads as needed. And then I will call it done. Back to my thought. I am now spending hours polishing out these last few pieces. I have spent more time working on the inside and back side of pieces then I have on some car bodies. This is the inside / bottom side of one of the side panels. I had to use Q-tips and this neat little pointed one from Tamiya to polish out the small corners and sides. It gets rather boring at times but soon, boom!, it will all come together. 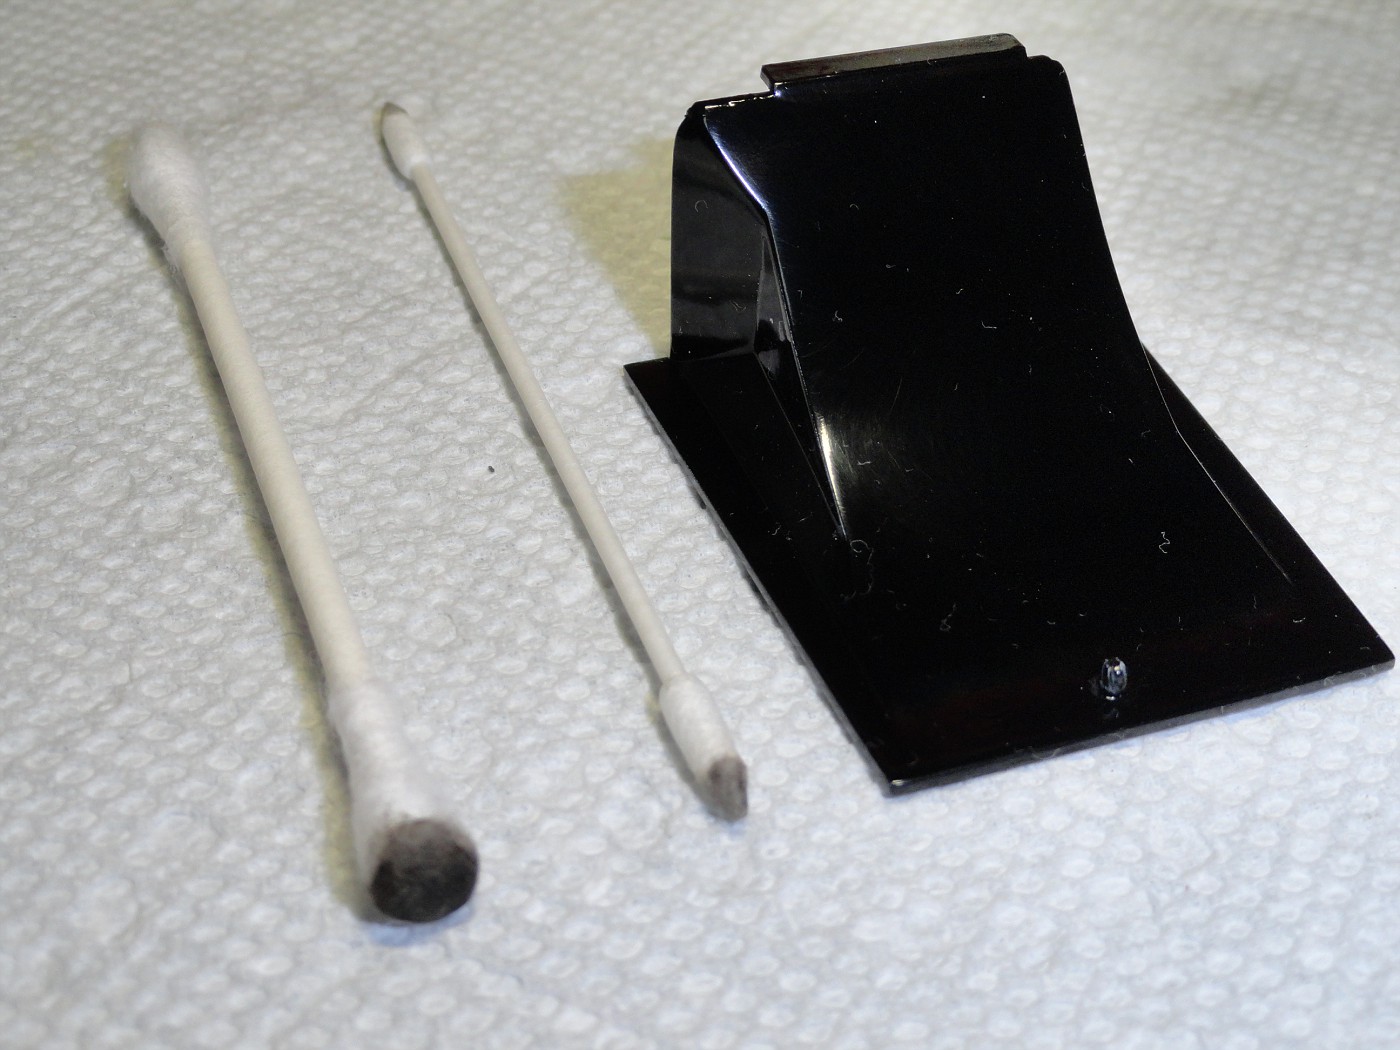  One little trick that I think makes PE items look a lot better is to add some depth to them. I do this by slopping on some Detailer and letting it dry. Once dried I simply run them over a sanding stick. It just gives it that little extra something.  |
|
dogfish7
Junior Member
  So many models.... so little time.
Posts: 119
|
Post by dogfish7 on Apr 21, 2014 3:28:08 GMT -5
Amazing work!
|
|
|
|
Post by Nacho Z on Apr 24, 2014 20:27:58 GMT -5
Just a quick update for my friends here on TMM. The Lotus is done! It is packed and on its way to NNL East. Gary Kulchock has made a base for it. I have not seen it but I know it is going to be amazing. I will post pictures of the car on the base when I get back. I only hope it makes the trip, out and back, in one piece.
|
|
|
|
Post by Eddie on Apr 25, 2014 8:48:51 GMT -5
This thing is absolutely amazing. I can't wait to see it finished.
|
|
|
|
Post by krazykarl on Apr 28, 2014 20:49:18 GMT -5
Just a quick update for my friends here on TMM. The Lotus is done! It is packed and on its way to NNL East. Gary Kulchock has made a base for it. I have not seen it but I know it is going to be amazing. I will post pictures of the car on the base when I get back. I only hope it makes the trip, out and back, in one piece. Hey there John.. how did the show go buddy?? Hope you guys had a good trip. |
|
|
|
Post by wtsf150 on May 4, 2014 7:35:06 GMT -5
John saw the pics from the show that Gary took the Lotus looks amazing great work doesn't begin to compliment this build
Willie
|
|
|
|
Post by Nacho Z on May 5, 2014 20:29:32 GMT -5
Well, she is finally FINISHED!!! Woo Hooooo!!!!! Haha. I was able to finish it in time for NNL East and it made the journey from WV to NJ and back in one piece, (actually in many pieces as you will see.) I really was hoping that it would get photographed by the magazines but it was not to be. Here is a little trivia for all of you. Do you know what "John Player" is? It is a British tobacco company. Scale Auto's policy is to not photograph models with tobacco sponsorship. That means this model will never be in the magazine. Model Cars Mag did not photograph. Sigh. I have 530 documented hours in this baby. I have many more hours in internet searches, hobby and craft store browsing, etc. Other than the braided lines and A/N fittings along with the harness hardware I have scratchbuilt most other "extra" parts not in the kit. You have seen all of the progress and detail pics so I will just share a few overall shots. This thing is big and not too easy to photograph. I would like to thank the folks who have helped me with this project but I would be remiss if I did not give a special shout out to Gary Kulchock. He gave me a bag of spare parts for this kit and I used them. He gave me the correct rear tires. Without those I would have been in trouble. Gary also, without me asking or even thinking about asking, built this BEAUTIFUL base that the car is sitting on. Thank you Buddy! 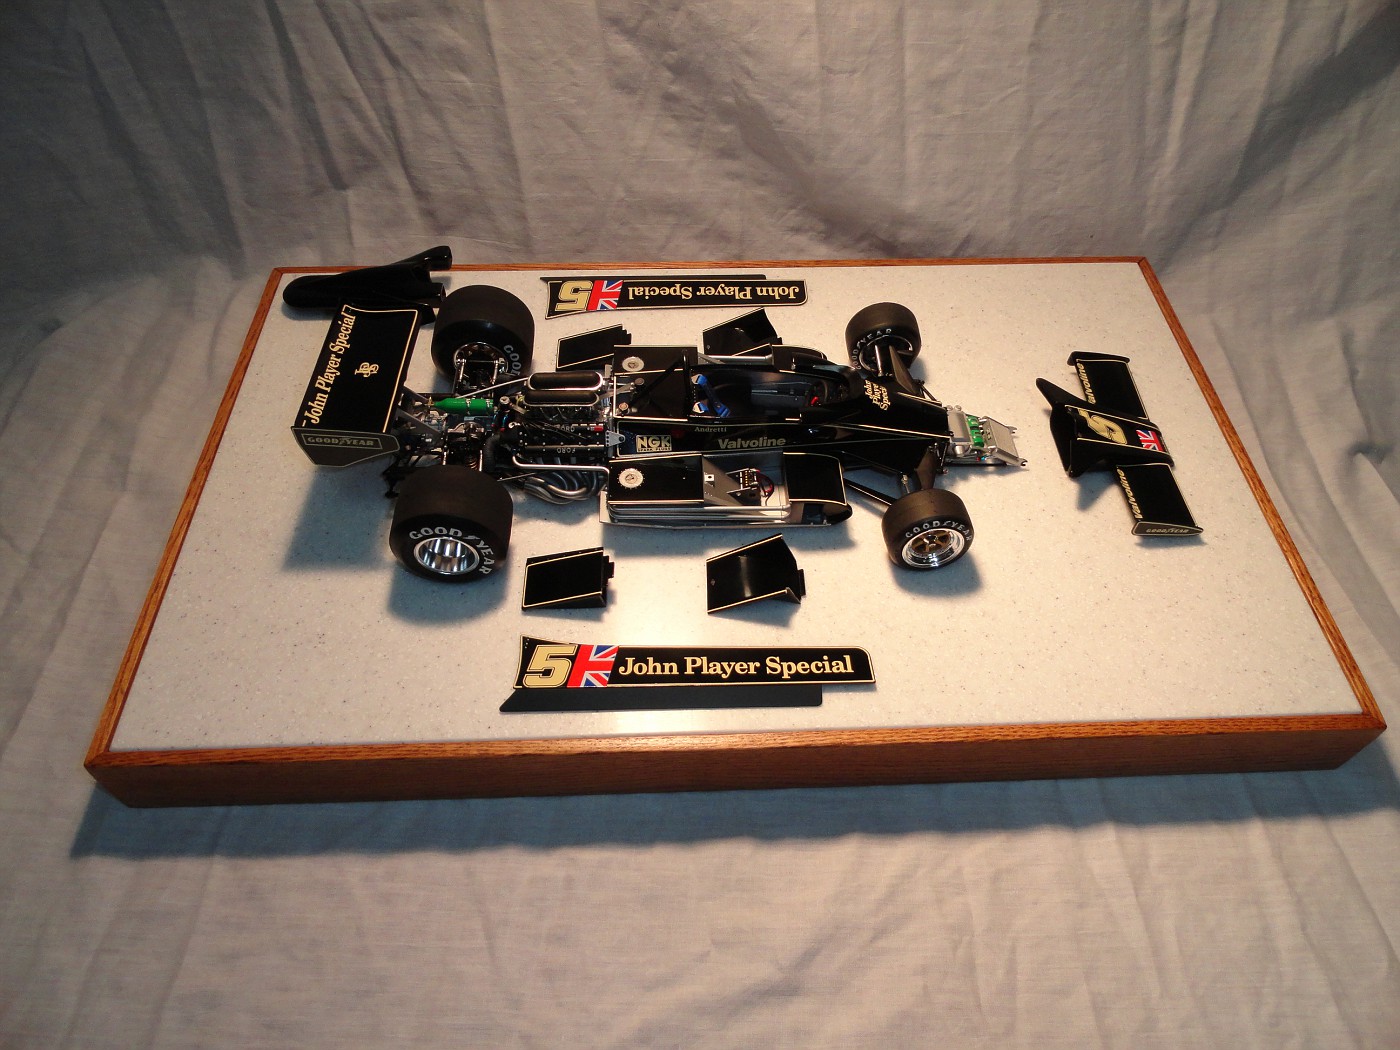    And a couple of pictures I thought were kind of cool.    |
|
|
|
Post by fireguy14 on May 6, 2014 9:47:51 GMT -5
d**n John, that is just beautiful! I have thoroughly enjoyed watching this progress, and it is awesome to see it finished. Fantastic job. Too bad SA would not photo it. Their loss! BTW, you have any pics of it with all the panels installed?
|
|
|
|
Post by harron68 on May 9, 2014 19:44:05 GMT -5
Tamiya 1/12 kits are excellent, but need careful and clean building to make them shine. Your going the extra kilometer to make this even better and sharing the results makes the hobby and this site worthwhile! Thanx for patience and persistence.
|
|
|
|
Post by IceMan555 on May 10, 2014 0:02:40 GMT -5
Amazing bud.
|
|
|
|
Post by Gary Kulchock on May 29, 2014 12:51:48 GMT -5
Great work John, one of your finest. I still say you are one of the best detail painters I know.
|
|

