|
|
Post by Nacho Z on Feb 21, 2010 21:33:51 GMT -5
Here is what is up next for completion. I am really excited about doing this one!!! This is an origianl kit. This build is for a friend who also is into modeling....sort of. He builds and flies some amazing RC planes. These things are HUGE. He scratchbuilds them and he does outstanding work. He bought this Tamiya kit back in 1978 for $27.00! He started it by putting the wheels and tires together and painting the main tub. As a nod to him I am going to leave the wheels and tires as they are. Everything else I am doing. This includes stripping the painted tub. This will be the most detailed kit I have ever attempted. Its size leads to super detailing. I started this back in 2005. It got boxed up that same year and I just got it back out. (Hey, he had it since 1978.....what's 5 more years ;D) The bad thing is I did not have a digital camera back then. Therefore not too many pics were taken. I will post some progress pics soon. I hope you all like progress pics because I'm going to post a gazillion of them. This is the only way my friend can see what is going on with his model......ain't the net great?!?!  BTW, as of this posting I have right at 150 documented hours. I have a lot more than that if you count ongoing research and lots of trips to the hobby store. 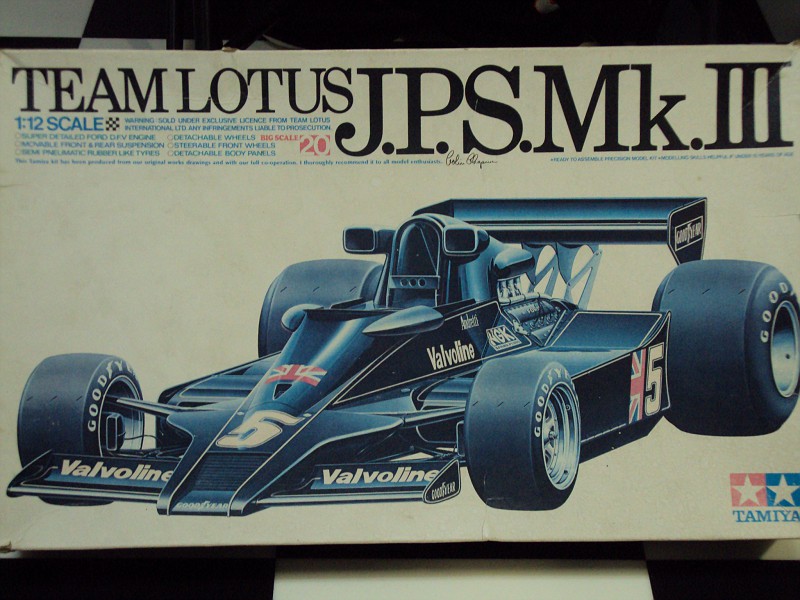 |
|
|
|
Post by Nacho Z on Feb 22, 2010 21:43:03 GMT -5
|
|
|
|
Post by fireguy14 on Feb 22, 2010 21:56:11 GMT -5
Very nice!!! I really like the looks of that kit. May have to just suck it up and get me one someday!
|
|
|
|
Post by Gary Kulchock on Feb 23, 2010 22:39:51 GMT -5
John, your expert detail painting is going to make this 1/12 kit shine. Keep the photos coming.
|
|
|
|
Post by The Mad Modeller on Feb 23, 2010 22:54:29 GMT -5
Great work John.
|
|
|
|
Post by Nacho Z on Feb 24, 2010 22:19:17 GMT -5
Here is the battery. I am trying to scratchbuild a good bit of things. The connections are solder that has been flattened on one end and drilled out to fit on brass posts. Wire insulation was added to look like the crimp piece. The battery cables were tied up and routed to the tub. I am not happy with the battery hold down straps. I may replace them. 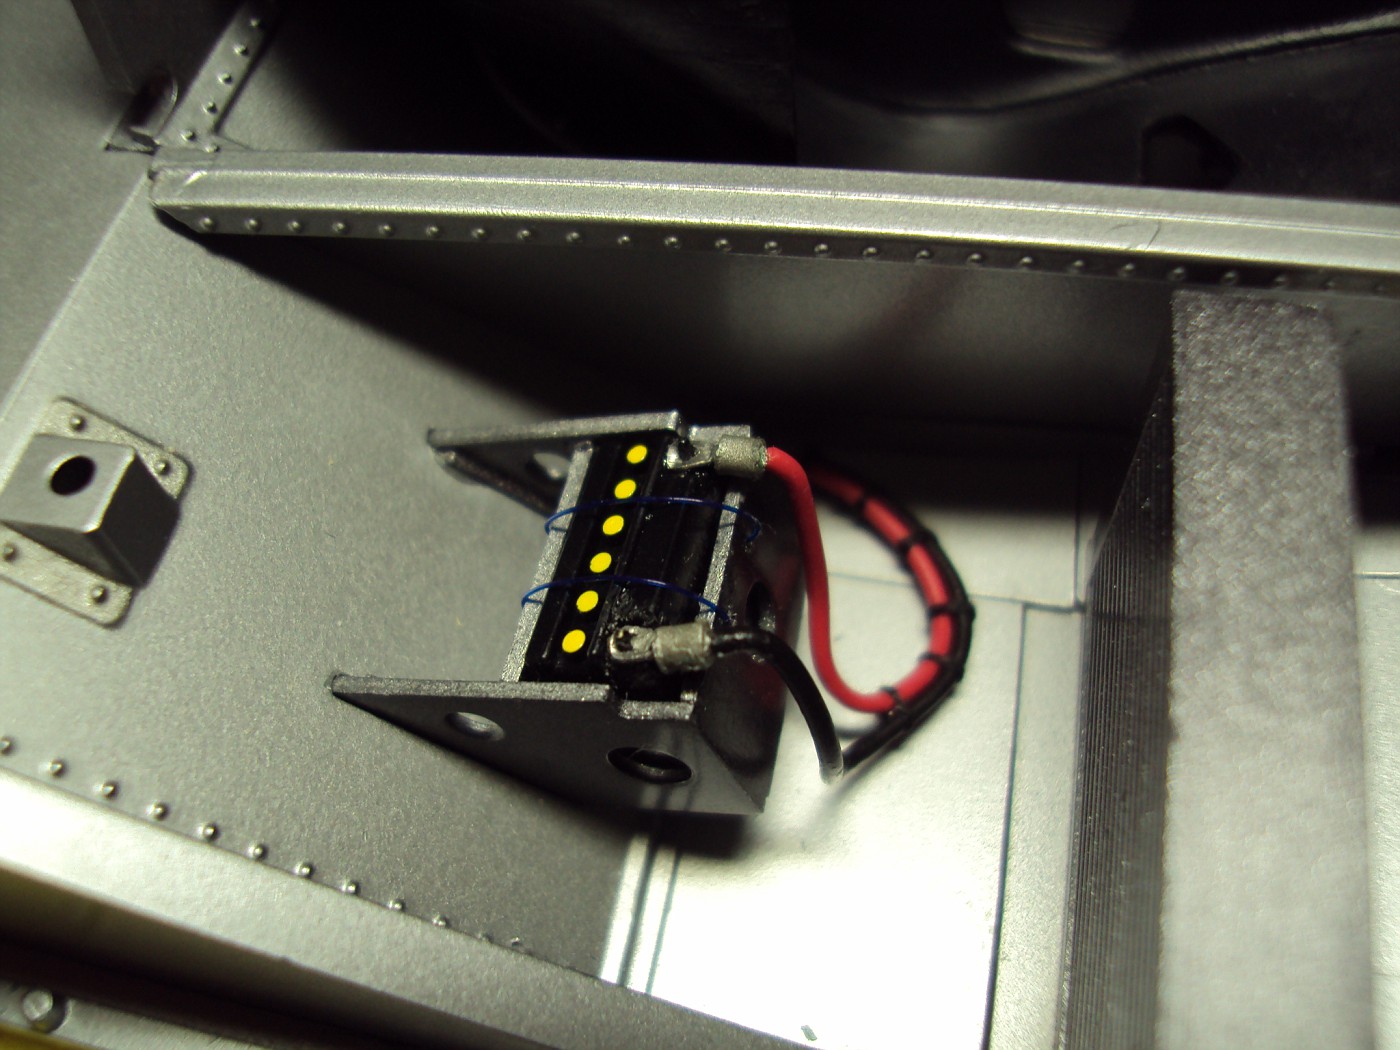 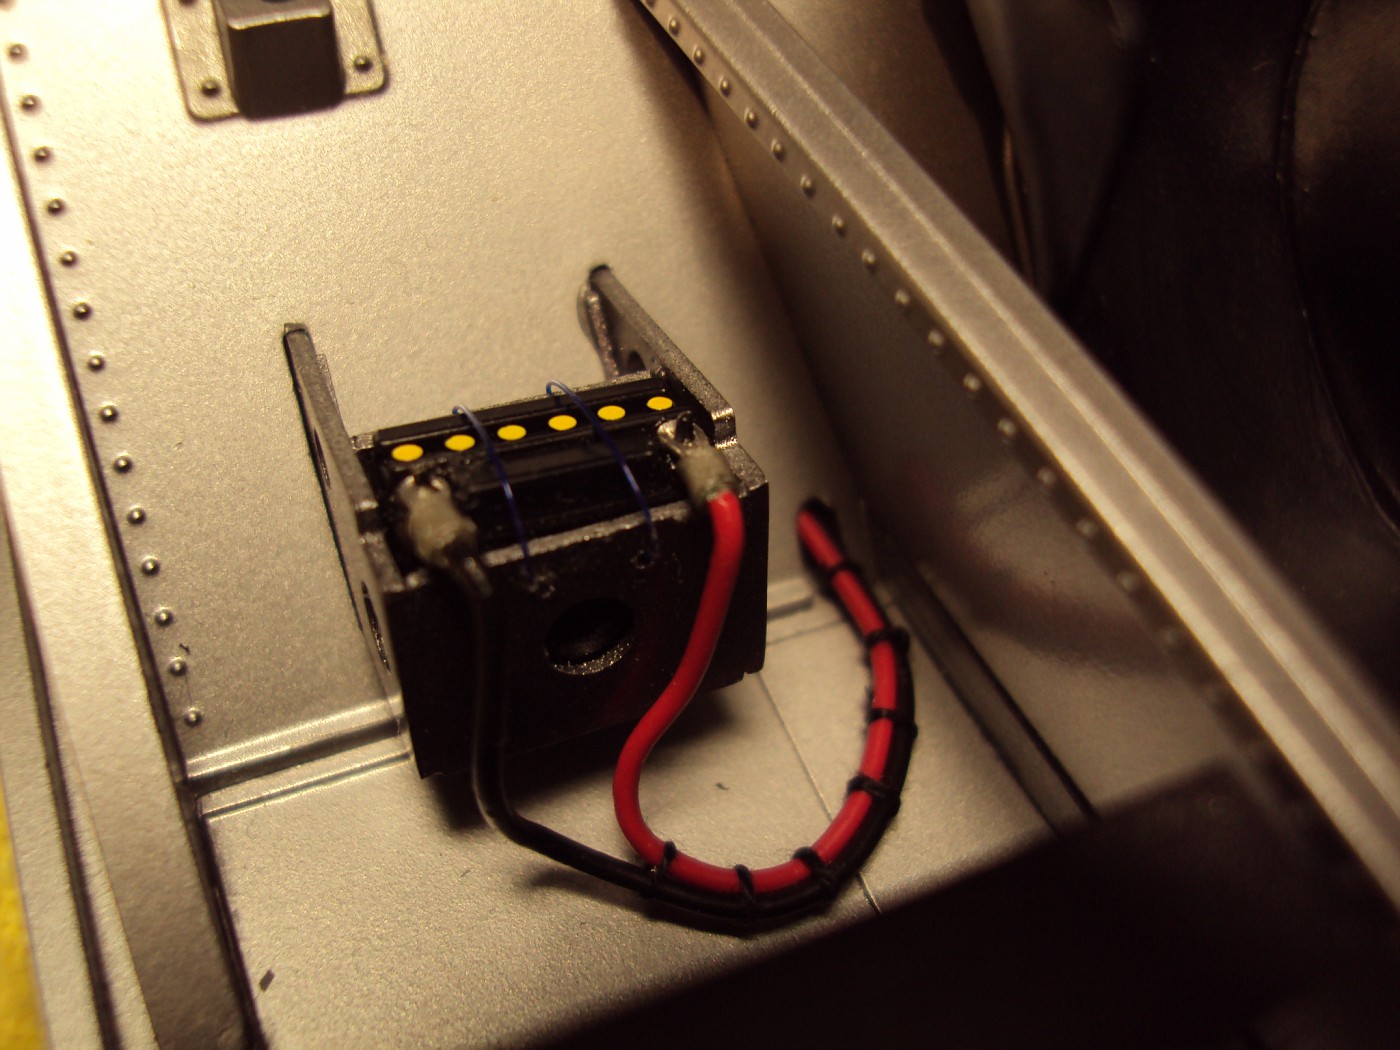 |
|
oldcoyote
Full Member
   Grumpy Old Furbutt
Posts: 469
|
Post by oldcoyote on Feb 28, 2010 9:24:48 GMT -5
|
|
|
|
Post by Nacho Z on Feb 28, 2010 11:11:14 GMT -5
|
|
|
|
Post by The Mad Modeller on Feb 28, 2010 15:53:22 GMT -5
Great work John.
|
|
|
|
Post by prumus99 on Feb 28, 2010 19:13:46 GMT -5
You do some great detail work!!! Thats looking great so far!
|
|
|
|
Post by whtchevy on Feb 28, 2010 20:31:01 GMT -5
I am not into this kind of race car but your detail work is crazy ...Keep up the great work and keep them coming.
|
|
|
|
Post by Gary Kulchock on Feb 28, 2010 23:35:37 GMT -5
Nice work John. What's the coiled metal line under all that braided hose?
|
|
|
|
Post by Nacho Z on Mar 1, 2010 5:37:14 GMT -5
Nice work John. What's the coiled metal line under all that braided hose? This goes back to not having very many good ref. pics or general info. on this car. The few pics I have of this area show this line. I added it and ran it to the tub panels. Honestly I have no clue what it is or does!! Perhaps a fuel pressure line? This will not be the only hose/line/wire that gets put in place that may not end up anywhere let alone in the correct place  . |
|
|
|
Post by Nacho Z on Mar 4, 2010 21:47:43 GMT -5
So I was visiting ferrarichip the other night. He was kind enough to lend me some ref. material for this car. He was commenting about the build and the pics. I mentioned the battery hold down straps and got the look that you give your wife when she asks "do I look fat in these jeans?"  I could tell he was not impressed with them but didn't want to hurt my feelings. I always ask for comments or criticisms and I'm glad he told me they didn't look too realistic or functional. So here is my third attempt at better straps. They are made from "chart-pak" tape cut into thin strips. Let me know what you think..... 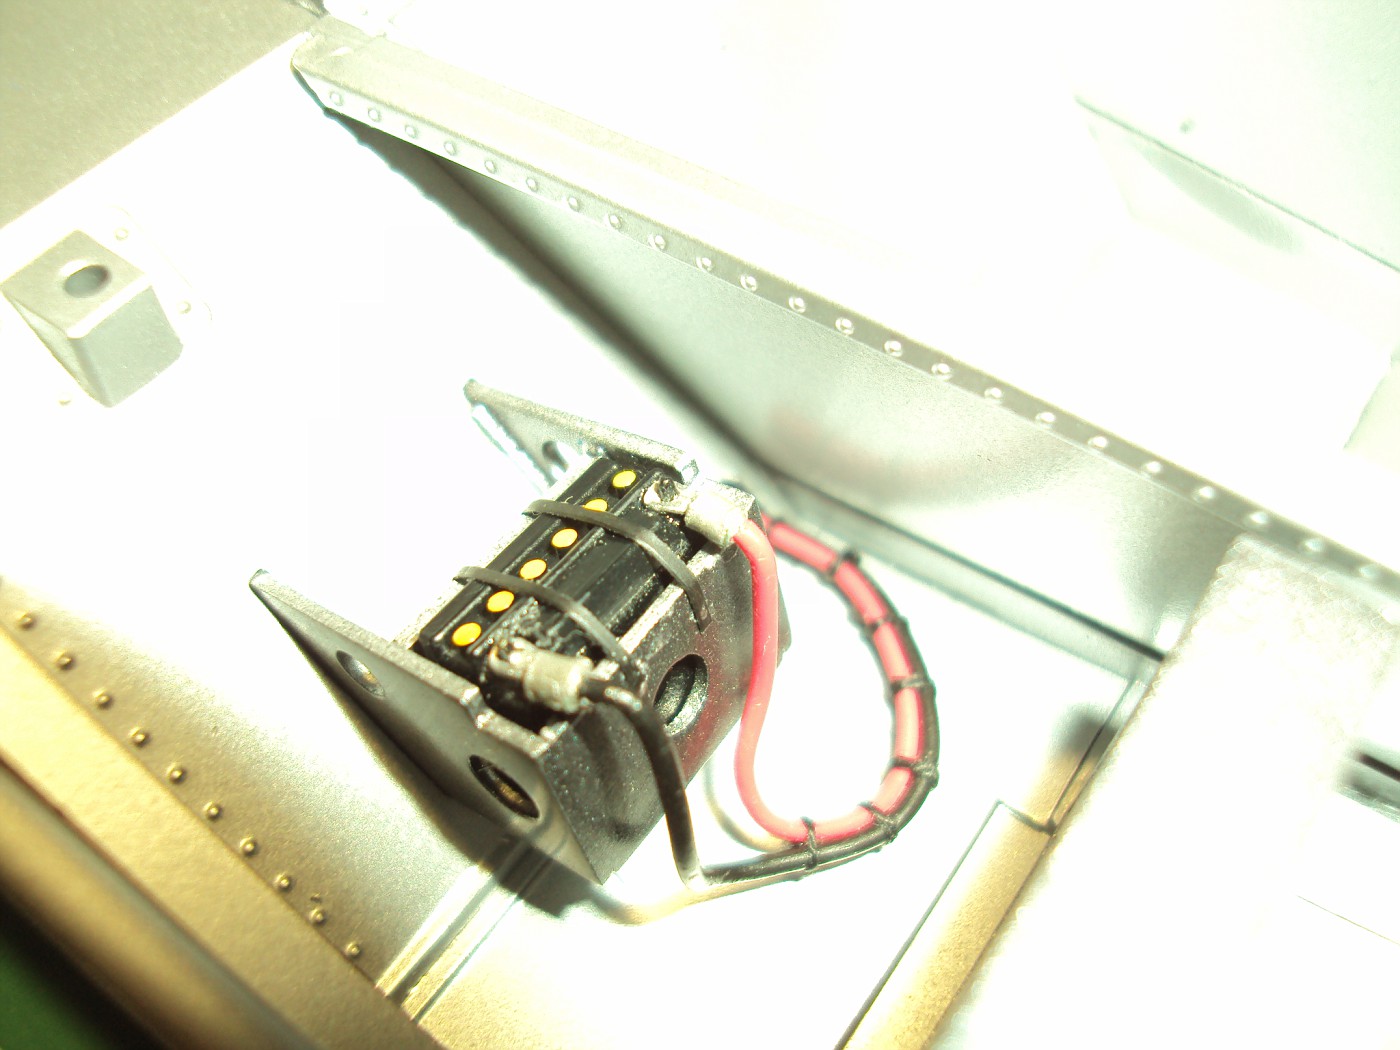 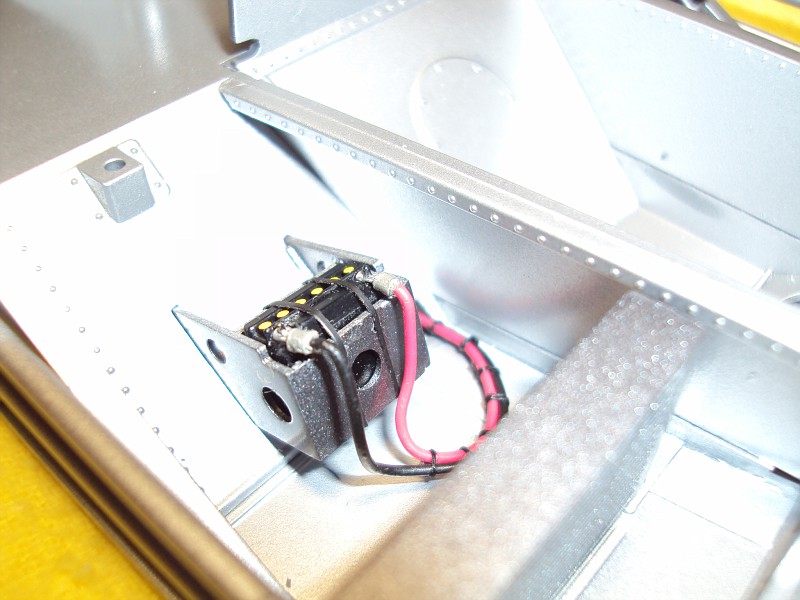 |
|
|
|
Post by Gary Kulchock on Mar 4, 2010 23:57:43 GMT -5
Straps look a lot better John. By the way, do I look fat?  |
|
|
|
Post by Nacho Z on Mar 6, 2010 18:11:15 GMT -5
|
|
|
|
Post by ferrarichip on Mar 6, 2010 21:22:40 GMT -5
Now that's what I call proper battery hold downs-that tape looks just like the reference photos.
Chip
|
|
|
|
Post by The Mad Modeller on Mar 6, 2010 21:42:38 GMT -5
Lookin good John.
|
|
|
|
Post by Gary Kulchock on Mar 8, 2010 12:10:00 GMT -5
I agree. The hold downs look in scale now. Make sure you bring it to the meeting tomorrow night. ;D
|
|
|
|
Post by prumus99 on Mar 9, 2010 1:27:39 GMT -5
The new hold downs look great! I'm blown away but the work you do.
|
|
|
|
Post by Nacho Z on Mar 10, 2010 6:51:03 GMT -5
Thanks for all of the comments guys! More updates will be coming in the next few days.
|
|
|
|
Post by Nacho Z on Jan 16, 2012 20:58:47 GMT -5
|
|
|
|
Post by Nacho Z on Jan 19, 2012 5:23:21 GMT -5
Today's installment are the radiators that sit in the side pods and the pipes that run back to the engine. The kit pipes had huge "steps" in them. What I mean is that the two molds did not line up so the two half pieces did not line up. There was no way to sand them down to make them truly round and if I were to sand them down they would have ended up about half of the diameter that they started. I made new pipes from styrene rod. 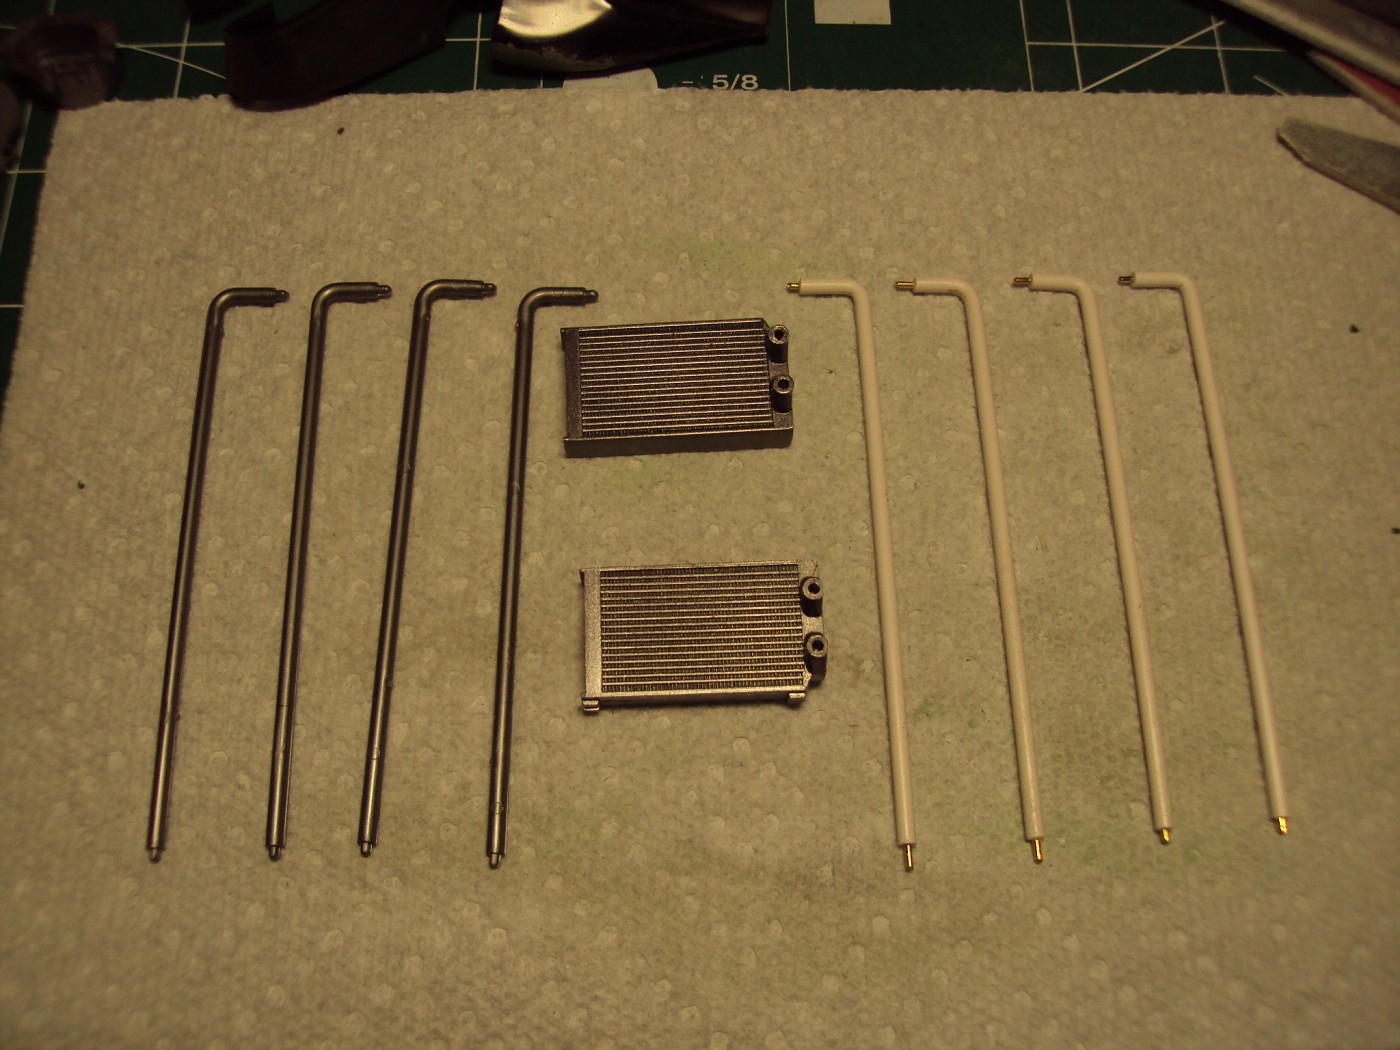 |
|
|
|
Post by Gary Kulchock on Jan 19, 2012 7:31:55 GMT -5
I'm enjoying seeing you working on this project again John. Keep it up buddy.
|
|
|
|
Post by zbuckster on Jan 19, 2012 11:25:50 GMT -5
Looks good.
|
|
|
|
Post by Nacho Z on Jan 21, 2012 15:00:47 GMT -5
|
|
|
|
Post by zbuckster on Jan 22, 2012 11:24:02 GMT -5
Nice workmanship. The engine is rocking already.
|
|
|
|
Post by Gary Kulchock on Jan 22, 2012 12:09:58 GMT -5
Very nice John.  |
|
|
|
Post by roadhawg on Jan 22, 2012 15:52:12 GMT -5
Holy moly......thats more detailed than a REAL engine! This is great!
|
|
|
|
Post by Nacho Z on Jan 24, 2012 5:42:00 GMT -5
|
|

