|
|
Post by Gary Kulchock on Jul 2, 2009 7:21:34 GMT -5
First off, this kit had no engine. This also means no inner fenders or firewall. When I first started on my portion of the build I added these in from an S10/GMC Syclone. I think I mentioned this all before, but now after adding in the interior, there was a 3/8" gap between the firewall and interior. Well not anymore. Sheet plastic, superglue and kicker. Knocked this out last night. 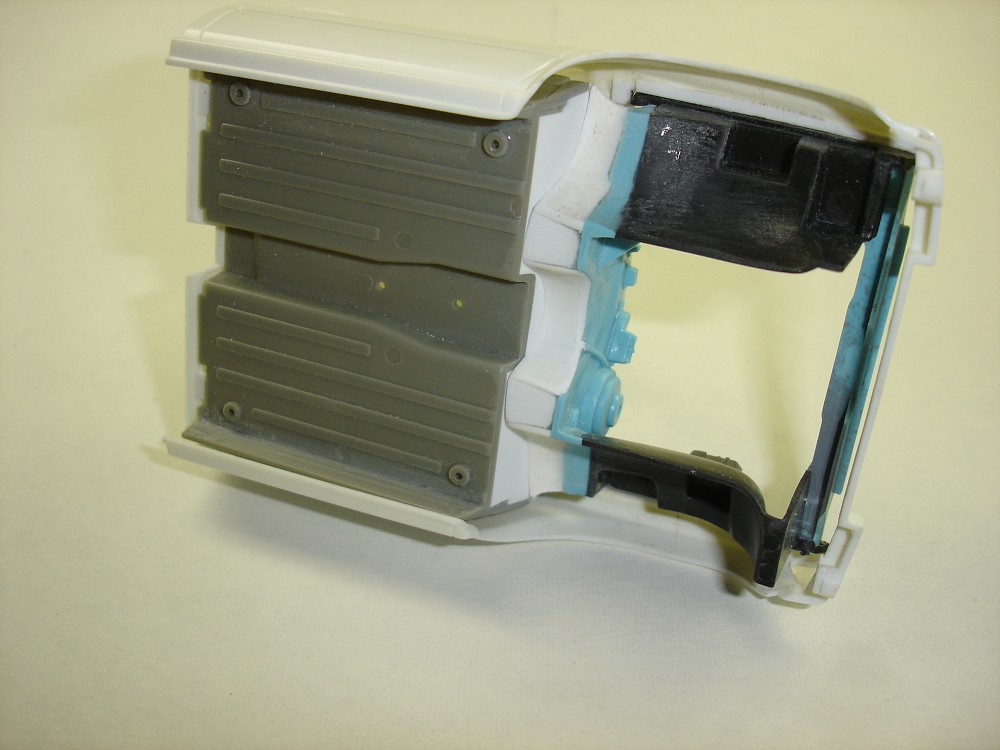 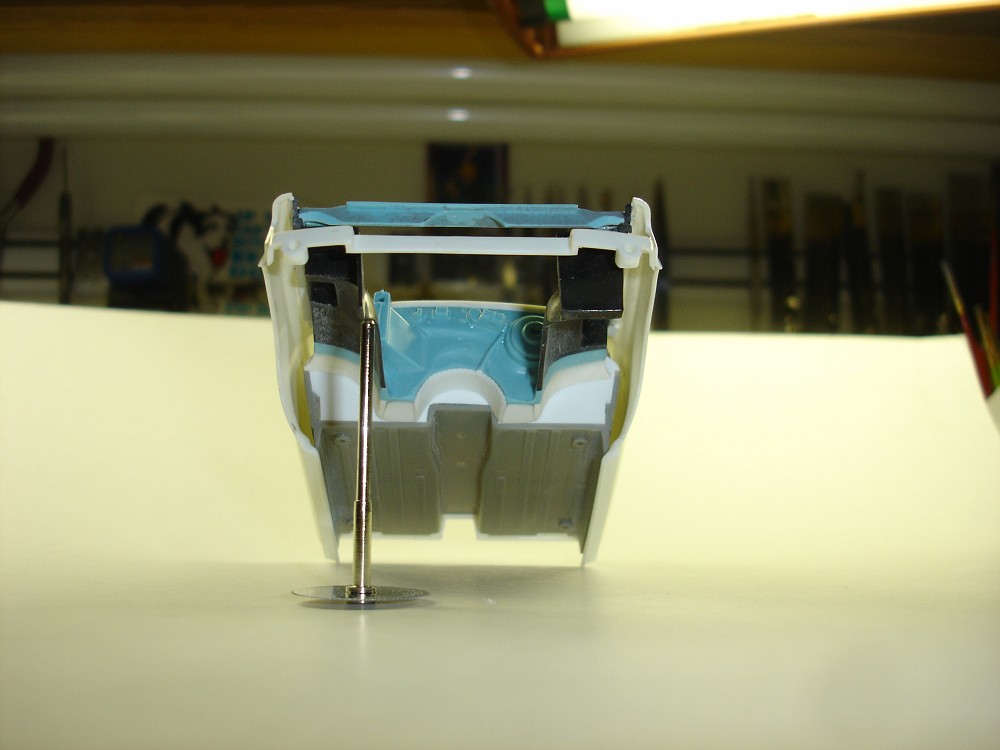 |
|
|
|
Post by coopdad on Jul 3, 2009 5:55:40 GMT -5
Wow Gary, Amazing work.
You too must have one of those personalities that you just can't let something slide. It is a curse, right?
What are your thoughts of the gap between the interior tub and the door panels? Will those areas also be filled? Yes, I am asking about this build but also trying to get ideas of what other people do for those spaces...
|
|
Big Ed
Junior Member
 
Posts: 187
|
Post by Big Ed on Jul 3, 2009 22:00:55 GMT -5
Hey Gary. Ditto on what John said. And yes, it is a curse. Great patchwork, by the way.
|
|
|
|
Post by olskoolrodder on Jul 4, 2009 10:32:10 GMT -5
Wow,this is a great thread! It makes me wish I had a Toyota long bed kit. I do have a 4 Runner,tho...  |
|
|
|
Post by Gary Kulchock on Jul 7, 2009 22:04:21 GMT -5
Radiator is mounted, plumbed, and the electric fan is operational.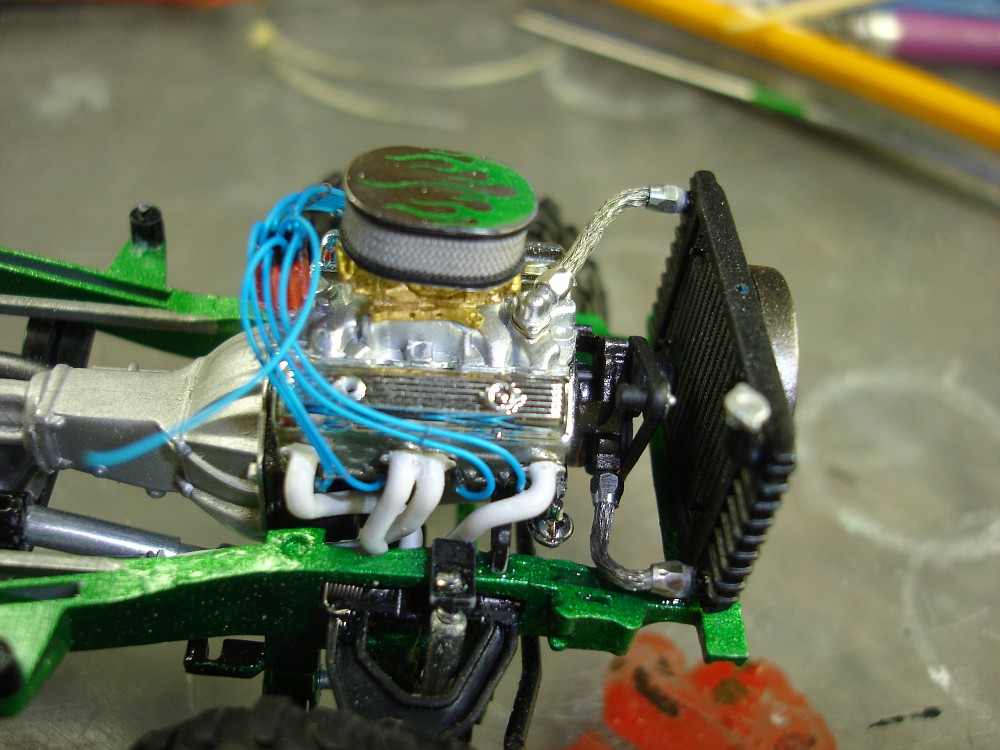 The air cleaner and carb are just sitting there right now. I still need to add all the linkage and fuel lines. The air cleaner and carb are just sitting there right now. I still need to add all the linkage and fuel lines.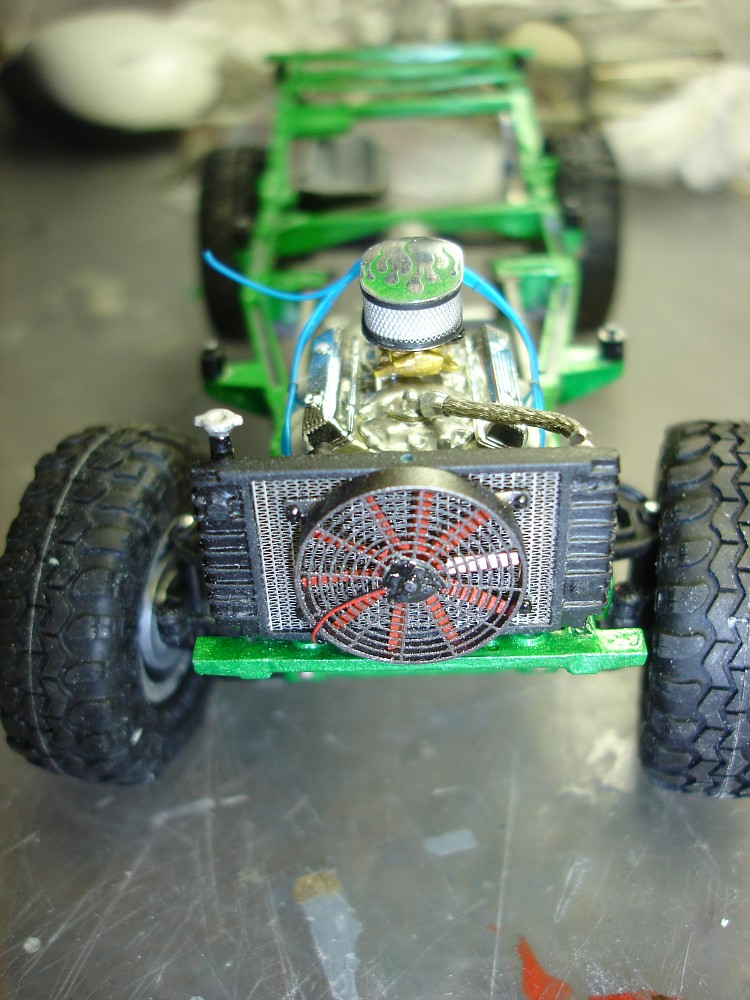 ....... then the coil, alternator and heater hoses. ....... then the coil, alternator and heater hoses.
|
|
|
|
Post by Gary Kulchock on Jul 7, 2009 22:06:37 GMT -5
Wow Gary, Amazing work. You too must have one of those personalities that you just can't let something slide. It is a curse, right? What are your thoughts of the gap between the interior tub and the door panels? Will those areas also be filled? Yes, I am asking about this build but also trying to get ideas of what other people do for those spaces... Do you mean at the window sills? |
|
|
|
Post by Gary Kulchock on Jul 7, 2009 22:08:21 GMT -5
Wow,this is a great thread! It makes me wish I had a Toyota long bed kit. I do have a 4 Runner,tho...  Me too! A real one. |
|
|
|
Post by Nacho Z on Jul 8, 2009 5:14:15 GMT -5
Looks great Gary. Very nice job on the fan.
|
|
|
|
Post by coopdad on Jul 8, 2009 7:02:12 GMT -5
Wow Gary, Amazing work. You too must have one of those personalities that you just can't let something slide. It is a curse, right? What are your thoughts of the gap between the interior tub and the door panels? Will those areas also be filled? Yes, I am asking about this build but also trying to get ideas of what other people do for those spaces... Do you mean at the window sills? No, under the doors, between fender and floor tub.  Great job on the motor! John |
|
|
|
Post by Gary Kulchock on Jul 8, 2009 9:51:21 GMT -5
Do you mean at the window sills? No, under the doors, between fender and floor tub.  Great job on the motor! John Well, in real life the truck would have a plastic inner fender liner that would cover all this. Without this liner you would be able to see the inside of the fender as well as the door hinges and the edge of the door. I wish I had time to construct an inner liner but I think I'm going to let it go as is. Maybe Bobby will decide to do something here when he preps the body for paint. Now if I had the time, I'd probably try to vacu-form a custom liner. That would be cool and I don't believe anyone has tried this before. |
|
|
|
Post by The Mad Modeller on Jul 8, 2009 18:41:53 GMT -5
Maybe I can cut some thin rubber and fill the gap just like an inner fender.
|
|
|
|
Post by Gary Kulchock on Jul 8, 2009 22:13:22 GMT -5
Linkage added to the carb tonight as well as the main fuel lines. Bad photos!  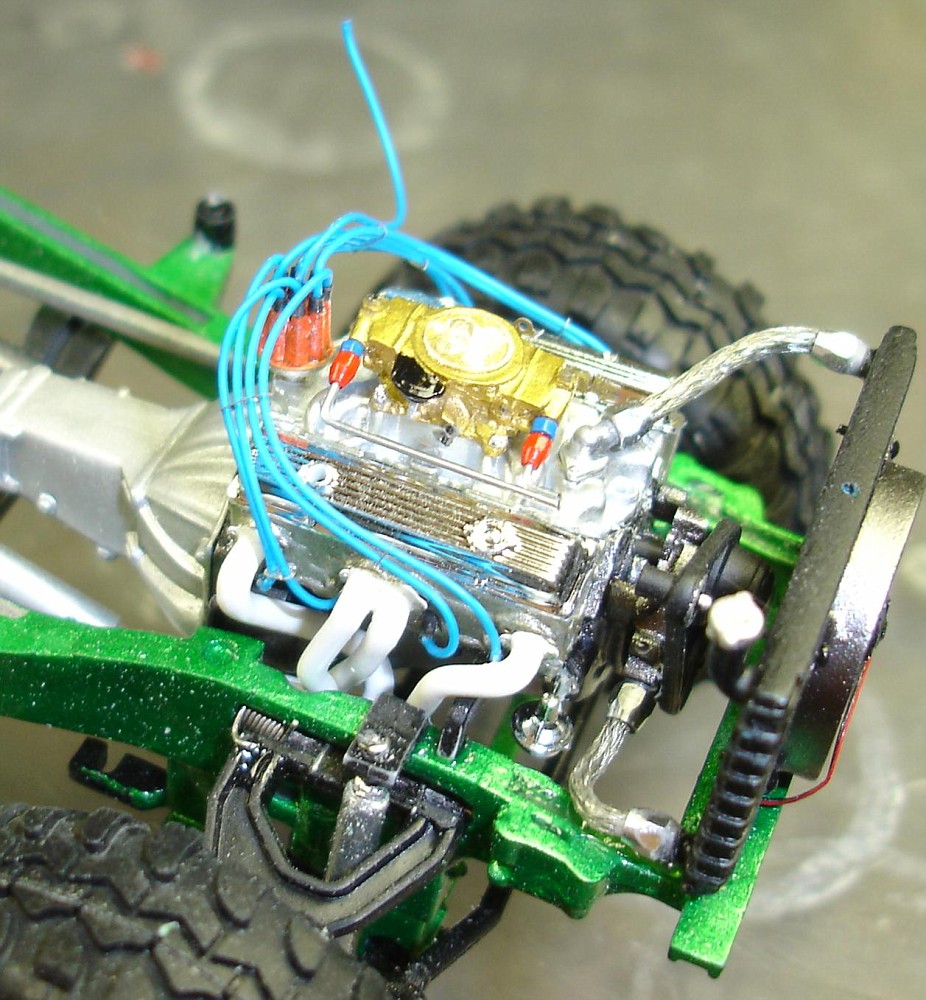 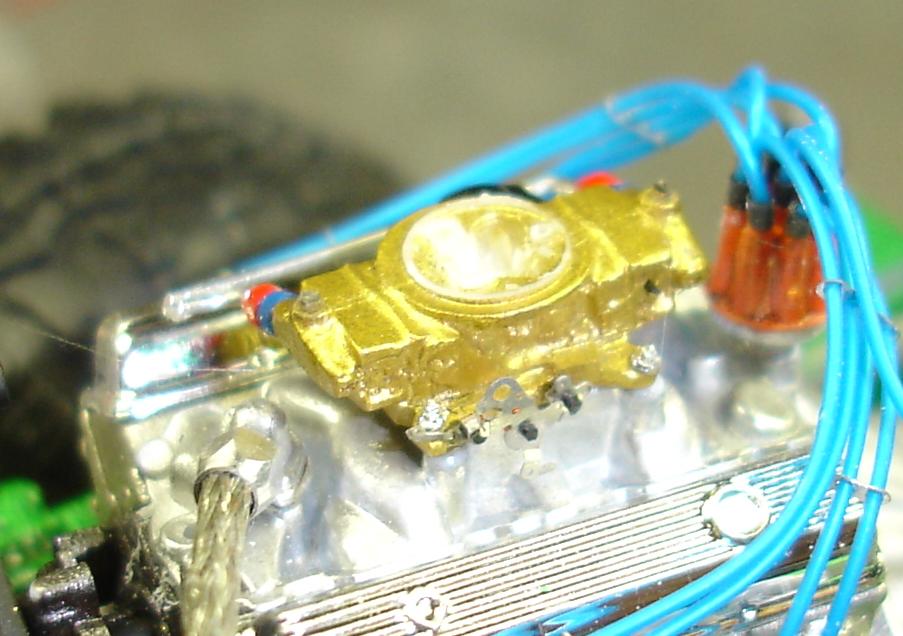 |
|
|
|
Post by Gary Kulchock on Jul 10, 2009 22:53:08 GMT -5
;D ;D ;D ;D I do believe I'm finished. ;D ;D ;D ;D Heater hoses and alternator have been added. Coil and master brake cylinder are painted but will wait for Bobby to do his paint thing. 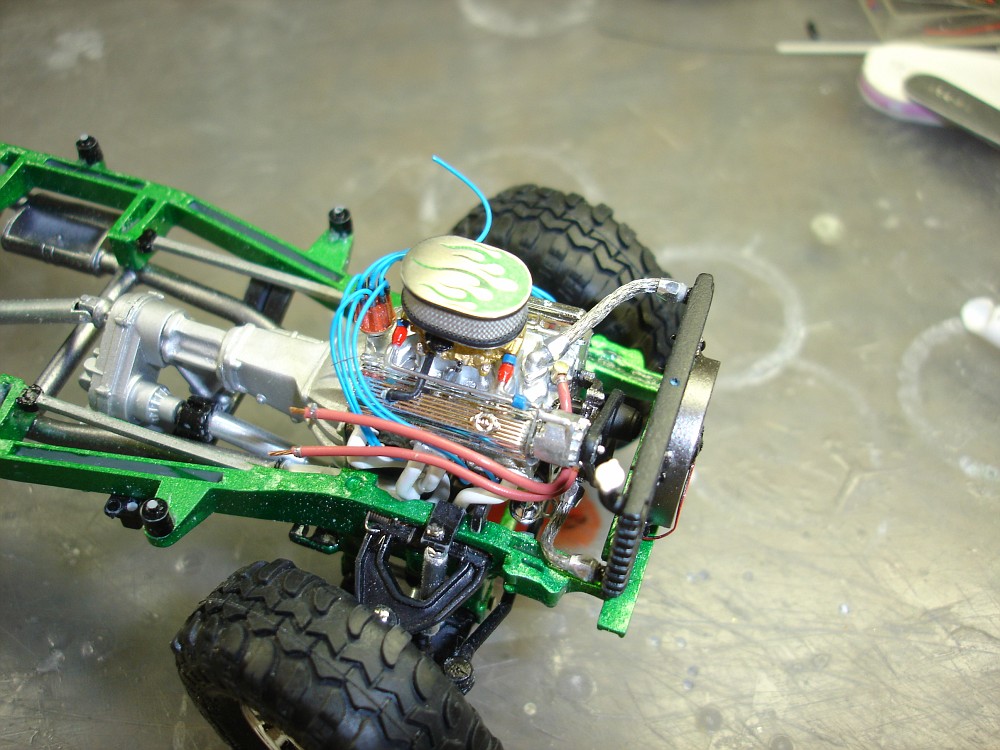 Is that an oil leak under the motor? I'll get that fixed. Is that an oil leak under the motor? I'll get that fixed.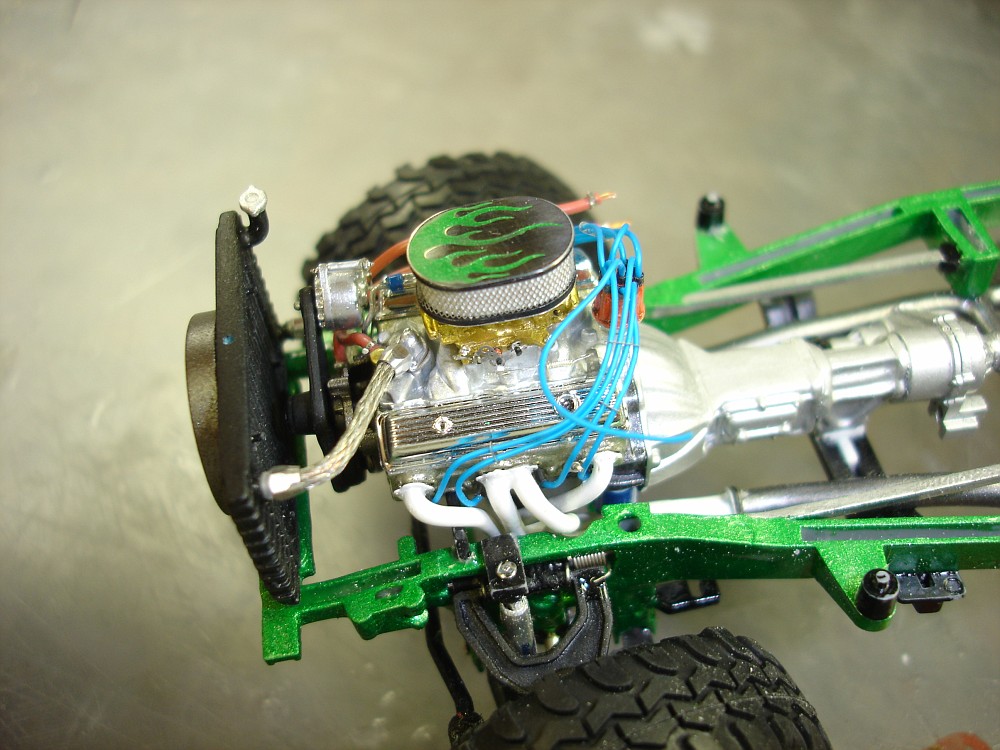 The hood even fits without modification!Get ready Bobby .... here it comes! The hood even fits without modification!Get ready Bobby .... here it comes! |
|
|
|
Post by Eddie on Jul 11, 2009 10:39:39 GMT -5
Your work is amazing Gary!!
It looks Real!!!
|
|
|
|
Post by The Mad Modeller on Jul 11, 2009 14:42:26 GMT -5
I have the paint ready.
|
|
|
|
Post by Nacho Z on Jul 11, 2009 20:35:29 GMT -5
Looks GREAT Gary! I'm running out of ways to say WOW. Nice work.
|
|
|
|
Post by willysurvive on Jul 12, 2009 22:13:19 GMT -5
I <3 small block Chevy motors. Awesome work there Gary. Toyota looks awesome. You guys should all be proud of this build.
|
|
|
|
Post by The Mad Modeller on Jul 14, 2009 22:02:52 GMT -5
The truck is in my hands now. Awesome work guys. I will get the body ready for paint. Jeff from our club is going to handle the interior work. Jeff has a great skill on detailing dash and interior. I will keep you updated.
|
|
|
|
Post by coopdad on Jul 15, 2009 11:21:15 GMT -5
Can't wait to see another set of photos... get busy Bobby!  Hey Gary, where did get all the add-on stuff for the engine like carb parts, fan, hose fittings? I am starting a motor that needs some "better than I can make" parts. John |
|
|
|
Post by Gary Kulchock on Jul 15, 2009 14:36:36 GMT -5
Can't wait to see another set of photos... get busy Bobby!  Hey Gary, where did get all the add-on stuff for the engine like carb parts, fan, hose fittings? I am starting a motor that needs some "better than I can make" parts. John Most of the add on parts came from Detail Master. Air cleaner, carb linkage, wire looms, radiator fan, heater hose, detail wire, fuel lines, AN Fittings, hose clamps, and Braided line. Since I design all their Photo-Etch, I get quite a nice perk of receiving all there stuff. The carb is a resin unit from Norm at Replicas & Miniatures. |
|
|
|
Post by Gary Kulchock on Jul 16, 2009 5:40:25 GMT -5
|
|
Big Ed
Junior Member
 
Posts: 187
|
Post by Big Ed on Jul 17, 2009 16:20:54 GMT -5
Holy cow, you guys are buildin' one killer truck. The details are amazing. Look forward to the paint.
|
|
mopar1
Junior Member
 
Posts: 88
|
Post by mopar1 on Jul 29, 2009 22:32:19 GMT -5
hmm... lookin great so far of course.. can we get some update pics on the interior or some primer shots or something...
|
|
jeffc
Junior Member
 
Posts: 71
|
Post by jeffc on Jul 30, 2009 20:26:15 GMT -5
Well, this project has been in the works awhile but yes, it is still in progress. Gary has finished the engine up and passed the body over to The Mad Modeller. He'll be painting that while I'm finishing up the interior.
Great work on everything I've seen so far guys!
|
|
|
|
Post by The Mad Modeller on Jul 30, 2009 21:41:23 GMT -5
Will try to get body in primer this weekend.
|
|
jeffc
Junior Member
 
Posts: 71
|
Post by jeffc on Aug 6, 2009 21:30:37 GMT -5
|
|
|
|
Post by Gary Kulchock on Aug 7, 2009 20:31:41 GMT -5
I see some progress. Are the gauges in the kit recessed like that or is this one of your custom touches?
|
|
|
|
Post by The Mad Modeller on Aug 7, 2009 22:23:28 GMT -5
Looking good Jeff.
|
|
jeffc
Junior Member
 
Posts: 71
|
Post by jeffc on Aug 16, 2009 20:30:10 GMT -5
I didn't see any gauges in the kit so I added some and surrounded each with some photo-etched Wizard "O"s from R&M. I cut a piece of tinted sheet plastic as a cover and will attach the gauges to the inside of the sheet so they show up better than in the previous pic. Think I'll leave in the passenger seat so a friend can come along for the ride!
|
|
|
|
Post by The Mad Modeller on Aug 16, 2009 22:02:59 GMT -5
Looks good. I shot some primer on the cab and started glueing the bed sides on. Will get pics Monday eve.
|
|

